Pages

Monday, October 31, 2016

Trick or Treat

Hi everyone, happy Halloween! It's Monique here today sharing a fun (and not scary at all) Halloween layout! Ever since I laid eyes on Ashley Horton's "Ghost Town" collection I've been wanting to give it a try and what better occasion than October 31st?! I used a photo from my daughter during her foreign exchange high school year in 2014 when she joined in a "Trunk or Treat" project at school with her friends.


The Ghost Town collection I used for my layout is a digital/printable scrapbook collection also designed by Ashley Horton and you can find in The Cut Shoppe Etsy Store as well. The colors and designs of this collection are really unique and I was so happy I got the opportunity to use it. 


I also used the Halloween Wood Veneer Set designed by Ashley. This set consists of  9 Halloween wood veneers. The largest piece is 2 inches wide, the others are smaller. Aren't they awesome?!


Except for the Ghost Town collection and the Halloween wood veneers I also used the Happy Haunting cut file. 


I just love the large cut file on the left and thought that cut from black cardstock it would be a perfect fit for my layout. I used a laser printer to print the Ghost Town collection and because I can't print 12"x 12" just yet, I printed everything measuring 8"x 8". The light blue strip of paper behind the cut file is an 8"x 8" paper cut in half and then adhered on the right, overlapping in the middle.  


The collection also contains a digital/printable Cut Apart Sheet, digital/printable Sets of Ephemera Pieces, journaling cards and an alpha & number symbol set, which are a really fun addition to the papers!


This was my project for today. I really hope you liked it. Don't forget to check The Cut Shoppe Etsy Store for more Halloween cut files and product. 

Thank you so much for stopping by our blog! Wishing you a thrilling Halloween!


Sunday, October 30, 2016

Happy Halloween

Hello there, friends! I'm back today with a new layout featuring the Wicked Good cut file set from The Cut Shoppe. It is perfect to document your Halloween adventures.

This picture of my son makes me laugh. He picked his costume, a skeleton zombie, because he thought the mask that came with it was the coolest thing ever. Of course, the rubbery smell of the mask made him take it off right away and never wear it again. This is the best he could do to resemble a scary zombie. I think it looks perfect! ;)


I used the Ghost Town digital collection and the Happy Halloween Wood Veneer set designed by Ashley Horton for this page. You can find them in The Cut Shoppe Etsy store. Only the background paper is from the Pink Paislee Memorandum collection. The design of the layout was inspired by the circles. The first thing I did was separate the images, as I only wanted to use a few of them. I adjusted the size and, after converting the circles to path, I welded them together.


I used foam tape to give more dimension to the whole cutout piece. The sticker letters are from the Oakley Avenue collection that you can find in the Pretty Little Studio store.


I love all the fun patterned papers that come in this collection. Some scary ephemera pieces and enamel dots finished my page.


Thanks so much for taking a look at my layout today! Visit The Cut Shoppe Etsy store for this and many more amazing products.


See you soon!


Saturday, October 29, 2016

October Favorite

It's almost Halloween, and I have to admit that it is not my favorite holiday. However, the adorable cut files, digital collection, and acrylic that are available in The Cut Shoppe are enough to sway me.


To begin this project, I used a sketch pen in my Silhouette to draw the spider web included in the Ghost Town digital/printable scrapbook collection. With the web drawn on my cardstock, I then hand-stitched with black yarn  to create a thick outer border. Next, I machine-stitched the inner portions of the web with black thread.


To create the banner, I printed patterned papers from the Ghost Town collection and used the Happy Haunting cut file. I then layered another printable (black strip with white stars) with a sticker and sentiment from Pretty Little Studio's Oakley Avenue collection by Ashley Horton.


Next came the bats from the Wicked Good file that I attached with double-sided foam for dimension.


The photo is anchored on a 4x6 card and patterned papers from Oakley Avenue in addition to a printable from Ghost Town. If you look closely, you can see that I printed this piece on my laser printer and foiled it with my Minc. The effect is subtle, but adds that little bit of bling to the layout.


I finished the project with the acrylic Halloween sentiment from The Cut Shoppe and various embellishments from Oakley Avenue and Ghost Town.

The final touch was a few enamel dots along with Abby's initials and the year the picture was taken. Please be sure to stop by The Cut Shop Etsy store for these adorable products and more.

Thank you for stopping by!


Friday, October 28, 2016

A layout with a Halloween themed cut file

 Hello,crafty friends~ Eunyoung, here. Halloween is approaching!! I don't enjoy Halloween but I can't resist the cute images from Halloween themed cut file. So Today I'll share a layout using Halloween images cutfile.


I used Wicked Good cut files  for this layout. It  includes 9 Halloween themed images.


1. Create own image using a spiderwep cutfile.
2. Do machine stitching the spiderwep image & white cardstock(a background).
3. Add patterned papers on the backside of spiderwep image with doble side tape.
4. Add spiderwep image & photo on a white cardstock.
 

5. Embellish with cork arrows stickers, wood veneer, diecut and so on.
6.Add patterned paper on the backside of white cardstock.
7. Stamp a date and finish to splatter a black color mist.

Thank you for stopping by.


Thursday, October 27, 2016

Take A Hike

Hi! Irit here with a new layout using some fantastic cut files from the Cut Shoppe. Fall is my favorite time of year, so I had so much fun creating! Here's my finished project:


These are the cut files I used- Nature Lover


I used a pencil and  a pen holder on my Silhouette Cameo to sketch the leaves, and then cut only their outline. I painted the leaves with watercolors, and once dry added the details with a white pen.


Thanks for visiting and check out the Cut Shoppe for these and lots more great cut files!

Wednesday, October 26, 2016

Be Still My Heart

Hello, it's Melissa here back with my second post for October!  For this layout I knew I wanted to use the flower on the Girl Stuff cut file, and create a daisy chain.  I drew a large circle on Silhouette Studio, and used it as a template to place the flowers.  Once I placed them, and they're not perfect, I welded them together.  It took some effort to get them positioned, but its worth it!  My layout is about my youngest and how she had to have all her new clips in her hair!  I used Cocoa Vanilla's Hello Lovely collection.


I popped up the centres of the flowers with dimensional foam.


I kept all other elements of the layout within the daisy chain.


I even managed to keep my splatters within the daisies!!


Here is the Girl Stuff cut file, and you can purchase it here in the Etzy Shop.  If you don't have digital die cutting machine you can also purchase this one pre-cut; check out the link to see a photo.


Thanks for looking!  See you in November :)


Tuesday, October 25, 2016

Halloween Boo!

Hi crafty friends! Kelly here today sharing a fun Halloween layout using the Ghost Town Digital Collection and the Wicked Fun Cut File.


For my layout today I knew I wanted to use multiple images from the Ghost Town Digital Collection! I used my wide format printer to print a 12x12 pattern paper from the collection to use as my background. I then used the Print Then Cut feature on my Cricut Explore for a few of the ephemera pieces included within the collection. Keep in mind there are maximum sizes for the Print Then Cut feature. For easy reference I've created a diagram posted below. You can also find more information on Cricut's Website.


I also used the "patterns" feature within Cricut Design Space to cut the bat from the Wicked Fun Cut File. I love this feature within DS because it allows me to size the patterns to fit within the image. This way I don't have to print the entire pattern on a sheet of cardstock! I've included how to use the "patterns" feature in my process video.


Halloween is one of my favorite holidays to scrapbook. I think it's because I only create a few pages a year and then I tuck away all of the papers, ephemera, photos, etc so when I grab my Iris container (okay let's be honest...it's containers...not container ha!) it is like seeing new product for the first time! Fun products like the cut files and ephemera pieces just add to the fun!

Here's the process video I promised! I have also had multiple requests to create a video showing how to upload cut files from The Cut Shoppe into Design Space from start to finish. That is coming within the next couple weeks so keep your eye on my YouTube channel!


Thanks so much for joining me today!!


Monday, October 24, 2016

Cute

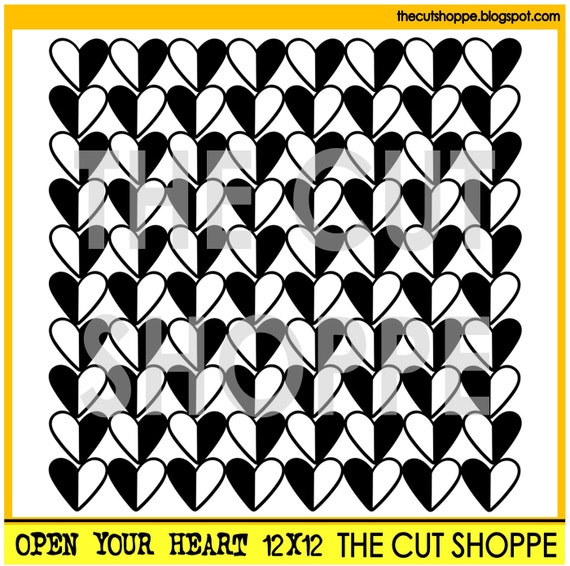
Hello! Mandy with you today, sharing a layout using the Open Your Heart background cut file from The Cut Shoppe!


I couldn't wait to document this sweet photo of my two girls together! They are ten years apart, but they are so close, and I love seeing how much they adore one another. I think this photo really captures their special bond.

The Open Your Heart background cut file was perfect for this page!

The Open Your Heart background cut file is available in 8.5x11 and 12x12 sizes for your scrapbooking and papercrafting projects.

I cut it from white cardstock, and then added some foam tape underneath to give it some dimension. I love the shadows that this creates!

My layout features patterned papers and embellishments from the Crate Paper Cute Girl collection.

Here are a few closeups...


I created a cluster on the bottom left hand corner of the photo that includes some flowers that I fussy cut from one of the patterned papers, as well as some stickers from the Cute Girl collection, and a silicone charm from Felicity Jane.


On the top right hand corner of the photo I added a Charms Creations heart. I tucked another fussy cut flower underneath the heart, and finished it off with a Crate Paper word sticker.


I created a third point of interest in the top right hand corner of the layout. You'll notice that the three embellishment clusters are positioned diagonally across the page so that the viewer's eye is drawn down towards the photo. This is where I added my title, as well as some more Crate Paper Cute Girl stickers. I finished the layout off with a few sequins.

Thanks so much for joining me on the blog today and taking a look at my layout! If you like to use background cut files on your layouts, you'll find this one, as well as many more, in The Cut Shoppe Etsy store!