Thursday, October 6, 2016

October 31


Happy October everyone!  It's time to get working on some fun Halloween projects and The Cut Shoppe has you covered!  This week, we have three new Halloween designs in the Shop...and don't forget that you can also pick up the Ghost Town Digital/Printable collection, Happy Halloween Wood Veneers and Halloween Acrylic!  I have a spooktacluar layout to share today, using the new Boo to You cut file.


https://www.etsy.com/listing/483455115/the-boo-to-you-cut-file-set-includes-5?ref=shop_home_active_3

I wanted to use Oct. 31 from the cut file set as a large title on my layout.  I started by drawing a large spider web in the background with my Silhouette Sketch Pens, and then hand stitching over the lines.  I also added some watercolors inside the web.  I tilted the title just a bit to follow the center line of the spider web and placed my photo right next to the title.


I added some machine stitching to the numbers on the title with my sewing machine, to give it some texture.  Then I layered a few of the wood veneers from the Happy Halloween wood veneer set over the title.  To give dimension to the title, I adhered it with pop dots to make it stand out from the spider web background.


https://www.etsy.com/listing/478922157/happy-halloween-wood-veneer-set?ref=shop_home_feat_4

I hope you've found some inspiration for your next Halloween layout, and you can create your own custom look with all of the Halloween products that are available in The Cut Shoppe Etsy store.  Here's a look at all of the new cut file sets that are now in the store.

https://www.etsy.com/shop/TheCutShoppe


https://ashleyhortondesigns.blogspot.com/
 

Wednesday, October 5, 2016

Right Now

Hello scrappy friends, it's Zinia here again and I have a fun mixed media layout to share with you, using a bunch of gorgeous cut files from the Cut Shoppe.


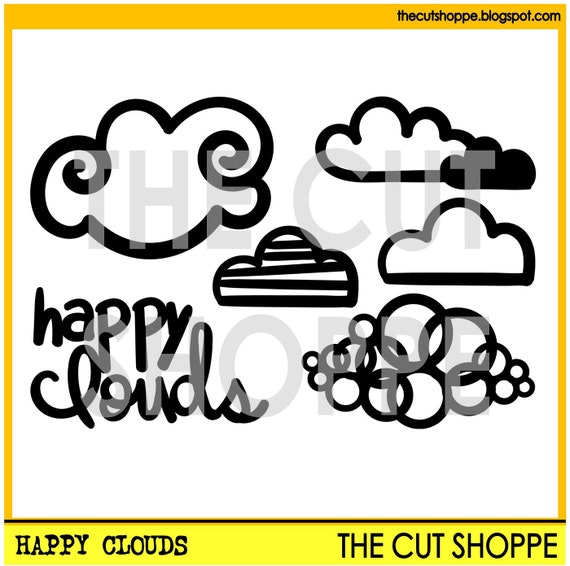
I used cloud shapes from three different cut file sets to create a big cluster in my Silhouette Studio and cut it out of white cardstock.

I backed the open spots with papers from different collections, focusing on pink and teal shades.


Behind this lovely cluster I decided to create a beautiful mess. I grabbed my watercolor palette and started spreading colors around. I also added some pink and white splatters to make my background look more interesting.


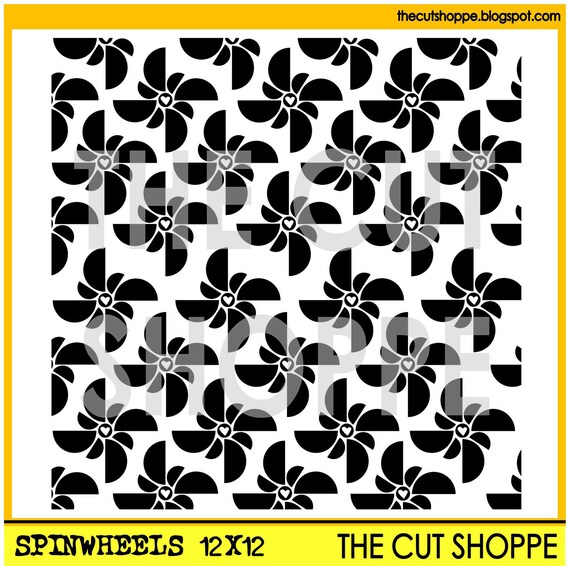
One the watercolors were dry, I decided to add something more to the background so I grabbed a stencil I created by cutting the Spinwheels cut file out of a laminate sheet and used a mix of gloss gel, glitter and ink.

I really love using this technique cause the gel dries clear allowing the glitter to shine through.


The embellishing part of this layout was probably the hardest. I had a hard time deciding what bits to use. I went for some chipboard pieces and stickers from the Crate Paper Cute Girl collection, as well as some stickers from the Amy Tangerine Oh Happy Life.


I'm really happy with the way this layout turned out. I absolutely love all the bright colors and the whimsical look of the clouds.

I hope you will go ahead and create something fun too, Until next time, happy scrapping.


Tuesday, October 4, 2016

Hello Fall!

While many mourn the end of summer, I am happiest during the fall months. The cool, crisp air invigorates me, and the colors are spectacular. For today's project, I am sharing a layout created using the Leaf it to Me and Hello Fall cut files from The Cut Shoppe Etsy Store. I love fall flowers and these photos are of a bouquet I purchased at the local farmer's market.


To begin my project, I used watercolor paper to create the multi-hued title. First, I added drops of paint and alcohol inks to my craft mat and then sprayed them with water to dilute the colors. Next, I dabbed my paper on the craft mat repeatedly until the paints were to my liking. During this process, I did have to add more paint and water because the watercolor paper really soaked it up.


My next step was to send the watercolor paper through my Silhouette Cameo to create the title. When using thick paper, it is always a good idea to use washi tape to ensure it stays in place during the cutting process.


Using gold wood grain patterned papers from Jen Hadfield, I next cut out several leaves from the Leaf it to Me file. These were placed behind the large photo to add dimension and color. 


To give the smaller photo some oomph, I added two Crate Paper tassels to twine and wound it around the picture a few times. Next, I stapled the twine in place and glued a leaf underneath. I also used a negative cut here - it is very delicate and a perfect complement.


Once the leaves and photos were in place, I added some drops of the mists and alcohol inks to the white card stock, which is matted on another Jen Hadfield gold paper. 


The final step was to add the title, which I did alter by removing a portion of the sentiment, and the quote to the layout. 


Thank you so much for stopping by, and I hope you are inspired to create today!


Monday, October 3, 2016

Oakley Avenue Cut File Feature!

Happy Monday!  It's Ashley, and I'm stopping in today to share two new layouts using the Oakley Avenue cut file set, with my Oakley Avenue collection from Pretty Little Studio!  I received my box of Oakley Avenue goodies on Saturday, and just couldn't wait to create a layout...or two!  I haven't had a chance to use the Oakley Avenue cut file set, so I thought this would be the perfect opportunity.

https://www.etsy.com/listing/480477205/the-oakley-avenue-cut-file-set-includes?ref=shop_home_active_50

The Oakley Avenue cut file set coordinates with the images included in the scrapbook collection.  The collection will be available for retail sale on the Pretty Little Studio website on Wednesday, October 5th.


The idea for this layout popped in my head, when I was on the way to Michael's to pick up some more adhesive!  I thought it would be fun to draw a large heart shape with the Silhouette Sketch Pens and fill it with the pie chart image from the cut file set and a mix of embellishments from the Oakley Avenue collection.  I cut the pie chart shapes from the Barn Door paper, the Mellow Yellow paper and the Fall Festival paper and overlapped them inside the heart shape.  I also fussy cut some of the pie chart shapes from the Pumpkin Pie patterned paper.  Then I added some of the flair buttons, wood veneers, cut aparts and stickers.


For this layout, I created a fun background look with the leaf image from the cut file set.  I set up a triangular shape with the leaves and repeated it around the background.  I backed the open leaves with four patterned papers from the Oakley Avenue collection.  Since the design moved toward the center of the layout, I placed my photo in the middle of the page.  Then I clustered my title and embellishments around the photo.  This way I could make the photo stand out a little more, and keep the embellishments from getting lost against a busy background.

I hope you'll check out the Oakley Avenue cut file set in The Cut Shoppe Etsy store, and pop over to the Pretty Little Studio website on Wednesday to take a look at the full collection!

And I'll have a giveaway for the collection on my Instagram this week, so if you're not following me, make sure you find me at @ashleyhorton75!

https://www.instagram.com/ashleyhorton75/?hl=en
 

Sunday, October 2, 2016

Fall in Love

Hello there friends. Today I'm back with a Fall layout featuring three different cut files: Trendy Trellis, Hello Fall and Leaf it to me. Fall is my favorite season. I love the colors, the crisp air, the fallen leaves. This picture of my kids was somewhat staged. They were playing outside and I asked them to start throwing leaves around so I could take a picture (life of a scrapbooker!!!).


I used the gorgeous Life is Beautiful collection by Fancy Pants Designs for this. I thought the colors were muted enough for a Fall layout, but I also loved incorporating the vibrant teals and greens that come in the collection.
My original idea was to just use the Trendy Trellis cut file and back the leaves with some patterned papers. Then I decided to make it part of my background, creating that white on white effect I love.


I also wanted to have a huge title on the page, so I picked the Fall in Love sentiment from the Hello Fall cut file set and enlarged it, then stitched around the edges to make it stand out more.


Next, the leaves. Creating clusters of different patterns and colors gives the layout more interest and brings the page together in a fun way.


Some wood veneers and enamel dots finished the page.


I hope you enjoyed reading about my process. Don't forget to check out these awesome cut files in The Cut Shoppe Etsy store.

Have a great day!


Saturday, October 1, 2016

You & Me

Welcome back,
Zsoka here with you and I have a new layout to share with you today! I really love how this one turned out! I have been looking forward to the Indigo Hills collection from Pinkfresh Studio ever since I first saw a sneak peek many months ago. It did not disappoint! It's an amazing line; that blue and mustard...Sooo good. I just want to use these papers as wall paper!


The cut files I used:
 
 
I started off by cutting strips of patterned papers, then I wove these together. I used to make woven paper baskets 15+ years ago so it was fun to use this technique again! I then backed my ampersand with this woven piece and stitched around it to make sure nothing goes anywhere. :) I really like how that looks!

 
Of course I didn't want to cover up any of this ha! So I placed my photo and embellishments around the middle, this way I hope one can still tell what's in the background! The ampersand is actually a part of my title, You & Me. The you/me words I made from the Brush Up Alpha cut file. I just added an outline to the letters so I didn't have solid white letters and I could back these with pattern paper. I popped these up to give the layout a bit of dimension.


I hope you found some inspiration here today! See you soon! X