Showing posts with label Sassy Circles. Show all posts

Tuesday, January 30, 2018

Love Love Love You with Jennifer

Hello everybody,

this is Jennifer with a new project for The Cut Shoppe!


For this layout I went a bit overboard with the cutfiles but I just had to use all of them!

I used:
Sassy Circles


Love Struck


Open Letter Alphas


Love Ya


My current scrappy motto seems to be "Use all the things!". It does help with stash busting so I'm not complaining. But that also means there's a lot going on on this layout.


I used the Sassy Circle cutfile as a background element but I only cut three rows of the circles. I backed them with a black-and-white and a pinkish red patterned papers as a contrast to my mint striped background paper.


For my title I combined the Love Struck cutfile with the Open Letter Alpha. I cut the Love Love Love from ombre cardstock that matched my striped background. My cutting machine was acting up so it didn't cut all the little circles from the Love Love Love. So I just rolled with the punches and poked out a few of the holes to kind of simulate the ombre effect of the paper. The open letters I backed with the same paper as the Sassy Circles.


I didn't want to leave the background as is and decided to add a few of the XOXOs from the Love Ya cutfile in white cardstock. It looks very soft but gives the background a certain something that I really liked.


For a few added spots of bling I added gold thread to the Sassy Circles and the Love Love Love.
I also added lots of dimension with foam dots behind the Sassy Circles, my photo and the title.

That's it for today. Thanks for stopping by and have a great week!

xoxo


Wednesday, March 8, 2017

You Are Here!

Hey friends! It's Monique on the blog today sharing a layout created with the Sassy Circles cut file from The Cut Shoppe Etsy Store and the You Are Here collection from Simple Stories.


When I first saw this cut file I just couldn't imagine how the result would look like and I've been wanting to give this cut file a try ever since. So now I have! And I adore the result!! With the colorful striped background paper the result is really awesome! The circles and hearts are only cut half and you have to fold them over ... in this photo it's better visible:


I decided to either fold the circle or the heart and not both of them at the same time. I sooo love this cut file! Also because of the versatility: you can use it for any subject at all, from Valentine's layouts to travel layouts like mine. 


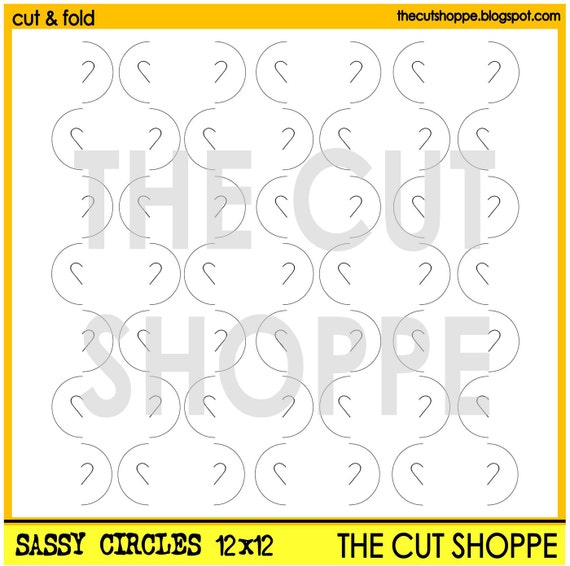
And this is the Sassy Circles cut file I used: 


And a few more close-ups of my page:


I hope I've been able to inspire you a bit today. You can find the Sassy Circles cut file set in The Cut Shoppe Etsy store, where you can find many more awesome cut files! 

Thank you for visiting our blog! Have a lovely day!
xoxo
Monique


Wednesday, September 14, 2016

Hello Sunshine

Hello everyone it's Zinia here again and I have another layout to share with you using the beautiful Sassy Circles cut file from the Cut Shoppe.


I was initially going to make this an A4 size layout (similar to 8.5x11) since I cut it using my portrait machine but as I was going I decided to mount that page on a 12x12 paper and make it work! So to all portrait owners, you can still cut beautiful backgrounds for your 12x12 pages, you just need to be a bit more creative with it.


I used some sort of wrapping tissue paper to create some ruffles at the sides of my A4 page to help it stand out. I backed the open spots with some papers from the Amy Tangerine "Rise & Shine" collection and then I started embellishing.


I created a cluster at the top left corner of my page using bits from different collections I had laying around.


I decided to punch out some tiny circles, color them and spread them around like confetti to break the white of the background.


I really hope you enjoyed and got inspired to create something beautiful with your cut files. Until next time, happy scrapping.


Thursday, July 21, 2016

Beautiful

Hello!  It's Melissa and I'm so happy to be back with you again!  Today I have a layout featuring my youngest Brielle when she was still a baby, and I used the Elle's Studio "Little Moments" collection that was featured in one of my Clique Kits.

I used the gorgeous Sassy Circles cut file, a cut and fold design which you can purchase in the Etsy store here.  I backed the cut file with one of the papers and arranged the half circles in an ombre pattern.  It was time consuming but definitely worth it!  I glued the folded down sides with liquid adhesive to keep them in position.


I also used the Girl Stuff cut file set for my title, and you can purchase it here.


 I  kept my journalling very simple on this page, because I've already scrapped a photo from this day for her first year monthly album.


Here are the two cut files:


Thanks so much for looking!


Saturday, July 16, 2016

Happy Memories

Hi Everyone! It's Michelle here today with my second share for The Cut Shoppe this month. And gosh is it my favourite so far!

I've chosen 2 cut files for this layout and a super cute photo of Leila on her first birthday. 

I love making a statement with cut files on a large scale, so for this layout Ive selected one of the half circles from the Sassy Circles 12x12 design and increased its size to almost a full 11x11 circle, then cut it out. I've also used the NEW Hello Hearts file by duplicating and welding together to create a larger strip piece. This made it perfect for layering between the half heart circle and pattern paper.


After adding the extra layers of pattern paper, the other cut file pieces and sewing around the edge a few times, I decided to go one step further by cutting it out of the page completely. This enabled me to pop it up off the page with some fun foam and gave it more dimension.

Heres some close ups.. 

I replicated the circular shapes top and bottom of the large shape, to form a diagonal line across the page. I find this helps to draw the eyes attention to the main focal point of the page, but then again the massive cut file helps with that too LOL

I've given the title a light covering of glitter using a clear Wink of Stella glitter brush rather than leaving it plain or colouring it. Who doesn't love a hint of sparkle? 

I always try to add some form of journalling on my layouts, lately I've been doing so with my trusty old typewriter. I really do like using my own handwriting, by theres something about the clean, crisp look of typed writing.

Loving the hearts cut file! And that cute little face..

And one last close up of the bottom cluster. All papers and embellishments are from a Hip Kit that I've been holding onto for a little while. The colours and designs are so bright and happy!

Thanks so much for stoping by today, Be sure to check out the Shop for all the new cut file designs released this week!

Until next time, Happy Scrapping x


Sunday, May 15, 2016

Joy

Hello everyone! I am so excited about the new Sassy Circles cut and fold file! I absolutely love these kinds of cut files, and I think they really stand out on projects.


For my layout today, I wanted the cut file to take up the whole page because I just can't get enough of it!


Double sided patterned paper works great for this type of cut file, as does plain cardstock! I chose a patterned paper from my stash and placed it on top of another coordinating patterned paper.


Since I had lots of patterns and dimension going on in the background, I kept my photo black and white and my embellishing pretty simple.


I love the look that the cut and fold files give, and I hope you'll check out this brand new one in the shop!


Monday, May 9, 2016

Sassy Circles-On This Day

Welcome back to The Cut Shoppe blog!  Candace here with you today to share a fun layout I created with the Sassy Circles cut file.  Here is a look at he cut file that comes in both 8.5x11 and 12x12.


I love this fun new cut file!  There are so many fun options with this cut & fold cut file.  If you haven't seen it yet Ashley has a video on how to use this cut file here.  To put it simply the Silhouette will cut along the lines then you fold the paper over to reveal a half circle and a heart!  So cute, huh?!  I decided to take the cut file and trace just one half circle.  Next I made the half circle large enough to cover half the page.  Here is a look at the final layout!


I  layered a bunch of papers behind the heart to simulate a pie chart.  To add definition and texture I sewed down all the edges of the pie chart.  I used various papers and pocket page cards from the Studio Calico April kit.  To finish off the page I added some black ink splatters and some extra stitching.  I love how it turned out!! So fun!  Give this new cut & fold cut file a try and tag #thecutshoppe so we can all swoon over your creations!
Have a beautiful day!