Friday, July 22, 2016

Here, There, Everywhere


Hello everyone!,  

Nathalie here bringing you a new layout using a few cut files from the Cut Shoppe Etsy store.   For this project I have combined the Star Light Star Bright, Going My Way, and Here There Everywhere cut files.  The combination of these three worked beautifully to bring my idea to life.


First, the two figure cut files (Going My Way, and Star Light Star Bright) were welded to create a large 'compass' image.   I chose to only cut three quarters of the shape on Shimelle's Starshine collection patterned paper;   once cut, I backed the empty spaces with vellum.  The cut-out was then anchored to the right side of  the layout with glue dots.


To create the background,  some simple gouache was applied to watercolor paper (in different colors/rainbow) around the 'compass' shape.  The picture was then placed surrounded with clusters of ephemera from Shimelle's Starshine collection, and Amy Tangerine's Better Together collection.


Lastly, to create the title, I set the Silhouette Cameo to perforate the edge of the Here There Everywhere cut file;   I used the perforations to hand stitch the design using thread of the same color as of the 'compass' shape.


I hope this inspire you to combine cut files to create a unique shape for your projects.   There are so many beautiful designs in the Cut Shoppe Etsy store, and the possibilities are infinite.

Till next time,

Happy Crafting!


Thursday, July 21, 2016

Beautiful

Hello!  It's Melissa and I'm so happy to be back with you again!  Today I have a layout featuring my youngest Brielle when she was still a baby, and I used the Elle's Studio "Little Moments" collection that was featured in one of my Clique Kits.

I used the gorgeous Sassy Circles cut file, a cut and fold design which you can purchase in the Etsy store here.  I backed the cut file with one of the papers and arranged the half circles in an ombre pattern.  It was time consuming but definitely worth it!  I glued the folded down sides with liquid adhesive to keep them in position.


I also used the Girl Stuff cut file set for my title, and you can purchase it here.


 I  kept my journalling very simple on this page, because I've already scrapped a photo from this day for her first year monthly album.


Here are the two cut files:


Thanks so much for looking!


Wednesday, July 20, 2016

This is my Happy Place

Welcome to the Cut Shoppe blog!  Wendy here today, I am thrilled to be joining the team here and sharing some fun inspiration with the amazing cut files Ashley has created for us all.  For my first layout I was drawn to the cut file, Road Trip, as we've been on a sort of road trip ourselves lately!


I wanted to document our here right now so I nestled my pictures with the You Are Here star as my main focus of the layout.


I added some fun embellishments, stickers, and thoughts along the starry path which I highlighted with some pen work, because even though our paths might seem to be all over they are actually very connected if we just hold on to see the big picture.


The Road Trip cut file is available in the Cut Shoppe Etsy store and many other fun cuts, stop by and check them out!  Thanks for joining me today.


Tuesday, July 19, 2016

Captain

Hello there scrappy friends,

It's Zsoka here with you today to share my latest layout for The Cut Shoppe! 

For today's layout I chose the Prickly Pineapples cut file because I've wanted to use it forever but still have not gotten around to do so. About a month or so ago I finally received my huge stack of supplies I had been building up at my friend's place in the US since last November and part of these items was one of my most favourite line ever, Citrus Bliss from Pink Paislee. Here in Germany it is not available anymore and when I found it on sale in the US, I had to have it! I just love citrus colors, I can never get enough of them! So obviously it was the line I had to work with first ha! And since this collection has pineapple designs in it, I thought I'd finally use this cute cut file!


There actually are two files in this set and I've used both. I just cut them in different sizes from white card stock, then did what most people do, backed them with various patterned papers from the Citrus Bliss collection. Some I put on pop dots to give the layout a bit of dimension. Then just placed them the way I liked them and layered my photos over them. I've added some wood veneer pieces, puffy stickers, chipboards, frames from the same collection together with some enamel dots and phrase stickers from the Simple Stories Sunshine&Happiness line. The clear stickers with black text might be Simple Stories Carpe Diem, but I am not quite certain, I don't have their packaging anymore...


For my title I chose Captain because in the second photo my son looked exactly like that ha! With his finger pointing to the sky, giving orders and all :). You can't really tell from these photos but the sun is kind of wrapped around his little finger like a halo, it's really cool! I've used some Dear Lizzy thickers for the title.

To finish it all off I've added some black splatters, like I almost always do!

Here, some more close-ups: 


 Hope you like! Thanks for stopping by and have a great day! X


Monday, July 18, 2016

Summer Lovin'

Hi! Irit here with a new layout using some great summer cut files from The Cut Shoppe! Here's my finished project-


I have been wanting to use the Go Fly A Kite file ever since I saw it, and this was the perfect opportunity.

 
 My title is from the Let's Do Summer file. Love the font!


I used lovely papers and embellishments from past Felicity Jane kits.


I love using white cardstock for cutting images and then backing them with colorful patterned papers.


Thanks for visiting and check out the Cut Shoppe for all these and more!

Guest Designer | Rachel Lowe

Happy Monday!  It's time to introduce our second Guest Designer for July!  Please help me welcome Rachel Lowe!  Rachel's layouts caught our eye on social media, and we love the way she incorporates cut files into her beautiful layouts.  Before we see what Rachel created for us today, let's get to know a bit more about her.

http://www.inmyworld-scrapbookingourjourney.com/
 
Hello my name is Rachel Lowe and I am from beautiful Perth, Western Australia. I am married with four great kids.  My crafting background is painting and quilting. However once I discovered scrapbooking I was hooked. I would describe my style as classic/contemporary. I am a lover of clean lines, negative space, embellishment clustering and sewing. I also love using my Silhouette Cameo. I am a keen photographer and believe the ‘photo' is everything on a layout.
 
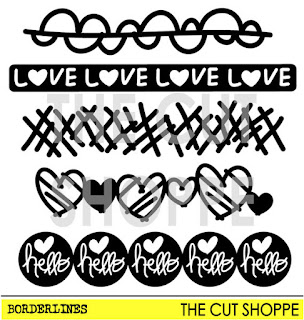
I am thrilled to be the guest designer for the Cut Shoppe as most of my layouts have a cut file or two from the store! The layout I have created today I have used two cut files, Spread Your Wings and the Borderlines cut file (choosing the heart border to place behind my photo). 
 
https://www.etsy.com/listing/224956433/the-spread-your-wings-cut-file-can-be?ref=shop_home_active_44
 
https://www.etsy.com/listing/196672172/the-borderlines-cut-file-consists-of-5?ref=shop_home_active_51
 
Thanks so much for joining us Rachel!  Now, let's take a look at what Rachel created!


What a beautiful layout!  The soft colors look so pretty, and the White on White tone adds a gorgeous look to the layout!  Thanks for sharing your work with us Rachel!
 
You can find more of Rachel's amazing work by visiting her Blog, In My World, and follow her on Instagram at @rachellowe___.
 
http://www.ashleyhortondesigns.com/
 

Sunday, July 17, 2016

My Fave.

Hello, crafty friends~ It's Eunyoung here. Today I'm sharing a layout using a new cut file - 'And Then'. You can see four pretty 'And Then' cut files in The Cut Shoppe Etsy Store.


Step 1. Pick a cutfile and background. 
Because I like this 'hello' font, I used 'hello' And Then cut file. It's so pretty. I usually start my page with white cardstock. But today I chose a pink colored striped pattern paper as a basis.


Step 2. Do machine stitching on cutfile and paper pieces.
I did randomly machine stitching on 'hello' with pink thread. And I did machine stitching the around of a pink colored striped pattern paper, heart shapes, butterflies and my photo with white thread,too. It's for a fun texture. 

 
Step 3. Arrange and embellish
After machine stitching, I arrange every pieces on 12x12 inch white cardstock. And then I added them with double side tape & pop-dots. I think that the shade of layering (the 3D effect) is very important, so I often use three different-high adhesive on a page. I embellished with a button, puffy stickers & chipboard shape.


Step 4. Title and splatter
I added the title with foam words sticker and splatter black color-shine on background. I had last touch is stamping a date.
 
What do you think  about my layout with a new cut file? I hope you'll enjoy it!!
Happy crafty time and Thank you!!