Monday, February 3, 2020

Christmas Traditions- Audrey Yeager

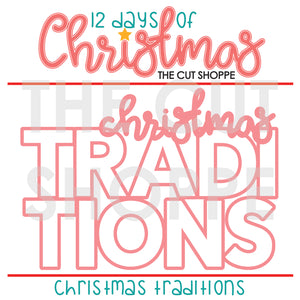
I'm almost caught up with my winter holiday scrapping, but have a few more pages I want to get done!  I wanted to document a new tradition that I started with my kids of making pierogi for Christmas Eve dinner, so the Christmas Traditions cut file was perfect for this page.   Better yet, this was a FREEBIE cut file that Ashely gave away during the 12 Days of Christmas!


Christmas Traditions

A goal of my holiday scrapping is to try and use my stash.  I broke out some OLD Basic Grey papers (from 2006!) and was determined to use them on my page.

I first cut the cut file from white cardstock. In Silhouette Studio, I worked with the file to cut out the backing for the letters with patterned paper (instead of tracing and backing each letter by hand). I also recut the word "Christmas" from a different colored paper to make it stand out a bit more.


On the page itself, I cut a large circle for the background, distressed and machine stitched around the edges.  I layered my photos with a mat and some patterned paper, and fussy cut flowers that I cut from patterned paper.


I also cut some small circles from patterned paper as well, and embellished with enamel dots, puffy stickers, brads, and a few more punched flowers.


Thank you for joining me today!

You can watch the entire process here:


Friday, January 31, 2020

Love with Kira

Hey there!  It's Kira, and I am back with another layout in my Folsom album.  Here's a look at my completed layout:


I started this layout writing a letter to my youngest son.  Him and Folsom were thick as thieves, but my youngest is still so young, I worry he won't have memories of that.  So I wrote a letter to remind him of how close they were.  I typed it on the computer and printed it on white cardstock, then trimmed it down to 4.25x8.25.


There was about 1.5" at the bottom of the page to add an embellishment.  I used the Cupid's Arrow cut file to create some DIY embellishments.

https://thecutshoppe.com.co/products/cupids-arrows?_pos=1&_sid=1f31441bc&_ss=r


I cut a heart off one of the arrows, then adhered a punched flower, topped with an enamel dot.  I finished off the embellishment by wrapping it with bakers twine.  I attached it to the white space on the bottom of the page.

I created another arrow embellishment by attaching a puffy sticker to the "o" of "love", and then wrapping it with bakers twine.  I adhered it to the photo with some tiny staples.


I wanted to add a little more color to the layout, so I punched some holes in a tag, and built an embellishment cluster on top.  I created a toothpick flag, layered it on top of a flower die cut, and used the negative space from the arrow cut file to attach a heart.


Thanks for stopping by!

xo, Kira


Thursday, January 30, 2020

Much Love by Joanna

Hi friends, Joanna Bandelin here sharing a 12x12 layout of my two little chicks. I used the newest Much Love cut file from The Cut Shoppe.


I made the cut file as big as I could and backed with lots of reds and pink pattern papers from my stash.


I added a few clusters of stickers tucked around the cut file.


Thanks for stopping by!


Wednesday, January 29, 2020

Play | Tarrah McLean

Hi creative friends,

It's Tarrah back with you and today I am sharing a new back to school themed layout using one of the Freebie Friyay cut files called Uncharted Territory.  


Uncharted Territory

I cut out the design from white textured cardstock and then chose some older coloured papers by Bella Blvd to back the cut file with. I used red on the very outside, then came in to yellow and then used the light blue/aqua colour in the centre.  Once the cut file was backed I adhered it to the centre of another piece of textured white cardstock.

I matted my photo using a star paper and adhered it slightly to the right of the design. I didn't want to cover up all the blue from backing the cut file. I added the strip of paper with the apples under my photo, I then used this as a place to adhere my acrylic title 'Play'. 

I used a mixture of embellishments including a felt bow, stickers, chipboard stickers, puffy stickers, die-cuts, enamel dots and shapes, a flair button and wood veneer.  I placed the felt bow under the apple paper strip, I love that pop of yellow here. Over to the right of my photo, I placed the backpack die-cut and then layered a Back to School flair button over the top. 

Thank you for stopping by today! Make sure to check out The Cut Shoppe store for amazing cut file designs for all types of projects!

Happy creating!

Tuesday, January 28, 2020

Farm Fresh- Audrey Yeager

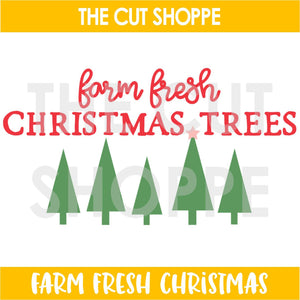
Hello everyone!  I am still plugging along with my Christmas pages.  There are just so many great holiday cut files in the store!  I used two on this page below; "Farm Fresh Trees" and "Branches and Boughs".


Branches & Boughs


Farm Fresh Christmas


I began with some woodgrain background paper and added some white gesso and mixed media shades in grey and brown.  I cut the trees from the "Farm Fresh" file from patterned paper, and one of the trees from the "Branches and Boughs" from a dark green cardstock. I centered my photo and scattered the trees around it.


I fussy cut out a few flowers and animals with red accents to add a pop of color. Finally, a few wood veneer starts an embellishments to go with the theme!


For the title, I again used the Farm Fresh file and cut it from brown cardstock and a mint colored patterned paper.


Thanks so much for looking!


Monday, January 27, 2020

Happy Together | Kylie Kingham.

Hello friends. It's Kylie with you all and today I am sharing a new layout I have created, featuring the new 'Square Off' cut file now available on The Cut Shoppe website. I decided to create a love heart within the square by backing it with a contrasting paper to its background.


It became pretty clear straight away that this cut file could be backed many ways to create many varying patterns. It would also be lovely as a coloured background. I began my layout by layering 3 different papers for my background so that it gave a nice border to my page. I used the gorgeous 'So Happy Together' paper collection by Simple Stories.


Once my cut file was backed I added my photo with foam tape, so that it sat up from the background to give dimension. This was then supported and surrounded with some cut die cuts for extra colour.


I really didn't want to 'over crowd' my background so I added a cute cluster of embellishments to the opposite side to my photo, keeping it minimal. This way the heart I created within the square background was still the main feature of my design.
Once completed I loved how all the layers and colour worked so well together...


I hope you have enjoyed seeing my layout today.Don't forget to stop by The Cut Shoppe website to see all the amazing cut files available.

Take care,


Sunday, January 26, 2020

"Love Your Smile" with Kira

Hey there!  It's Kira and I am back with another scrapbook layout using a cut file from The Cut Shoppe.  I am currently working in my Citrus Twist Kits Life Crafted album, working on an album for my recently departed Folsom.


I decided to use the Love Grows Here cut file.


I cut it out on white cardstock, then backed it with the exclusive papers from the January Life Crafted kit.  I added a few puffy stickers on top of the cut file.  Then I adhered it to some patterned paper using foam adhesive.


On the reverse page, I kept my embellishing minimal.  I added a label, puffy sticker and tiny word sticker (bumped up on foam) to my photo of Folsom.  Isn't he just the most handsome boy?!


And below his photo, I added a piece of patterned paper and embellished with a die cut and fabric die cut from my LC kit.


Thanks for stopping by!

xo, Kira