Friday, November 30, 2018

Thankful cards | Victoria

Hi friends, Victoria today sharing with you my last project for The Cut Shoppe.

I love to make cards to say thank you to my loved ones.
Those kinds of cards that just pop into their letter box and light up their day!


I made those cards with the Thanks & Giving cut file.
I just cutted them in a card size, that can fit easily into an envelope.


I chose the collection "Along the Way" from Pebbles to make those cards.
I used a few embellishments like stickers, ephemeras, flair buttons and foam thikers.


It's really simple to do, and I love the result !

Hope you'll like it!

Victoria


Thursday, November 29, 2018

New Cut Files | You'll Shoot Your Eye Out Kid

It's beginning to look a lot like Christmas, and we're ready to help get you in the Christmas spirit!  All of our NEW Cut Files are perfect for any of your upcoming Christmas projects.  One of my favorite new releases is the Merry Movies cut file set.  If you're like me, I'm sure you have some favorite Christmas classics that you have to watch every year.  One of mine, is definitely A Christmas Story.  The Merry Movies cut file includes one of the most well known quotes from the movie, "You'll Shoot Your Eye Out Kid".  I had the perfect photo from Christmas 2013 to go with this cut file, and I love the way it turned out on my layout!


https://www.etsy.com/listing/662910485/the-merry-movies-cut-file-can-be-used?ref=shop_home_feat_1


I love using large titles on my layouts, so I thought it would be fun to make this one really large and create a background with it.  I used a polka dot patterned paper from Crate Paper to cut the design, but I wanted some variation in the title.  I kept three of the titles solid and made one with an outline.  Then I backed the open spaces with a Buffalo Plaid patterned paper.  I really like the emphasis it gives to the cut file, and it makes it stand out from the rest of the page.


I decided to place my photo next to the part of the cut file with the Buffalo Plaid patterned paper.  I liked the horizontal look of the title, photo and the main embellishments going across the page.  I used a mix of embellishments around the photo, to add some interest...and I really love the old car puffy sticker (it reminds me of the tire changing scene from the movie)!!


Once all of my main elements were in place, I still had several spaces of white space.  I didn't want to totally fill in those spaces, but I felt like they needed a little something.  I used the Joy patterned paper from the Crate Paper Snow & Cocoa collection, and fussy cut some of the cute Christmas trees.  I used them to create a few borders in those white space areas, and machine stitched through the center of each one to add some texture.  

I hope you're ready to get started on some Christmas crafting, and that you'll check out our NEWEST Cut Files in The Cut Shoppe Etsy store!  Don't forget to visit our Holiday section while you're there, to see all of our Christmas related cut files.

https://www.etsy.com/shop/TheCutShoppe

https://www.instagram.com/ashleyhorton75/
 

Wednesday, November 28, 2018

All I Want For Christmas | Erica Thompson

Hey Everyone! Erica with you today to share a holiday layout using the Tis The Season cut file! I love this set of files and I decided to go with the All I Want For Christmas is You!
I am excited to also try some of these sayings cut with some vinyl for home decor! So many possibilities with this cut file! For my layout I cut the file using some smooth white American Crafts card stock. This is my favorite card stock to use when cutting with my Cameo.
I backed each word with a different pattern paper from the Clique Kits Classic Holiday Kit. This kit comes with a 6x6 paper pad which is perfect for backing cut files! The collection is Echo Park Celebrate Christmas and is my favorite holiday collection this season. I love the classic holiday colors in this collection and the red vintage truck just gets me every time!
The photo I am documenting is 3 of the 4 little ladies in my crazy family. My daughter Alyssa and my two nieces Marissa & Madison Rose. You definitely know these three are related when you are around them. All three are loud, silly and love to talk! I just love them to piece! The photo was taken at our family Christmas. I added some layers behind my photo using the left over pieces from backing the file.
I also pulled in some of the Simple Stories new holiday collection. Some of the ephemera bits went well with the Echo Park collection. I love that both collections have some kraft in them! Anyone else loving kraft this holiday season? I stuck in some bit on both sides of my photos. I used ephemera, chipboard and puffy stickers. I love to use different textures on my layouts! I also added the cute flair that came in the holiday kit! Here is a look at my final layout!

If you love this cut file as much as I do you can grab it HERE in The Cut Shoppe! While you are there make sure to check out the rest of the holiday files! Thanks so much for stopping by today! We love to see what you are creating with TCS cut files so please tag us on social media! Enjoy your day!

Tuesday, November 27, 2018

One Cut File - Three Ways | Kelly Janes

Hey there friends! Kelly here today to share THREE layouts using the Great Pumpkin Cut File!


I started with an idea to use the Great Pumpkin Cut File as a template for hand stitching, so I placed the cut file on a piece of woodgrain patterned paper and used my paper piercer to punch holes in the background. I started with a standard backstitch, but it wasn't giving me as much dimension as I was hoping. I went over the stitching a second time using a chain link stitch. I then quilled multiple pieces of orange and yellow papers for even more dimension. I added my photo and a few embellishments to finish the layout!


I then thought it would be fun to use the negative pieces from the Great Pumpkin Cut File for another layout! I used orange watercolors and Halloween stamps to create a pattern on the cut file. I also added orange machine stitching to all of the pumpkin pieces. I added foam squares and fun foam behind the pumpkin to add dimension. To finish the layout, I added a photo  and Halloween themed embellishments.


For my final layout, I decided to use the outer rim of the cut file. I added watercolor splatters and purple hand stitching around the pumpkin. I then grabbed multiple scraps of Halloween themed patterned papers and I was recently inspired by Paige Evans to pull out my border punches! I created a fun, colorful pattern within the pumpkin image. I added a couple photos, a few embellishments and a couple lines of journaling to finish this layout!


I love that I not only used the same cut file, but I used the same cut from the same cut file for all 3 of these layouts! Remember to visit The Cut Shoppe Etsy Store to check out all of the cut files!


Monday, November 26, 2018

Cozy weather | Sasha Biyanova

Hello, everyone! Sasha here today) There will be winter in several days, but I have so many photos and want to create layouts and albums about autumn) And this one not the last)))) I loved The Pumpkin Pie cut file so much that decided to make layout with photo which is not connected with pumpkins at all)))


I think this pumpkin is cozy so I've used it with cute photo of my sleeping son)


I've just took 2 piece of pattern paper (size 6x6) and embellishments from different old collections. Our autumn was so warm that ladybags didn't fall asleep for a long time!


Wood veneers looks nice with this pattern) Actually I wanted to use acrylic paints but changed my mind! And I want to join challenge of this month in the facebook group : white on white :)


I recorded the video process of this layout creation! Thank you for watching)


Thank you for stopping by today! Please visit The Cut Shoppe Etsy Store to find more beautiful cut files!!!

And happy crafting))


Sunday, November 25, 2018

Halloween Things

Hey there! It's Devra here today and I'm super excited to share my project with you! Why? Because this is one of those rare times when my page turned out almost exactly as I saw it in my head.

I'd been wanting to use the Halloween Things cut file since I first saw it. But I didn't have a photo! Lucky for me, I got this gem of a photo of some friends and I dressed up at work. It couldn't be any more perfect for this cut file if I'd tried.

I cut the file out of black cardstock, backing each letter with patterned paper. Yes, it took some time, but yes, it was also well worth it!  Want to know how I got them placed so well? After I sprayed and dribbled paint down the page, I laid the negative cut space over the white, then placed each letter back into it's original place. I added more black in some of the embellishments, to make sure the title stands out. I like using a cut file as a title on my pages. This one especially grabs your attention right away don't you think?


Thanks for stopping by today. Share your projects with us in our Facebook group, The Cut Shoppe Scrap Spot. See you next time.


Saturday, November 24, 2018

Hello, Let's Chat Glam Girl! | Amanda Baldwin

Hi Cut Shoppe Friends & Fans! 

Amanda here, with a super girly and fun page to share with you! 
Today I am featuring the fabulous Hello Let's Chat digital cut file & let's just say, it's perfection for teen girls!!!
Here's what I've created with it today....

"Glam Girl"


Well, Hello Glam girl, indeed! Such a fun & playful page for my not so little girl! 
I have combined the Echo Park's Fashionista with the My Mind's Eye Glam Girl collections to create this teen scene layout. 
I cut the file in white cardstock, attach it to my page with lots of foam dots, and finish it off with lots of embellishments. SO pretty! Raising the cut file with foam dots really makes it stand out against that soft mint background.
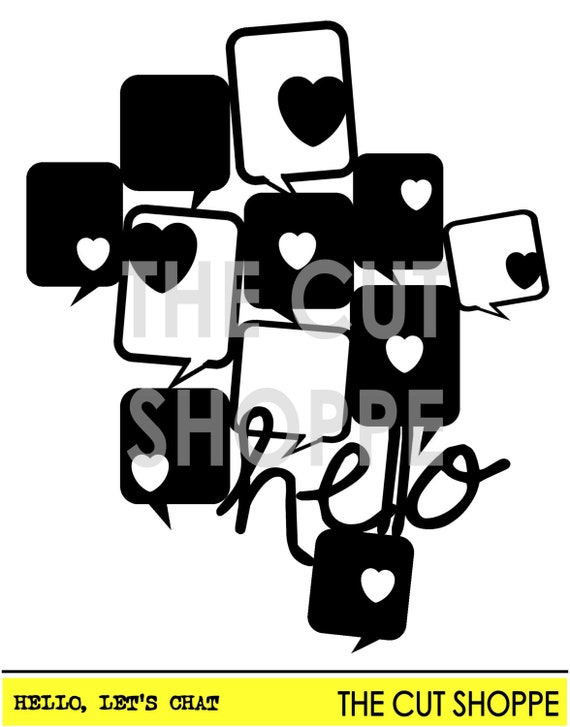
Let's have a closer look at this amazing cut file!

Hello, Let's Chat looks like this.....

image 0

So awesome, huh?! I can see a ton of possibilities with this file too!
You can get the Hello, Let's Chat file from The Cut Shoppe Etsy Store HERE.

Here's a closer look at my layout, and all those sweet embellishments.....


 I choose to back a few of the speech bubbles with pattern papers, and of course, my fun photo! 
This cut file is ideal for memory keeping all our conversations, texts and phone pics! She looks way too grown up in that mirror selfie - I blinked, and all of a sudden she wasn't little anymore. So glad that I document her stories to remember all our days! 
Here's another view for you....


I layer ephemera pieces onto some of the other speech bubbles, as well as cute brads, gold sequins and even some puffy sticker hearts! You'll also spot some typewriter font sentiments around the cut file. 


Loving that hello - it's such a fun font to compliment the speech bubbles with! 


Gorgeous, girly and so much fun!!!
I hope my layout has inspired you to go cut the Hello, Let's Chat file today! 

Thanks so much for visiting, 
til next time, 


https://www.instagram.com/happy_arty_days/


Friday, November 23, 2018

Trick Or Treat | Tarrah McLean

Happy Thanksgiving Cut Shoppe fans!

I hope you all had a fabulous day with your families! It's Tarrah McLean back with you, 
I am still in Halloween mode here and couldn't resist creating another spooky page!
I just love the Trick Or Treat cut file!  
I started out first by using some distress oxide inks to create a little bit of mixed media on my white cardstock background, I used mostly an orange colour and I also splattered some black mist. 
I cut the Trick Or Treat cut file from black cardstock as I knew this would highlight the papers the most.
I used the Bewitched collection by We R Memory Keepers on this page, I love how everything co-ordinates and the papers all look so awesome behind each letter in Trick Or Treat! 

image 0
I loved that I was able to use the Trick or Treat banner stickers on each of the letters from the cut file, it really adds some extra detail and highlights each letter even more. I added some chipboard pieces I have had in my stash for quite a while too including the bat at the top. The other cut file I used was the spider web from the Wicked Fun cut file set. I cut it out of black cardstock, I love how that looks poking out of the potion bottle.

image 0
My youngest son dressed up as a zombie mummy for Halloween this year, this photo is so funny how his hands look giant compared to his body! I just had to add that sticker above the photo that says, 'Mind Your Mummy'!!
Here is another detail photo showing another chipboard piece I have had in my stash for ages - the ghost. It fits perfectly there between the 'E' and the 'A' of 'Treat'. A few finishing touches like some star stickers, the date stamp and a few more splatters of black mist finished off my page. 

Thank you so much for stopping by today!

Happy creating!


BLACK FRIDAY WEEKEND SALE!

Happy Black Friday friends!  We hope everyone that celebrated yesterday, had a Happy Thanksgiving!  Now, it's time to sit back and relax and do some shopping from the comfort of your couch!  TODAY through MONDAY, NOVEMBER 26TH, you can save 50% off of your entire order in The Cut Shoppe Etsy store!!  This is a great time to stock up on some of your favorite designs, that you've been eyeing in the shop...especially, if you know Santa will be leaving a new Die Cut machine under your Christmas tree this year!

https://www.etsy.com/shop/TheCutShoppe

Also, feel free to share our sale on your Social Media, with your friends!  If they love cut files, we would love for them to stop by the Shop, too!

https://www.instagram.com/ashleyhorton75/
 

Tuesday, November 20, 2018

Fall Happy

Hey everyone, Michelle here today with a new LO to share.  I don't think I can ever get tired of fall.   The colors, the cool air, the fun photo opportunities!!!  It's my absolute favorite thing to scrapbook!

I used the All About Fall background for my LO.  I just backed some of the leaves with some papers from the Simple Stories Forever Fall collection.  Background cut files are so much fun and make such easy LO's!


Here's a closer look at those pretty leaves:


Thanks for stopping by!