Showing posts with label Elle' Studio. Show all posts

Wednesday, June 14, 2017

Make a Splash

Hello friends!  Candace with you today to share a little summer inspiration in my travelers notebook. I love documenting little moments in my travelers notebook and this was perfect!  To complete my spread I used the Make a Splash file you can check it out in the shop here. 


To start the spread I printed out my photo at 5x7.  I knew I wanted to place the photo in the center of the spread so I cut down the center of the photo at 3.5 inches and placed each half on the spread.  


For the title I placed a piece of the file on the upper right hand corner along with a few embellishments from Elle's Studio.


I added my journaling on a tag in the lower left hand corner tucked in-between a few of the waves in the file. 


I love the simplicity of travelers notebook spreads and the sweet moments that can be captured and documented.


Thanks for stopping by today!  Give documenting your little summer memories in travelers notebooks a try and get creative!

Candace 

Wednesday, January 4, 2017

Holiday Favorites

Hello friends!  Candace back with you today to share a new project using the beautiful Stained Glass cut file.  While last week I used just one circle in the file, this week I decided to use the file as a full background for my project.  


I love the look of white on white especially when it comes to cut files.  I love that it adds texture and dimension to a project without adding too much distraction.

For my project I adhered the cut file down to the center of my travelers notebook leaving the sides of the cut file free.


I added a few tags and journaling cards to the right side of my layout underneath my cute family's Christmas photo booth picture.


On the left side of the spread I added a journaling card with a few notes about our family's holiday favorites.


I added just a few details around the page like the puffy stickers, acrylic pieces and labels.  By adding small embellishments around the spread it helps to balance the colors and designs.  


I love the added detail and interest the background file adds to the spread.  Give this a try on your next spread and make sure to share it with us!  

Have you heard that it is even easier to play all along with our monthly Cut it Out Challenge? 


Thanks for stopping by!  Have a beautiful day!

Thursday, December 10, 2015

We Wish You a Merry Christmas

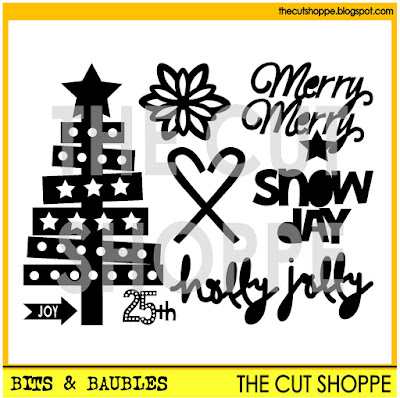
I don't know about you, but I usually come up with layout ideas, when I should be sleeping!  When I was thinking about which cut file set I wanted to use this week, inspiration struck when I settled on the poinsettia image in the new Bits & Baubles cut file set.  I decided to use it to create a textured background for my layout, and loved the end result.


https://www.etsy.com/listing/259898813/the-bits-baubles-cut-file-set-includes-8?ref=shop_home_active_7

https://www.etsy.com/listing/258531432/the-deck-the-halls-cut-file-includes-3?ref=shop_home_active_11

I started the layout by using the text tool in Silhouette Studio to spell out the word "Merry".  Then I sized it to fit across the center of the layout, and I created an outline of it using the Offset tool.  Once I had the offset sized to where I wanted it, I sent it to my Cameo to draw out with the Sketch pens.  Then I went back after it was finished and cut the original letters on different patterned papers from the Elle's Studio Good Cheer collection.  I used a paper piercer to punch holes along the drawn lines and then stitched around each letter with embroidery floss.  When I finished stitching, I adhered the patterned paper letters to the inside of each stitched letter.  While I was working on all of that, I set up my Cameo mat with the poinsettia shape from the Bits & Baubles cut file set, and let those cut.  After they were done, I randomly placed them on the White cardstock background paper to create the textured look.  I punched holes from Gold glitter paper and added a dot to each of the poinsettia shapes.  I kept my photo, title and embellishments clustered to allow a lot of the background to be seen.  I incorporated the Deck the Halls cut file into my title, by cutting the word "Christmas" from the first tree in the set.

This is a really fun technique to try on your layouts.  And you can grab the Bits & Baubles cut file set from The Cut Shoppe and try it out using the poinsettia shape.  While you're there, you can also check out the other new sets that are now available in the Shop!

https://www.etsy.com/shop/TheCutShoppe

And don't forget to use the Discount Code MERRY31 at check out to save 31% off of your purchase!  You can use the code all month long, through December 31st!!

https://www.etsy.com/shop/TheCutShoppe

Supplies:  Bits & Baubles cut file & Deck the Halls cut file:  The Cut Shoppe; Patterned Paper, Stickers, Wood Veneers, Letter Stickers & Cut Outs:  Elle's Studio; Flair Button:  A Flair for Buttons; Glitter Paper:  Recollections; Die Cut Machine:  Silhouette Cameo

http://www.ashleyhortondesigns.com/
 

Thursday, July 9, 2015

#Throwback Thursday | Hello Lovely

Welcome to a new #Throwback Thursday post!  This week, I am sharing a layout using one of my favorite background cut files, from The Cut Shoppe.  There are a lot of possibilities with the Hello, Let's Chat cut file, and I decided to use some watercolors with the cut file!


https://www.etsy.com/listing/193519078/the-hello-lets-chat-cut-file-is-a-fun?ref=shop_home_active_12

This layout is a mix of some of my favorite things... wood grain, watercolors, the color scheme, the stitching and the cut file!  I used the watercolors to create a coordinated look with the Hello Lovely collection from Cocoa Vanilla Studio.  And for some added interest, I added tone on tone stitching to the solid talk bubbles.  If you would like to check out my full process for this layout, you can see it in my newest Process Video!


We've also got a sale going on right now, for our Team Up with CSI: Color Stories & Inspiration, that's happening this month!  You can save 30% off of your purchase in The Cut Shoppe, using the Coupon Code CSITCS30!

https://www.etsy.com/shop/TheCutShoppe

Supplies:  Hello, Let's Chat cut file:  The Cut Shoppe; Patterned Paper, Stickers & Enamel Dots:  Cocoa Vanilla Studio; Flair Buttons:  A Flair for Buttons; Color Shine:  Heidi Swapp; Thickers:  American Crafts; Wood Veneers:  Elle's Studio; Die Cut Machine:  Silhouette Cameo

http://www.ashleyhortondesigns.com/


Tuesday, June 30, 2015

Hello Summer Love


Hi everyone!  It's Gina here and I have a new layout to share with you today using the free Newsletter (Summer Love) cut file and the Bitty Borders cut file. 

Here's my layout:


I'm in love with that Summer Love cut file.  I knew right away when I saw it, that I just had to use it right away.  To create my layout, I actually cut the Summer Summer Summer Love title twice.  The first cut was the full title and then I trimmed off the bottom (love) piece.  The second cut I only cut the word "Love" from white cardstock paper.  I then placed the "Summer Summer Summer" title right above the love cut piece.  I placed my photo behind the love word.   To add color to my page I added watercolors on two of the Summer words and behind the title, before adhering down.  


The small circular hearts are from the Bitty Borders cut file, I simply ungrouped them and then cut them out individually and added watercolors to them.  To finish off my layout I added black spray mist, wood veneer pieces and machine stitching.


Summer Love


I hope this post has inspired you to try watercolors on a layout. It really adds a lot of color and interest!  Have a great day!


Thursday, June 4, 2015

Dog Gone Cute

It's Thursday and I'm back with three new cut file sets, a new layout and a new Process Video!  That's a lot of new!  There's a fun variety of cut files that have been added to the Shop this week, and I chose to work with the Give It a Whirl cut file set.  This set includes 4 circle designs, that can be used in a variety of ways on your projects.


https://www.etsy.com/listing/235685419/the-give-it-a-whirl-cut-file-sets?ref=shop_home_active_3 

I wanted to create a grid design with the circle, so I cut nine of them from White cardstock.  Then I used the 6x6 Paper Pad from the Baxter collection from Studio Calico, to add different patterned papers behind the circles.  I wanted my photo in the center of the layout, and I used some of the SC Puffy Stickers and some enamel dots to create a fun frame around the photo.  And I embellished each of the circles with stickers, wood veneers, and chipboard.


You can check out my full process for creating this layout, in my new YouTube video!


If you get a chance to visit the Shop, you'll also find two other new sets this week!

https://www.etsy.com/shop/TheCutShoppe?show_panel=true

Supplies:  Give It a Whirl cut file:  The Cut Shoppe; Patterned Paper, Wood Veneers, Stickers, Puffy Stickers & Chipboard:  Studio Calico; Flair Buttons:  A Flair for Buttons; Wood Veneers:  Elle's Studio; Enamel Dots:  My Mind's Eye; Thickers, American Crafts; Die Cut Machine:  Silhouette Cameo

http://www.ashleyhortondesigns.com/


Thursday, May 7, 2015

Every Picture Has a Story to Tell

We've got three new Cut File sets in The Cut Shoppe today!  I always have such a hard time deciding which set to work with for my Thursday posts.  But this week, I knew I had to use the Stay Focused set.  The "Every Picture Has a Story to Tell" title was perfect for the photo I wanted to use this week!


https://www.etsy.com/listing/232509546/the-stay-focused-cut-file-set-consists?ref=shop_home_active_1

I used the Silhouette Sketch Pens to draw out the title and then used the offset feature to cut it out.  I wanted it to be a large element on the layout, so I kept things fairly simple.  Instead of adding mixed media on this layout, I kept the White background so all of the bright colors from the Life Document collection could pop.  And it may be a little hard to read the journaling (also done with the Sketch Pens), so here's what it says:  The Life of a Boy: Going down the slide with the metal cylinder from a vacuum cleaner probably wasn't your best idea.  But I guess it's just one of those life learning experiences!

If you're visiting the Shop to check out the Stay Focused cut file set, make sure you take a peek at the other two new sets that are available this week!

https://www.etsy.com/shop/TheCutShoppe?ref=hdr_shop_menu

And I'll be back with some more process videos soon.  I've been busy preparing to record segments for Scrapbook Soup TV, and there's been a lot to get done!  I'll share more about the upcoming episodes, soon!!

Supplies:  Stay Focused cut file:  The Cut Shoppe; Patterned Paper, Stickers, Enamel Dots, & Bits:  Simple Stories; Flair Buttons:  A Flair for Buttons; Color Shine:  Heidi Swapp; Tiny Attacher:  Tim Holtz; Wood Veneers:  Elle's Studio; Die Cut Machine:  Silhouette Cameo

http://www.ashleyhortondesigns.com/

Thursday, April 2, 2015

Meet Me In the Sunshine

If it's still not feeling like Spring where you are, we've got some new cut file sets in The Cut Shoppe to help get you in a springy mood!  I created a layout for today, using the Blooming Bouquets cut file and the Spring Fever cut file.  I love mixing the cut file sets on my layouts, and finding different ways to use them on my page.


https://www.etsy.com/listing/228411018/the-blooming-bouquets-cut-file-consists?ref=shop_home_active_4
 
https://www.etsy.com/listing/228409427/the-spring-fever-cut-file-consists-of-4?ref=shop_home_active_1


I wanted to use the cut files in two different ways on my layout.  I knew I wanted to include the word "sunshine" from the Spring Fever cut file, in my title, so I used the Black sketch pen to write the word on the White cardstock.  Then I cut one of the flowers from the Blooming Bouquets cut file in White and used my watercolor set, to add Pink, Yellow and Green to the flowers.

If you would like to check out more of my process for creating this layout, you can watch my new Process Video!


We also have one other new cut file in the Shop today!  Here's a look at all three of the new sets.  They are all available for purchase in The Cut Shoppe today!

https://www.etsy.com/shop/TheCutShoppe?show_panel=true
   
Supplies:  Blooming Bouquets cut file & Spring Fever cut file:  The Cut Shoppe; Patterned Paper, Wood Veneers, Stickers & Bits:  Elle's Studio; Color Shine:  Heidi Swapp; Flair Button:  A Flair for Buttons; Enamel Dots:  Freckled Fawn; Tiny Attacher:  Tim Holtz; Watercolors:  Artist's Loft; Die Cut Machine:  Silhouette Cameo

Thursday, February 12, 2015

Love This Girl

Hi everyone!  I'm stopping in today to share a layout with you using some of the cut files from one of the new sets in The Cut Shoppe!  I used two of the icons from The Love Club cut file to create the title for my layout, and as a layer to add behind my photo.  And I got a chance to play with the adorable new collection, Up In the Clouds, from Pinkfresh Studio!!


https://www.etsy.com/listing/222281822/the-love-club-cut-file-consists-of-4?ref=shop_home_active_1

I cut both of these on White cardstock, and used Acrylic Paint to add some color to the title.  I kept the heart cut file White, so it would be a nice layer behind my photo, but wouldn't compete with the pattern on the paper.  This cut file set would be great for Valentine's Day layouts or for your everyday pages!

You can check out my full process for putting this layout together, by checking out my new Process Video!  And don't forget to Subscribe, to keep up with all of the new videos for The Cut Shoppe!


And speaking of Valentine's Day...we want to spread the love and give you 30% off of your purchase NOW through SUNDAY, SEPTEMBER 15th!  Use the Discount Code LOVE30 to save!


You can pick up some of the new cut file sets, or grab some of your favorites for a discount!

https://www.etsy.com/shop/TheCutShoppe?ref=ss_profile

Supplies:  The Love Club cut file:  The Cut Shoppe; Patterned Paper, Wooden Beads, Rub-Ons, Wood Tags & Puffy Stickers:  Pinkfresh Studio; Color Shine:  Heidi Swapp; Tags & Flair Button:  Hip Kit Club; Wood Veneers:  Elle's Studio; Tiny Attacher:  Tim Holtz; Enamel Dots:  Freckled Fawn; Date Stamp & Thickers;  American Crafts; Die Cut Machine:  Silhouette Cameo

http://www.ashleyhortondesigns.com/