Showing posts with label scrabooking. Show all posts

Monday, February 24, 2020

best day of school - Kim Jeffress

Hello everyone! I am thrilled to be back on the Cut Shoppe blog today. I want to share my newest project with you using the "You've Been Schooled" cut file!


I have been working away in my Heidi Swapp Storyline Chapters notebook with the theme all about me! As a teacher I wanted to record that part about me so I went searching in the Cut Shoppe store for a school themed file. I came across the First Day Of School cut file in the You've Been Schooled set and new I could work with it.


I cut the file onto some white cardstock and then trimmed off the top word "First"since it was not needed on my page. I then adhered it to my pattern paper and added some texture by adding some back and forth stitching on the word school.


I finished off my page by layering over some letter stickers and ephemera to add a fun look. I love how the bright pops of color contrast against the white.
Thanks for joining me here today. Till next time...


Tuesday, February 4, 2020

Love Grows Here | Vânia Fonseca

Hello crafty friends! Vânia here and today i´m sharing a layout that i made using the Love Grows Here cut file available at The Cut Shoppe.


I´ve started by cutting the file in white card stock and then chose some patterned papers, mainly from the Horizon colllection from Paige Evans, to back the file.
To adhere the file i used foam adhesive to give a little dimension. 


For the tittle i mixed puffy stickers with alphabet stickers and then stamped the date using a roller stamp.


To embelish my page i use flowers, butterflies and glitter hearts. On the center of each flowers i made a little dot using Nuvo drops. And finished my page with some ink splatters.


And that´s all for today, thank you so much for passing by, don´t forget to go grab your file here.

Friday, January 10, 2020

Mele Kalikimaka layout - Lisa Fonseca

Hey scrappy people,

it's Lisa back on the blog to share this layout with you.


For this layout, I used a new cutfile called LET IT SNOW from the CutShoppe. It's a snowflake wreath and it's so cute. 
I had the idea to cut it out of two different colored cardstock sheets and adhered it to a pretty, matching background. In my stash, I found this cool green paper from Pinkfresh Studio and thought that those two pink shades would match perfectly. I used them to cut out my cutfile but also to create a frame for my layout. I stitched around the frame in a zigzag, using pink thread.


So when I had my two wreaths cut out, I adhered them to the background, paying attention to only put glue in the middle of each snowflake, so that later, I could create texture by pulling up the little branches. I love the effect it gives with the darker color peaking out from behind the lighter one. 


I used the same two colors to matte my photo and adhered the picture to the background using adhesive foam. I also used two older gold glitter frames behind the photo. Then I went through the rest of my Snow and Cocoa collection and used all the things that I thought would be cute. 


For my title, I used three different kinds of Thickers. I wrote "Mele Kalikimaka", which means "Merry Christmas" in Hawaiian. In the picture I'm in Oahu and even if it doesn't look like it, it was the 23th of December :)


I wanted to add more sparkle, so I used four different colors of sequins and adhered them to the little holes in the snowflakes. I also used white puffy hearts in each of the snowflakes' centers. I finished by using some white snowflakes to lighten up the wreath and also some black splatters to balance the darkness of the photo.

I hope you like it and are inspired to use this new cutfile.

Thank you so much for stopping by, see you soon!

Lisa

Saturday, August 11, 2018

Catch of the Day | Tarrah McLean

Hi everyone!

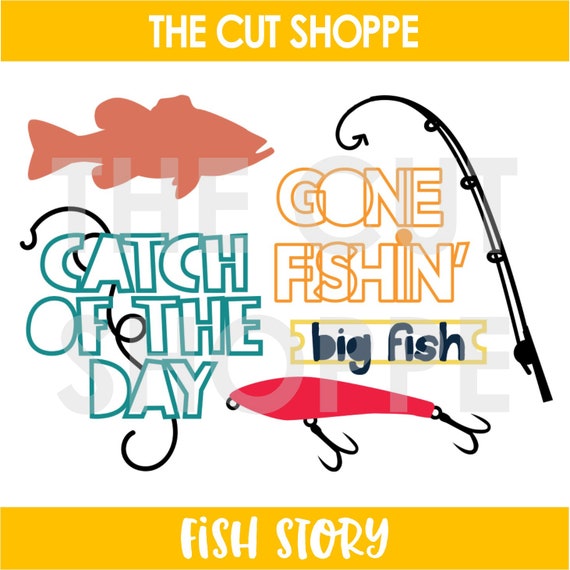
It's Tarrah McLean back with you today to share a new layout created using the awesome 'Fish Story' cut file!

Fish Story cut file

The Catch of the Day part of this cut file made the perfect title for this layout! I decided to ungroup the whole title in the software first so I could cut one part of it with one colour paper and then I cut the individual letters to go back into the centres in another colour paper. Once I had adhered the letters back in, I took out my black pen and outlined them to make them pop a bit more.

I really needed a pop of red so I decided to cut the fishing rod out of red cardstock, I really like how I was able to place this in the background and then layer everything else over the top! Of course I had to add a die-cut fish to end of the line! 

I added a few water and fish embellishments like stickers, die cuts and wood veneer that went along with the theme of the page and lastly added some black mist splatters to finish off! 

Thank you so much for stopping by The Cut Shoppe blog today!

Be sure to check out The Cut Shoppe Etsy store for amazing cut file designs to suit and project and theme!

Happy creating!