Showing posts with label layout. Show all posts

Sunday, March 29, 2020

Somewhere Over the Rainbow | Tarrah McLean

Hi friends,

It's Tarrah back with you and today it is sadly my last post and share with you as part of The Cut Shoppe design team. :( It has been an absolute blast being on this team and using Ashley's cut files! Thank you so much for having me Ashley!

So now to my layout! I decided for my last layout that I would create something bright and fun to hopefully cheer people up with all the uncertainty and difficult times you may be going through. 

I used the Over the Rainbow cut file and cut each individual piece of the rainbow using different coloured cardstocks. 


Over the Rainbow

Once I had the cut file pieces all stuck down in rainbow order, it was time to add my photo and embellish! The photo is of my gorgeous niece in a pretty rainbow dress and handbag that matched! Perfect photo for this layout! I added a rainbow paper underneath the photo and placed it slightly to the right of the centre of the rainbow. To balance all the colour at the top of the rainbow, I decided to add a rainbow strip of paper down the very bottom of the page. I love how that looks!

With embellishing, I tried to embellish tone on tone where I could. The flair button was perfect in the centre of the rainbow on the blue piece as it had the same blue background. I added some pink enamel hearts in some of the heart cut outs of the cut file. I also added some phrase stickers that suited the page also. 

The white fluffy hearts are a fabric embellishment made by a lady in Australia. I added a small gold heart sticker to each cloud. On the yellow piece of the cut file, I added some yellow glitter chipboard thickers from my stash and that became the beginning of the title of the page. On the right of the photo, I punched out a heart from red cardstock and layered a gold sticker heart over the top of that one too.

Thank you so much for your support using The Cut Shoppe cut files on the design team. I do hope that you all continue to support Ashley and The Cut Shoppe by purchasing her amazing cut files!

Happy creating, stay healthy and look after each other!

Tuesday, March 24, 2020

Happy spring layout - Lisa Fonseca

Hey friends, 

it's Lisa on the blog and today I'm sharing my last layout for TheCutShoppe.


The cutfile I'm using is called Happy spring, you can find it by clicking on this link. :)

For this layout, I wanted to use very bright spring colors, so I chose pink, yellow and mint. I went through my paper scrap stash and chose all the ones that I thought would look good together, then I traced all the letters on the mint and pink papers and cut them out. 


For my background, I created three stripes of color, using acylics, on a white cardstock sheet. Then I adhered my letters to the mint and pink sections. I wasn't careful with the placement of the letters, I wanted them to be a bit crooked, so that when I placed the cutfile on top, they would't match perfectly. If you have been following me for a while, I'm sure you know that I like doing this. I like when the letters peek out from the sides.


The yellow section was still empty at this point. I wanted to place my photo there but I also needed something else to fill up more space. So I went back to my cutfiles and used one of the flowers from the Spring Flowers cutfile. I backed it, as well as my photo, with a yellow patterned paper. I thought it would be cool if the flower had a stem going down to the green section. So I cretated a stem with leaves and a cute little knot. 


I went through my stash and chose a lot of cute little details to add. Stickers, ephemera pieces... I added them all to the corresponding section. To finish I splattered some paint. 
I hope you like how it turned out. 


I want to thank Ashley Horton again for giving me the chance to work with her great cutfiles. Audrey, I wish you all the best for your future projects. :) 

Don't forget that you can still purchase cutfiles on the CutShoppe website!!! :) 

Thank you for the support and nice comments on Instagram.

See you,

Lisa


Saturday, March 14, 2020

Boys Will Be Boys | Tarrah McLean

Hi friends,

It's Tarrah back with you and today I am sharing a boy layout using the awesome Boys Will Be Boys cut file! Being the mum of 2 boys and hubby I love it when I can use one of the many awesome boy related cut files in The Cut Shoppe store!


Boys Will Be Boys

I cut the cut file design out from a grey paper and then backed each letter in the title with a different paper. Backing cut files is one of my favourite techniques and these titles are also one of my favourites too. Once it was all backed I adhered the whole piece to the lower half of a piece of white cardstock. 


I adhered the photo of my sons at the top above the cut file design slightly tucked in underneath at the bottom of the photo. The reason I often add my photo to the top of a design like this is so it creates a good balance on the page. To the right of the photo I added a circular die-cut, a star and some phrase stickers.

I love to add embellishments over cut files too and this one was no exception! As you can see in the photo above, I added a flair button to the centre of the 'O' in 'Boys' and an enamel dot in the middle of the rocket that forms the 'I' in 'Will'. I also added a word sticker and an arrow die-cut.

Thank you so much for stopping by, I hope you are inspired by my layout in some way!

Happy creating!


Saturday, February 29, 2020

Soak Up The Sun | Tarrah McLean

Hi creative friends!

It's Tarrah back with you and today I am sharing a new Summery layout using one of the cut files from the Full Circle set!

Full Circle

I cut the cut file design from white cardstock and backed different patterned papers behind each of the triangle spaces making sure that each colour was opposite to the other one.   

I used up some older Bella Blvd papers and embellishments to create my layout. I love the bright colours and Summery feel this layout has. The pie-chart design is perfect to use up scraps of paper that you don't have many of! I embellished with a tone on tone look, trying to use embellishments in the same colours as the papers. 

I placed my photo right in the middle of the circle that I was able to balance the title on each side of the photo. I used craft foam under my photo to create height and dimension. I like how this allowed me to tuck embellishments into the sides of the photo like the blue fabric star from my stash!

Thank you so much for stopping by today! Make sure to check out The Cut Shoppe store for all the amazing cut file designs that enhance any themed project!

Happy creating!


Tuesday, February 25, 2020

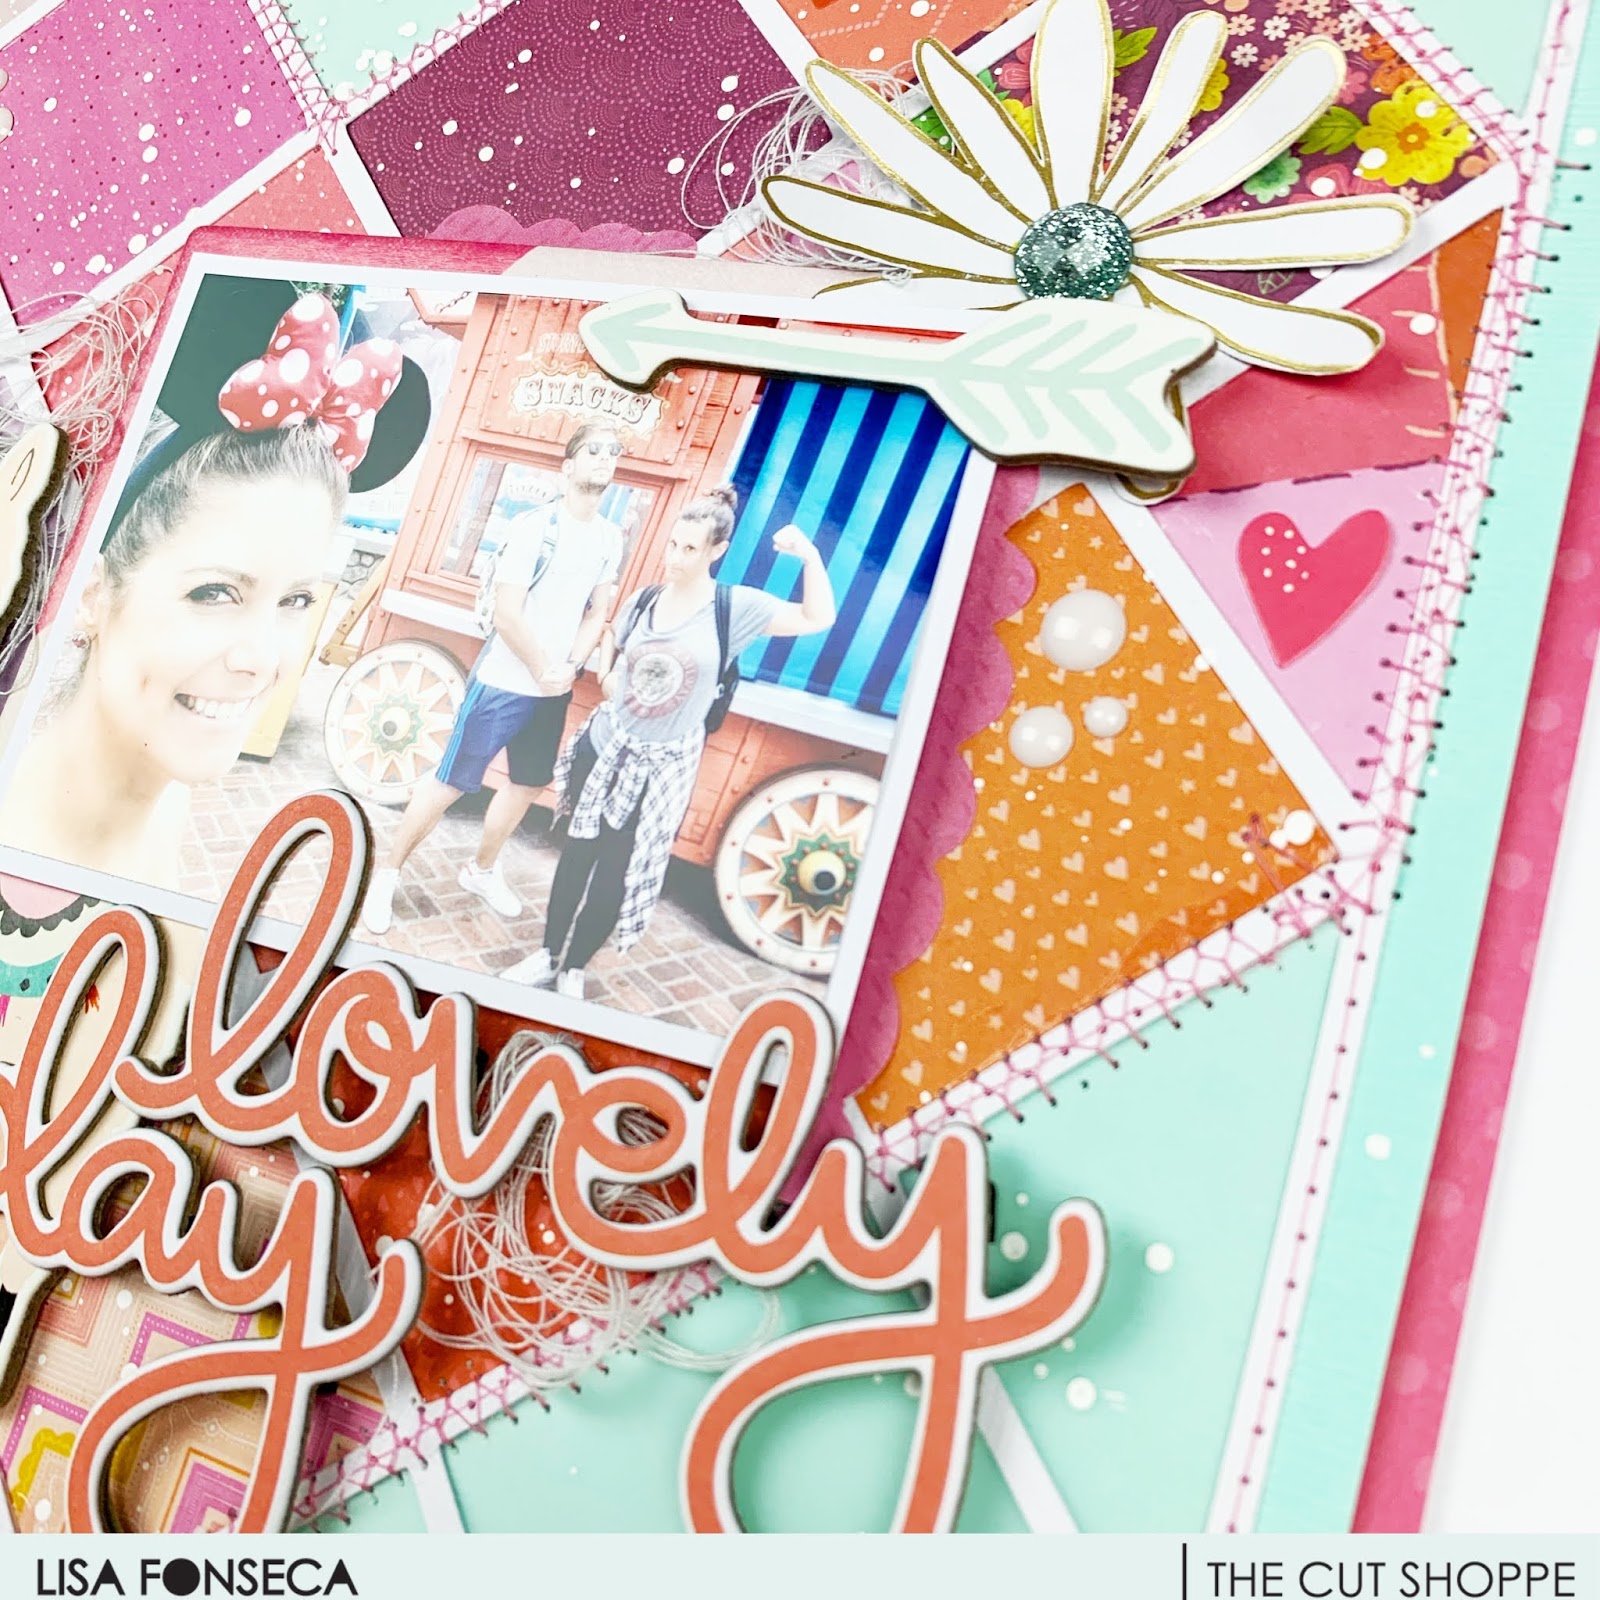
Lovely Day layout - Lisa Fonseca

Hey scrappy people,

it's Lisa and today I'm sharing a new layout, using the SQUARE OFF cutfile.


You can find the cutfile on the CUTSHOPPE website. 

When you look at the cutfile as is, you see this regular square pattern. When I looked at it a bit longer though, I could make out a heart in the middle, by filling only some of the squares. In fact, the very cool thing about this cutfile, is that you can fill any squares and make it look different every time. So there are many possibilities with this cutfile. 


To fill the squares, I wanted to use only reds, pinks, oranges and purples. The little 2x2 paper pads from Pink Paislee, are exactly the same size as were the squares of my cutfile. That was awesome. :) So I went through all of the Paige Evans collections and got out all of my swatch books. I chose all the ones that were in the colors that I needed. 


I backed all of the squares to create the heart shape and backed the rest of the squares with vellum (which you can't really see on the pictures...). Then I adhered the whole thing to a mint sheet of cardstock and started machine-stitching. I used a regular stitch on the borders and a zig-zag stitched all around the heart.

Then I created a frame for my layout, using a pink patterned paper from my stash.


To embellish, I didn't really had somethi ng specific in mind. So I went through a of things from my stash and chose a cardboard llama from Crate Paper, some fussy-cut flowers from Dear Lizzy, some cardboard words and arrows from My Mind's Eye (I think...;) and some other little bits. I matted my photo on some patterned paper and adhered it to the layout, using foam.


Then I added my chosen embellishments in a way that I liked and looked balanced to me. I also added some tangled thread to give the whole thing more detail and interest. 

To finish, I added some white splatters of paint.

I really hope you like it and are inspired to use that cutfile too. 

See you soon, 

Lisa

Sunday, February 23, 2020

Curl up with a Good Book | Mandy Melville

Hey friends!

Mandy here with you today to share a layout that I created using the Good Book cut file from The Cut Shoppe. My eldest daughter Abi is an avid reader, so this was the perfect cut file to use to document a photo I snapped of her recently while she was reading.


The Good Book cut file:

Good Book

I started by cutting the cut file out of white cardstock, and then backing it with patterned papers from the Felicity Jane Shay collection. I don't often use coloured patterned papers for my background, but I decided to use one this time, to help the cut file to really stand out against the background, and I like the subtle tone-on-tone stripes on this patterned paper. I backed the cut with craft foam before adhering it to the background to give it some extra dimension.


I added a couple of layers behind my photo using a 3x4 journaling card and a tag, and then adhered it over on the right hand side of the page. I fussy cut some pretty florals to embellish around the photo, and I also added a sub-title across the bottom of the photo using a die cut word from the Shay collection, and a little puffy word sticker.


To balance out the photo cluster over on the right hand side of the layout, I created a second cluster to the left of the cut file. I repeated elements in this cluster that I'd used in the main one including another fussy cut floral cluster and another little puffy word sticker. I also added a label here to record the book that my daughter was currently reading when I took the photo.


I finished the layout off with some typed journaling and a couple of chipboard asterisks.

Thanks so much for joining me here on the blog today! I hope that you enjoyed taking a look at my layout.

Tuesday, February 4, 2020

Love Grows Here | Vânia Fonseca

Hello crafty friends! Vânia here and today i´m sharing a layout that i made using the Love Grows Here cut file available at The Cut Shoppe.


I´ve started by cutting the file in white card stock and then chose some patterned papers, mainly from the Horizon colllection from Paige Evans, to back the file.
To adhere the file i used foam adhesive to give a little dimension. 


For the tittle i mixed puffy stickers with alphabet stickers and then stamped the date using a roller stamp.


To embelish my page i use flowers, butterflies and glitter hearts. On the center of each flowers i made a little dot using Nuvo drops. And finished my page with some ink splatters.


And that´s all for today, thank you so much for passing by, don´t forget to go grab your file here.

Wednesday, January 29, 2020

Play | Tarrah McLean

Hi creative friends,

It's Tarrah back with you and today I am sharing a new back to school themed layout using one of the Freebie Friyay cut files called Uncharted Territory.  


Uncharted Territory

I cut out the design from white textured cardstock and then chose some older coloured papers by Bella Blvd to back the cut file with. I used red on the very outside, then came in to yellow and then used the light blue/aqua colour in the centre.  Once the cut file was backed I adhered it to the centre of another piece of textured white cardstock.

I matted my photo using a star paper and adhered it slightly to the right of the design. I didn't want to cover up all the blue from backing the cut file. I added the strip of paper with the apples under my photo, I then used this as a place to adhere my acrylic title 'Play'. 

I used a mixture of embellishments including a felt bow, stickers, chipboard stickers, puffy stickers, die-cuts, enamel dots and shapes, a flair button and wood veneer.  I placed the felt bow under the apple paper strip, I love that pop of yellow here. Over to the right of my photo, I placed the backpack die-cut and then layered a Back to School flair button over the top. 

Thank you for stopping by today! Make sure to check out The Cut Shoppe store for amazing cut file designs for all types of projects!

Happy creating!

Friday, January 24, 2020

Baby it's cold outside layout - Lisa Fonseca

Hey friends, 
it's Lisa back on the blog today and I'm sharing a super cute layout with a brand new cutfile.
The cutfile I'm using is called FRESH CUT TREES and is available on the THE CUT SHOPPE website. 

In fact the cutfile is made of four rows of trees, all on top of each other. What I did was cut it out two times. One time filling the 12x12 sheet, one time a bit smaller. So I had big and smaller trees. I cut the cutfile apart and used two rows of each. 
First I backed them with pretty patterned papers from the Crate Paper Snowflake collection. Then I positioned them on the paper, always using two rows, that I superposed in a way that the bigger trees would overlap the smaller trees a bit. I also used foam dots to adhere the bigger trees, to create dimension.


Then I used another cutfile for my title, which is called WINTER IS COMING. I cut out the letters from white cardstock and placed them on patterned paper before cutting them out, leaving a colored border. The word 'cold' I backed in the traditional way.


I really love the effect it gives with the different fonts and different colors. 
I matted my photo with five or six scraps of paper and adhered it to the layout, in between the rows of trees. I also created a frame for the layout, using a pretty patterned paper. Then I went through my embellishments and used stars and some animals to pimp my pretty layout.


To finish the layout, I splattered some gold ink in some places.

I really love this tree cutfile because, as I did, you can use it in so many different ways. You can use it as is, or cut the trees as you like and need them on your layout. The phrase cutfile is also very fun. It's meant to be used in a traveler's notebook, but I switched it up and used it on my layout. So, as you can see, you only need a bit of imagination and your options are endless :)

See you soon!

Lisa