Showing posts with label Summer. Show all posts

Tuesday, March 24, 2020

Happy spring layout - Lisa Fonseca

Hey friends, 

it's Lisa on the blog and today I'm sharing my last layout for TheCutShoppe.


The cutfile I'm using is called Happy spring, you can find it by clicking on this link. :)

For this layout, I wanted to use very bright spring colors, so I chose pink, yellow and mint. I went through my paper scrap stash and chose all the ones that I thought would look good together, then I traced all the letters on the mint and pink papers and cut them out. 


For my background, I created three stripes of color, using acylics, on a white cardstock sheet. Then I adhered my letters to the mint and pink sections. I wasn't careful with the placement of the letters, I wanted them to be a bit crooked, so that when I placed the cutfile on top, they would't match perfectly. If you have been following me for a while, I'm sure you know that I like doing this. I like when the letters peek out from the sides.


The yellow section was still empty at this point. I wanted to place my photo there but I also needed something else to fill up more space. So I went back to my cutfiles and used one of the flowers from the Spring Flowers cutfile. I backed it, as well as my photo, with a yellow patterned paper. I thought it would be cool if the flower had a stem going down to the green section. So I cretated a stem with leaves and a cute little knot. 


I went through my stash and chose a lot of cute little details to add. Stickers, ephemera pieces... I added them all to the corresponding section. To finish I splattered some paint. 
I hope you like how it turned out. 


I want to thank Ashley Horton again for giving me the chance to work with her great cutfiles. Audrey, I wish you all the best for your future projects. :) 

Don't forget that you can still purchase cutfiles on the CutShoppe website!!! :) 

Thank you for the support and nice comments on Instagram.

See you,

Lisa


Saturday, February 29, 2020

Soak Up The Sun | Tarrah McLean

Hi creative friends!

It's Tarrah back with you and today I am sharing a new Summery layout using one of the cut files from the Full Circle set!

Full Circle

I cut the cut file design from white cardstock and backed different patterned papers behind each of the triangle spaces making sure that each colour was opposite to the other one.   

I used up some older Bella Blvd papers and embellishments to create my layout. I love the bright colours and Summery feel this layout has. The pie-chart design is perfect to use up scraps of paper that you don't have many of! I embellished with a tone on tone look, trying to use embellishments in the same colours as the papers. 

I placed my photo right in the middle of the circle that I was able to balance the title on each side of the photo. I used craft foam under my photo to create height and dimension. I like how this allowed me to tuck embellishments into the sides of the photo like the blue fabric star from my stash!

Thank you so much for stopping by today! Make sure to check out The Cut Shoppe store for all the amazing cut file designs that enhance any themed project!

Happy creating!


Saturday, January 11, 2020

Sweet Summer Time | Tarrah McLean

Hi creative friends,

It's Tarrah back with you and today I am sharing a new Summer layout! Its currently very hot down here in Australia so a Summer layout it is today! 

I used the Sweet Summer Time freebie cut file that was included in the June 27th 2019 newsletter. 


I cut the cut file design out from white cardstock and then backed the title parts with 2 different patterned papers from the Sunny Days 6' x 8' pad. I used the pink in 'Summer' to make it stand out just a little bit more. For the spikes of the sun, I chose a yellow paper from the 6' x 8' paper pad.  

Once it was all backed, I adhered it down to another piece of white cardstock. I then matted my photo with another of the 6' x 8' papers and adhered it to the bottom right of my page. I then started to embellish using chipboard pieces, die-cuts and stickers and puffy stickers.

The 'Vacay Vibes' die-cut piece was perfect underneath the 'Time' word and I just had to add the teal coloured chipboard car here too! A few of the other chipboard embellishments I added are the shell on the left, the heart at the top and the 'Sunkissed' piece right at the top too. 

Make sure to check out The Cut Shoppe store for amazing cut file designs to enhance any project!

Thanks for stopping by today!

Happy creating!

Tuesday, November 26, 2019

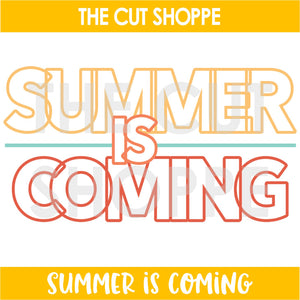
Summer Is Coming | Tarrah McLean

Hi creative friends!

It's Tarrah back with you and today I am sharing a new Summer themed layout featuring the awesome 'Summer Is Coming' cut file. Its getting pretty hot down here in Australia and we are never short of Summer photos to scrapbook, all the Summer themed cut files are perfect to document our Summer! 


Summer Is Coming

I started out by cutting the cut file design from white cardstock, I then chose lots of the fun papers from the 6'x 8'paper pad from the Sunny Days collection. to back behind each letter in the title. I love how all the colours and patterns look together! Once the letters were all backed, I used craft foam underneath to pop it up off the pink background patterned paper. I placed it down the bottom of the page so that I was able to add my photo and some embellishments at the top. 

I layered a few die-cuts underneath my photo and just had to add that super cute girl transparent die-cut piece to the left of the photo too. On the right of the photo, the Sun Shine Sun die-cut was perfect to add, I like the pop of yellow. I added one of the blue puffy hearts to this piece as well.  I also added some embellishments overlapping the cut file to bring some more interest to the design. 

I hope my layout had inspired you in some way today? Don't forget to check out The Cut Shoppe for all your cut file designs!

See you next time!

Happy creating!

Monday, October 21, 2019

Summer Memories | Mandy Melville

Hey friends!

Mandy here today to share a new layout featuring the Beach Life cut file from The Cut Shoppe! Here in Australia, we're just starting to head into the warmer weather, and I was in the mood to scrapbook a summer photo! I decided to document a photo that I took of my son and youngest daughter when we spent a day at the beach last summer, and I knew that Beach Life cut file would be perfect for that!


Beach Life

I cut the cut file out of white cardstock and backed each of the images with some bright and summery patterned papers. I used a combination of Felicity Jane, Cocoa Vanilla and Heidi Swapp papers and embellishments on this layout. Once I'd backed each of the sections in the cut file, I adhered it to my background using craft foam to give it lots of nice dimension.


I matted my photo and then adhered it overlapping the right hand side of the cut file. I then created a cluster of cute summery embellishments on the bottom right hand corner of the photo. I also added my title 'Summer Memories' here using a die cut piece combined with a rubber charm.


To balance out the photo and embellishments on the right hand side of the page, I clustered some floral die cuts and a shell chipboard piece around the thongs on the left hand side of the cut file.


To complete the visual triangle, and to help draw the viewer's eye around the page, I created a third embellishment cluster up in the top left hand corner of the layout.


I finished it off with some cute puffy stickers, epoxy dots, clear word stickers, and lastly some black ink splatters.

Thanks for joining me here on the blog today! I hope that you enjoyed taking a look at my summery page! Don't forget to head on over to the shop to grab this fun cut file to use on your own beachy projects!


Wednesday, July 31, 2019

Poolside | Kelly Janes

Hey friends! Kelly back today with a new layout using an exclusive cut file that was available in the most recent Cut Shoppe Newsletter.


I started by cutting the Poolside Cut File on white cardstock. I then backed the words using different 6x6 patterned papers from the Fancy Pants Poolside Collection. I added machine stitching to the wreath portion of the cut file and hand-stitching around the words to help them stand out from the background.


I started by just adding white embroidery floss, but I didn't feel like the words stood out enough. So, I added pink embroidery floss on top of the white embroidery floss. That was a lot of hand-stitching, but I love the look!


I adhered the cut file to a pink patterned paper and added a mix of embellishments from the same scrapbook collection around the edges of the cut file. I tucked a few of the embellishments under the wreath portion and on top of the cut file for added dimension!


You want to make sure that you are signed-up for The Cut Shoppe Newsletter (see the right sidebar on TCS blog). The newsletter is sent directly to your inbox twice a month. These cut files are released randomly and are only available in the newsletter! Don't miss out on the next FREE newsletter cut file, but until then you can check out all of the cut files available in the shop!


Monday, July 22, 2019

Summer Fun + Sun | Marsha Farris

Hey friends!  Marsha here today sharing a fun summer layout in my traveler's notebook.  I used the Vacay Mode cut file from The Cut Shoppe.


For my spread today, I used mainly the Crate Paper Sunny Days collection by Maggie Holmes.  To begin the layout, I enlarged the sunglasses portion of the cut file to span across my traveler's notebook spread.  The best part about this cut file is that it includes so many fun images, and there are so many layout design possibilities!  I cut out the file using white cardstock and backed it with a floral paper.  I also created an offset of the cut file in Silhouette Studio using navy patterned paper, so the sunglasses would stand out from the white background.  To complete the title, I added some chipboard phrase stickers.


I chose to document a photo taken on a recent family vacation to the lake.  I thought it worked perfectly with this fun cut file.  I layered some papers behind the photo and added puffy stickers and cardstock stickers to frame the photo.  Next, I stamped the date using my favorite Heidi Swapp date stamp and trimmed it out using a tab punch.


At the top of the other page, I added a tag and layered some puffy stickers and a fussy cut element from one of the patterned papers.  I just love the little beach bag!


Thanks for stopping by today!  I hope I have inspired you to use a cut file on your next project.  See you soon!


Friday, June 28, 2019

Sweet Summer Time | Erica Thompson

Have you signed up to receive The Cut Shoppe Newsletter yet? Well what are you waiting for? Yesterday a new newsletter went out and included was the Sweet Summer Time cut file! Who loves free cut files? I know I do!
I pulled out the Oh Summertime collection from Pebbles that I picked up at A Cherry on Top! I love the bright colors and fun summer images in this collection.
 I added some fun yellow Shimmerz to a white piece of cardstock and also some sprinkles of aqua and pink for little pops of color behind the cut file.
The photos are of our youngest Liam Jay and his first time having a shaved ice from Tropical Sno! He had a cinnamon flavored one and he loved it! Such a fun summer treat! I embellished around the cut file with ephemera and stickers from the collection and a pink epoxy flair from Scrappin Happy Studio. Here is a look at my completed layout using the Frebbie cut file available in our newsletter!
You can sign up for the newsletter on The Cut Shoppe Blog! Thanks so much for stopping by today!

Friday, June 14, 2019

Summer Adventure | Marsha Farris

Hey friends!  Marsha here today sharing a spread in my Life Crafted Album using the Summer Adventure Freebie Friyay cut file.


For my layout, I mainly used the Crate Paper Sunny Days collection by Maggie Holmes.  To begin the spread, I cut out the cut file using white cardstock.   This is my "go to" for cut files- I just love the way it pops against patterned papers.  I decided to create a pocket and layered the cut file over it.  I tucked several ephemera pieces into the pocket, and I used some of the stickers from the collection to embellish the die cuts.


The photo I am documenting is of my grandmother and I, taken a few years ago.  It's one of my favorites of us, enjoying an afternoon at the beach.  I layered ephemera pieces behind the photo and embellished around the photo with chipboard and stickers.  


Thanks for stopping by today!  Don't forget to check out The Cut Shoppe store and grab this fun Freebie Friyay cut file!