Showing posts with label papercrafts. Show all posts

Thursday, March 19, 2020

Off grid | Vânia Fonseca

Hello crafty friends! Today i´m sharing a TN page in my album using the Off Grid cut file from The Cut Shoppe.


It´s a really simple page to document my father´s birthday, i´ve started by cutting the file in white cardstock, and choose a plain yellow cardstock as a background.


Add my tittle on the top of the grid, using one of the ephemera pieces from the My Favorite Story collection by Pinkfresh Studio and a puffy alpha.


Use the mini alpha punch board from We R Memory keppers to create the age and put the numbers on the bottom right side of the page. And decorate the page using some stickers and ephemera.


And that´s all for today! Thank you so much for passing by, don´t forget to take a look at all the cut files available on The Cut Shoppe.

Sunday, March 8, 2020

Market Fresh | Vânia Fonseca

Hello crafty friends! Today i´m sharing a layout from my album, i´m using the Market Fresh cut file from The Cut Shoppe.


I made a little shaker, using the cut file and my fuse tool. I have used the cut file as a guide to fuse the plastic and then filled up with sequins. I cut the file two times, one to use in front and the other to back the plastic. That way i have the two sides cover and don´t look wierd when you flip the shaker. Because i didn´t adhere it to the page i just use the handle to put it in one of the rings of the album.


I´m using the new My Favorite Story collection from Pinkfresh Studio collection that i think it´s perfect for Spring projects.


This page it´s about a flower festival that i went in Frebruary, dedicated to Camellias. Besides flowers they also have little cakes with "camellias" that i thought are really cute and have to eat one.


For the tittle i mixed stickers with stamps, and use different elements from the collection to decorate my page.


Thank you so much for watching! Don´t forget to go grab your file on The Cut Shoppe and make your one shaker, i think it always add a fun touch in your album.

Saturday, February 15, 2020

XOXO | Tarrah McLean

Hi creative friends,

It's Tarrah back with you and today I have a new love themed layout using the Love Ya cut file.

I cut the cut file design out of white textured cardstock and then backed the shadow parts with black cardstock. I then used a black pen to outline the outer edge and also the shadow pieces.


Love Ya

Going through my stash of bits and pieces of love collections I found I had lots of things with the XOXO on to add to my page. These were mostly from the Hello Love and Main Squeeze collections by Crate Paper. 

I adhered the XOXO to some red cardstock using some craft foam underneath the cut file to give some height and dimension. 


Over the top of the cut file, I layered lots of things like a pocket, some tags, a few stickers and some wood veneer hearts. 


The fabric X and O are from my stash and I layered a heart puffy sticker and a gold glitter sticker. The flair button on the left of my page is also from my stash and it goes perfectly as it is a bicycle with hearts in the top basket!


Thank you so much for stopping by today, I hope I have inspired you to create a love themed layout and to check out all the gorgeous cut file designs in the shop!

Happy creating!

Friday, January 17, 2020

Baby it's cold outside | Vânia Fonseca

Hello crafty friends!  Vânia here, today i´m sharing this layout that i made using the Winter is Coming cut file from The Cut Shoppe. It´s a really simple page, with a little mixed media touch.


This cut file it´s for travaers notebook, but i think it can also be used for a 12x12 layout. And that´s what i did.


I´m using Felicity Jane papers and some Crate Paper stickers. Also used some texture paste and a stencil to create a snowflake wave on the top and bottom of the page, mixing the sticker snowflakes with the cut file ones.


I add a little white border at some of the shapes, because i think it really helps to stand out from the background.


And that´s all for today, thank you so much for passing by!


Tuesday, November 26, 2019

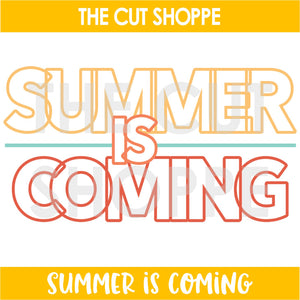
Summer Is Coming | Tarrah McLean

Hi creative friends!

It's Tarrah back with you and today I am sharing a new Summer themed layout featuring the awesome 'Summer Is Coming' cut file. Its getting pretty hot down here in Australia and we are never short of Summer photos to scrapbook, all the Summer themed cut files are perfect to document our Summer! 


Summer Is Coming

I started out by cutting the cut file design from white cardstock, I then chose lots of the fun papers from the 6'x 8'paper pad from the Sunny Days collection. to back behind each letter in the title. I love how all the colours and patterns look together! Once the letters were all backed, I used craft foam underneath to pop it up off the pink background patterned paper. I placed it down the bottom of the page so that I was able to add my photo and some embellishments at the top. 

I layered a few die-cuts underneath my photo and just had to add that super cute girl transparent die-cut piece to the left of the photo too. On the right of the photo, the Sun Shine Sun die-cut was perfect to add, I like the pop of yellow. I added one of the blue puffy hearts to this piece as well.  I also added some embellishments overlapping the cut file to bring some more interest to the design. 

I hope my layout had inspired you in some way today? Don't forget to check out The Cut Shoppe for all your cut file designs!

See you next time!

Happy creating!

Thursday, November 14, 2019

Pumpkin Patch | Tarrah McLean

Hi Cut Shoppe friends!


It's Tarrah back with you and today I am sharing a new layout using the Pumpkin Patch cut file. This cut file is gorgeous for Fall/Autumn themed projects! I have teamed it with the soft and pretty 'Just a Little Lovely' collection by Pinkfresh Studio.


Pumpkin Patch

I started out by backing the title in a soft pink paper and then backed the main part of the pumpkin with another of the soft papers. The stalk and leaves were backed using 2 of the papers from the 6' x 6' paper pad. I then added craft foam underneath and adhered to the background paper. 

I placed my photo up in the top right of the pumpkin and layered some of the 6'x 6' papers from the paper pad underneath the photo. I also added one of the dimensional banner stickers under the photo. I also added one of the wood beads to the centre of the 'p' in 'Pumpkin'.

The florals in this collection are gorgeous, I added one of them to the top left of the pumpkin and also added some of the gold glitter enamel dots to the centres of the flowers. I also added a small single flower above the floral cluster.

Thank you so much for stopping by today! I hope you have been inspired by layout? Make sure to check out The Cut Shoppe store for the Pumpkin Patch cut file so you can use it your next project!

Happy creating!

Thursday, October 17, 2019

Pumpkin Patch | Vânia Fonseca

Hello friends! It´s Vânia here, sharing my first layout with the The Cut Shoppe DT.
When i saw the Pumpkin Patch cut file from the new release i knew i need to make something with it.


First i cut the cut file using white card stock and then i grab the Heritage collection from Maggie Holmes to start choosing which papers i want to use.

I chose a little flower patterned paper to fill the pumpkin and because of that i used a plain peachy card stock for the background.


I only add volume on the top of the pumpking, using foam pieces. So i could have a little extra dimension. And put a little tag around one of the pumpking leaves.


I also decided to add hand stitching, so i use some floss in the same color i use to hold the tag around the leave and stitch the butterfly trail.


Thank you so much for watching, i hope you find some inspiration here!

Wednesday, September 11, 2019

Today | Tarrah McLean

Hi Cut Shoppe friends!

It's Tarrah back with you and today I am sharing a new layout using the gorgeous All Heart cut file


All Heart

I chose the Flourish collection by Maggie Holmes for this layout and decided to do a reverse design on this layout, so I cut the design out from the spotted paper and then took the hearts out and put them aside. I then washi taped the background like a template to white cardstock. I took each heart and added them back in to the design like a jigsaw puzzle, I used foam tape to pop them all up and then took away the template once they were all back in. I love how it looks!

I added some pretty embellishments to enhance the design of my layout, I love the gold accents on the embellishments, they really match the colour of the photo. I added a wood veneer title that I have had in my stash for ages and I love how that looks.

The All Heart cut file is one of my all time favourite designs from The Cut Shoppe store. There is also also a remix of the same file where you can back the hearts instead of having them solid. It's such a versatile design and takes the guess work out of deciding on a design sometimes! 

Make sure to check out the store for all the awesome designs you can get! Don't forget once you have purchased the design they can be used over and over again and can be modified too!

Happy creating! 

Saturday, June 8, 2019

Adored | Tarrah McLean

Hi Cut Shoppe friends!

It's Tarrah McLean back with you and today I have new layout to share using the gorgeous Flutterby cut file.


Flutterby

I cut the Flutterby design out from white textured cardstock and then chose some of my favourite papers from a 6' x 6' paper pad and backed all the butterflies with the different papers. Once it was backed, I adhered it down to another piece of white textured cardstock, leaving the wings of the butterflies so that they could be bent up. I love the dimension and shadows this creates.

I then machine stitched around the circle and through the centres of the butterflies to add dimension and texture. My photo was matted on white cardstock and I placed it to the bottom right of the layout. I tucked in some of the embellishments on the right hand side of the photo. 

On the left of the photo, I added a tag with some twine. I also added a few phrase stickers to help tell the story of the layout both above the tag and also under the photo. I added some of the die-cut butterflies and a wood veneer one over the top of the cut file design ones plus I took a flair button from my stash and added that too. 

Lastly I added a few pastel coloured enamel dots to enhance some of the colours and a wood veneer title overlapping the photo.

Thank you for stopping by today! 

Happy creating!