Showing posts with label papercrafting. Show all posts

Saturday, February 15, 2020

XOXO | Tarrah McLean

Hi creative friends,

It's Tarrah back with you and today I have a new love themed layout using the Love Ya cut file.

I cut the cut file design out of white textured cardstock and then backed the shadow parts with black cardstock. I then used a black pen to outline the outer edge and also the shadow pieces.


Love Ya

Going through my stash of bits and pieces of love collections I found I had lots of things with the XOXO on to add to my page. These were mostly from the Hello Love and Main Squeeze collections by Crate Paper. 

I adhered the XOXO to some red cardstock using some craft foam underneath the cut file to give some height and dimension. 


Over the top of the cut file, I layered lots of things like a pocket, some tags, a few stickers and some wood veneer hearts. 


The fabric X and O are from my stash and I layered a heart puffy sticker and a gold glitter sticker. The flair button on the left of my page is also from my stash and it goes perfectly as it is a bicycle with hearts in the top basket!


Thank you so much for stopping by today, I hope I have inspired you to create a love themed layout and to check out all the gorgeous cut file designs in the shop!

Happy creating!

Tuesday, November 26, 2019

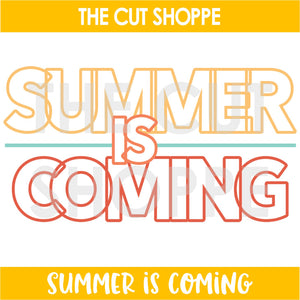
Summer Is Coming | Tarrah McLean

Hi creative friends!

It's Tarrah back with you and today I am sharing a new Summer themed layout featuring the awesome 'Summer Is Coming' cut file. Its getting pretty hot down here in Australia and we are never short of Summer photos to scrapbook, all the Summer themed cut files are perfect to document our Summer! 


Summer Is Coming

I started out by cutting the cut file design from white cardstock, I then chose lots of the fun papers from the 6'x 8'paper pad from the Sunny Days collection. to back behind each letter in the title. I love how all the colours and patterns look together! Once the letters were all backed, I used craft foam underneath to pop it up off the pink background patterned paper. I placed it down the bottom of the page so that I was able to add my photo and some embellishments at the top. 

I layered a few die-cuts underneath my photo and just had to add that super cute girl transparent die-cut piece to the left of the photo too. On the right of the photo, the Sun Shine Sun die-cut was perfect to add, I like the pop of yellow. I added one of the blue puffy hearts to this piece as well.  I also added some embellishments overlapping the cut file to bring some more interest to the design. 

I hope my layout had inspired you in some way today? Don't forget to check out The Cut Shoppe for all your cut file designs!

See you next time!

Happy creating!

Thursday, November 14, 2019

Pumpkin Patch | Tarrah McLean

Hi Cut Shoppe friends!


It's Tarrah back with you and today I am sharing a new layout using the Pumpkin Patch cut file. This cut file is gorgeous for Fall/Autumn themed projects! I have teamed it with the soft and pretty 'Just a Little Lovely' collection by Pinkfresh Studio.


Pumpkin Patch

I started out by backing the title in a soft pink paper and then backed the main part of the pumpkin with another of the soft papers. The stalk and leaves were backed using 2 of the papers from the 6' x 6' paper pad. I then added craft foam underneath and adhered to the background paper. 

I placed my photo up in the top right of the pumpkin and layered some of the 6'x 6' papers from the paper pad underneath the photo. I also added one of the dimensional banner stickers under the photo. I also added one of the wood beads to the centre of the 'p' in 'Pumpkin'.

The florals in this collection are gorgeous, I added one of them to the top left of the pumpkin and also added some of the gold glitter enamel dots to the centres of the flowers. I also added a small single flower above the floral cluster.

Thank you so much for stopping by today! I hope you have been inspired by layout? Make sure to check out The Cut Shoppe store for the Pumpkin Patch cut file so you can use it your next project!

Happy creating!

Wednesday, October 23, 2019

Love Language | Vânia Fonseca

Hello crafty friends! Vânia here with a new 12x12 layout using the Love Language cut file from The Cut Shoppe.


Really love all the speech bubbles in this cut file. And it was perfect to document a photo of me and my mum.
I chose to work on a patterned paper as background so i cut out the cut file using white card stock.


I used the Heritage collection from Maggie Holmes, and backed the speech bubbles with a couple of different patterned papers, a little bit inspired by patchwork.
On the top i add different kinds of stickers, die cuts, so i could have a lot textures.


Also leave some of speech bubbles empty, so i could stamp directly on my background and add one more layer to my page.

I used foam between the cut file and the background to give dimension. This way the heart really stands out from the background.


To finish my page i add some withe ink splatters.

Thank you so much for watching!

Wednesday, September 11, 2019

Today | Tarrah McLean

Hi Cut Shoppe friends!

It's Tarrah back with you and today I am sharing a new layout using the gorgeous All Heart cut file


All Heart

I chose the Flourish collection by Maggie Holmes for this layout and decided to do a reverse design on this layout, so I cut the design out from the spotted paper and then took the hearts out and put them aside. I then washi taped the background like a template to white cardstock. I took each heart and added them back in to the design like a jigsaw puzzle, I used foam tape to pop them all up and then took away the template once they were all back in. I love how it looks!

I added some pretty embellishments to enhance the design of my layout, I love the gold accents on the embellishments, they really match the colour of the photo. I added a wood veneer title that I have had in my stash for ages and I love how that looks.

The All Heart cut file is one of my all time favourite designs from The Cut Shoppe store. There is also also a remix of the same file where you can back the hearts instead of having them solid. It's such a versatile design and takes the guess work out of deciding on a design sometimes! 

Make sure to check out the store for all the awesome designs you can get! Don't forget once you have purchased the design they can be used over and over again and can be modified too!

Happy creating! 

Saturday, June 8, 2019

Adored | Tarrah McLean

Hi Cut Shoppe friends!

It's Tarrah McLean back with you and today I have new layout to share using the gorgeous Flutterby cut file.


Flutterby

I cut the Flutterby design out from white textured cardstock and then chose some of my favourite papers from a 6' x 6' paper pad and backed all the butterflies with the different papers. Once it was backed, I adhered it down to another piece of white textured cardstock, leaving the wings of the butterflies so that they could be bent up. I love the dimension and shadows this creates.

I then machine stitched around the circle and through the centres of the butterflies to add dimension and texture. My photo was matted on white cardstock and I placed it to the bottom right of the layout. I tucked in some of the embellishments on the right hand side of the photo. 

On the left of the photo, I added a tag with some twine. I also added a few phrase stickers to help tell the story of the layout both above the tag and also under the photo. I added some of the die-cut butterflies and a wood veneer one over the top of the cut file design ones plus I took a flair button from my stash and added that too. 

Lastly I added a few pastel coloured enamel dots to enhance some of the colours and a wood veneer title overlapping the photo.

Thank you for stopping by today! 

Happy creating!


Monday, May 27, 2019

So Fun | Tarrah McLean

Hi Cut Shoppe friends!

It's Tarrah McLean back with you and today I am sharing a pretty layout using the gorgeous Dainty Doily cut file. I was totally inspired to use this cut file because of the Ferris wheel photo! I teamed with the Crate Paper Carousel collection and I love how it turned out!

Dainty Doily

I cut the cut file out from white cardstock as I knew that I was going to back it with a bright coloured paper. Once I had backed it, I machine stitched around the main circle to add texture and detail. I then added craft foam underneath to adhere it down to the background patterned paper, creating shadows and dimension. I then took some of the scallop stickers and added those tucked in around the perimeter to enhance the scallop design.  
In the centre of the Dainty Doily cut file, I added a chipboard Ferris wheel and then placed my photo to the left of the centre. I added a few phrase embellishments to my photo that were suitable for the photo and also used some of the packaging under the photo to repeat the scallop design. I also added some embellishments to the top of the page to create a sense of movement.
 
My title was made up of the chipboard stickers from the Carousel collection and I added many other embellishments including puffy stickers, die-cuts, enamel dots and clear stickers to decorate my page and tell the story. Lastly I added the date stamp of the day I took the photo.
 
Thanks so much for stopping by The Cut Shoppe blog today!

Happy creating!

Saturday, May 18, 2019

Away We Go | Tarrah McLean

Hi Cut Shoppe fans,

It's Tarrah McLean back with you and today I am sharing a new layout using the gorgeous Away We Go cut file.

Globe cut files are one of my favourite to work with so when I saw the Away We Go cut file I just knew I had to use it! I took out one of the older Paige collections and picked some of the papers from the 6' x 6' paper pad from the Fancy Free collection.
Away We Go

I decided to use one of the 12' x 12' papers as my background paper from the Fancy Free collection. I love how the white cut file pops against the green background paper. I machine stitched around the main circle of the globe once I had glued it down. 

I placed my photo down in the bottom right section of my page and placed the embellishments around the photo. I love how the different patterned papers look behind the cut file.

This cut file is one that you can use any collection with, I love it when the cut files are so versatile like that! All the files in The Cut Shoppe store are suited to any collection so make sure to check them out!

Thanks so much for stopping by The Cut Shoppe blog today!

Happy creating!

Thursday, April 18, 2019

Happy Times | Tarrah McLean

Hi Cut Shoppe friends,

It's Tarrah McLean back with you and today I am sharing a new layout with you using the gorgeous new Butterfly Wings cut file!

Butterfly Wings

As the Butterfly Wings cut file is quite a large design, I wanted to try one of the busy papers from the Cocoa Vanilla Happiness collection behind it to see how it would look. I just LOVE how that paper looks behind the white outline of the cut file.

Once I had the cut file backed, I added craft foam on the underneath side and added it to the pink background paper. I wanted the butterfly to pop up from the background paper to create shadows and dimension.

I have scrapped a photo of my niece, it was perfect to use for this layout as she looks as though she is holding out her arms to look like wings. I placed it right in the centre of the cut file because of this reason! I did matt the photo using a dark blue paper and also layered some other papers and embellishments underneath the photo. I added the butterfly die-cuts scattered around to enhance the butterfly design even more. 

My title was added overlapping the photo on the left hand side and a couple of sentiments were added at the bottom of the cut file also. 
Lastly some white mist and the date stamp were added.

I hope I have inspired you to check out The Cut Shoppe store for some amazing cut file designs! There is something in store for everyone!  

Happy creating!