Showing posts with label Christmas Magic. Show all posts

Sunday, July 28, 2019

december daily traveler's notebook inserts | iris fox

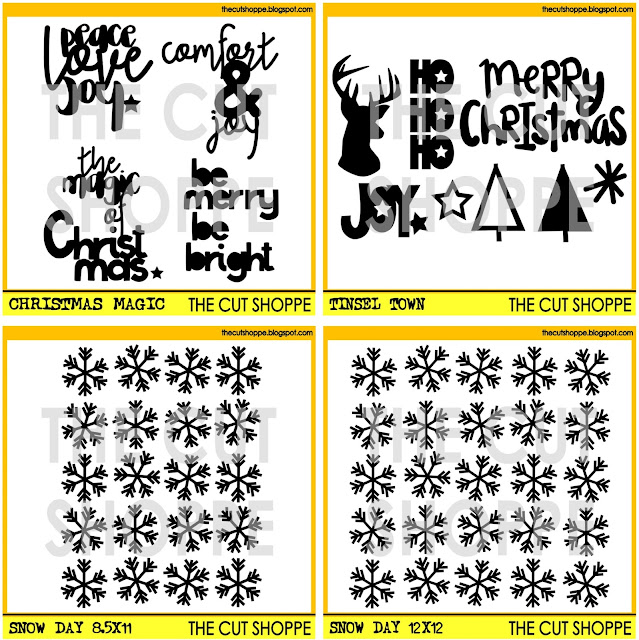
Hello cut file enthusiasts!  Iris here, and I'm getting some more #scrappychristmasinjuly scrapbooking done thanks to several fabulous holiday files in the shop: Tis the SeasonChristmas MagicTree Farm, and Tinsel Town.


I made myself four custom December Daily inserts for use in my Color Cast Designs wood veneer Traveler's Notebook covers with binder rings.


I finally brought my WRMK Foil Quill out to play!  In order to use it, I opened the ‘Tis the Season cut file and used the Internal Offset function to thicken the lines.  In order to do that, I selected the top four words, clicked Internal Offset, chose 0.010 inches, and hit Apply.  That added a line just inside the original outline.  I did that once again so most of my letters were 3 lines thick.


I selected "Sparkle" and did the same thing, but this time I continued to click on the Internal Offset until it was filled in completely. Then I chose the Sketch function before pressing the Send button.  The heated Foil Quill tip traces all the concentric lines.


I traced the ‘Tis the Season with gold foil onto vellum, and one of the trees from Tree Farm in green foil onto another piece of vellum.  I cut each to 4.25”x8.25”, the standard Travler’s Notebook size, and for the gold insert, I used a Fiskars border scallop punch on the right edge.


After that experimentation, I decided to mix it up and switch to traditional cutting, using Felicity Jane papers that I pre-cut to TN size.  I cut the "be merry be bright" out of the buffalo plaid so the sentiment is the negative on the page. For "Ho Ho Ho", I first welded the three together, then cut.  I used the positive piece, adding two tabs made from the same paper with my Tiny Attacher, then I handstitched all around the outline.


Now I have four cool TN dividers for my December Daily!  If you're finishing up holiday projects from last year, or you've started thinking about prepping for this year, stop by The Cut Shoppe to snag some fun Christmas cut files and get creative!


Sunday, July 21, 2019

christmas magic | iris fox

Hello friends, Iris here with a layout I made for #scrappychristmasinjuly using the fabulous Floral Leaf Cut and Fold file. I am usually too busy during the holidays to do much scrapbooking, so I like to get some Christmas projects done in the summer.


I started off by cutting the Floral Leaf design out of a Bazzill Swiss Dot Cardstock in Salt, which is one of my favorite cardstocks because of the texture. I added foam dots to every single leaf and to ensure I that when I glued it all down to the backing green cardstock, those leaves would really pop. I added lots of adhesive in the spaces between the rings.

I made sure to press down to get maximum adhesion, and those leaves did pop!


Then I built up a bunch of layers from scrap pieces of paper and vellum I have in my Christmas stash. I added a title made up of scripty puffy alphas from Freckled Fawn and a "magic" chipboard from one of the past December Daily kits. One of my layers is the top piece of a tag that I added twine to.


I also added a couple little stickers from a December Daily word sheet, a star clip from Felicity Jane, and I made a holly cluster out of felt balls from Amy Tangerine and two loops of ribbon. 


I wanted the cut file background to be the star of this layout, besides my photos, so I sprinkled just a handful of acrylic shapes from Color Cast Designs and gold Heidi Swapp Colorshine. Then I typed up my journaling in Photoshop by making a circle path, saving and opening it in the Silhouette software, drawing two cut circles around the journaling, then doing a print and cut on vellum.  That worked awesome for tucking the typed journaling within the leaf rings!


I had so much fun experimenting with new techniques to get the look I was going for with this cut file, which you can find in the shop! I made it look like Christmas wreaths, but you can line it with any color to get a whole different look!


Thanks for stopping by.  I do plan to have a tutorial on how I created my journaling up on my youtube channel after I get back from vacation, so I invite you to bookmark this and come back to check it out in a couple of weeks.


Sunday, December 18, 2016

The Magic of Christmas

Hello!  It's Melissa here!  So much has happened since I last posted a layout.  We had a new baby girl on 22 November called Ava, and whilst I can't wait to scrapbook her, I've been making an effort to start scrapping older Christmas photos.  The photo I've scrapped in todays layout is my oldest Sam and third child Brielle on her first Christmas.  I used the Christmas Magic cut file set for my title, and I made the layout with my November Hip Kit.


I cut the title from the soft woodgrain paper, and I love how it looks with the white background and pops of non-traditional pink.


The small star after the title is part of the cut file too!  


I had fun embellishing with die cuts from Crate Paper's "Snow & Cocoa" ephemera pack, vellum star stickers and sequins.


And here is the cut file, which you can purchase in the Etsy store here.


Have a blessed Christmas!


Friday, December 2, 2016

Five Minutes Christmas Card

Hi Girls! It's Flóra here with a seasonal project. We are still in time with Christmas Card but it can happen that we need something in the last moment. I thought it would be smart to share a five minutes card.


These cool titles from Christmas Magic cut file set can save the day. Enlarge the sentiments and cut them out from a fancy paper. For this project I used a gold glitter cardstock. It's so festive and shine you don't need much more to finish off your project.


I added only few stickers and enamel dots to embellish the card. Use a colorful cardstock as a base and a matching envelope.


Other fast way to make card to use a background cut file from The Cut Shoppe. For this project I used the Snow Day 12x12 cut file. 


I cut out nine snowflakes from a 6x6 cardstock and back it with pink, teal and gold glitter paper. I decorated with a big chipboard element and also added sentiment stickers.


Smart to use cut files for fast and easy projects, and also great solution if you need to make "serially-manufactured" cards.


I wish happy preparing for Christmas! Thanks for stopping by! ;-)


Sunday, November 20, 2016

The Magic of Christmas..

Hey Everyone! Michelle here today with a layout share featuring 2 of the new Christmas Cut files released in store this week  'Christmas Magic' & 'Tinsel Town'


I've been wanting to document these Christmas photos from 2013 for quite some time now, but couldn't quite figure out how. These cut files were perfect for this occasion. 


I started the layout by making the tree using a pattern paper from 2012 😂 To do this I cut the whole tree shape twice on the same pattern paper, and then used one piece to make the super fun fringed layers. This gave the paper tree a similar look to the many layers of branches on trees.  


Next I worked on the title using the Magic of Christmas cut file and some left over stars from my Superstar layout the other week, and coloured them all with Gelatos. These, along with some gold glitter tape and glitter dots, really helped to finish the tree off.


Next I added a strip of paper to the edge of the layout, and worked on a super simple photo stack. Then I also added a few stars, this time coated in gold paint, above the photos, and to the top of the tree.


Lastly I used an older Cut file from the store  'Very Merry' to add the presents under the tree


Thats all from me today. Thanks so much for stopping by!
But before I say goodbye today.. Be sure to stop by The Cut Shoppe Etsy store to see all the new release cut files, and don't forget to check out the other Inspiring work by the other Designers here at The Cut Shoppe
Until Next Time, Happy Scrapping!!


Thursday, November 17, 2016

Peace Love Joy

Christmas is right around the corner, so it's time to start sharing some fun, Christmas cut files and inspiration with you!  When I sat down to work on my layout, I couldn't decide what cut file set I wanted to use, so I decided to use all three of the new sets!  I incorporated designs from the Tinsel Town cut file and the Snow Day cut file in a circle design, around my title, cut from the Christmas Magic cut file.


I always love the look of hand-stitching on a layout, so I drew the title "Peace Love Joy" with my Silhouette Cameo Sketch Pens.  Then I used White embroidery floss to stitch on the outline.  I wanted the title to be the center of the layout, so I added the other cut files around the outside of the circle.  I cut the designs from a mix of patterned papers from the Scrapbook Circle November Kit.  Then I placed them on the layout, and added another layer of stitching with my sewing machine.


I wanted to finish the layout design with a bit of embellishing, using some of the items included in the Scrapbook Circle Kit.  The Snow & Cocoa stickers were perfect for filling in some spaces in the circle and I loved adding the cute pom poms to the center of the Asterisk die cuts.

  
You can find all three of these new cut file designs in The Cut Shoppe Etsy store!

https://www.etsy.com/shop/TheCutShoppe

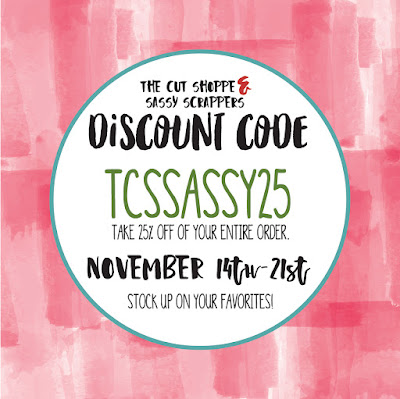
And while you're shopping, don't forget that you can save 25% off of your total purchase with our current Discount Code!!  We have teamed up with Sassy Scrappers this month, and they would love for you to visit their online store!  You'll also find an Exclusive FREE Cut File available in their shop!

https://www.etsy.com/shop/TheCutShoppe
  
If you miss out on this sale, don't worry, because we've got a few more coming up before the end of the year!  And make sure you keep an eye on the Blog, because we'll have some FREE Christmas cut files coming soon!!

https://ashleyhortondesigns.blogspot.com/


This post contains affiliate links, which means I will receive a small commission from any purchases made from product clicks on this post.

PRODUCTS USED: