Showing posts with label Half Hearted. Show all posts

Tuesday, October 22, 2019

Family | Marsha Farris

Hey friends!  Marsha here today sharing a layout in my traveler's notebook album.  I used the awesome Half Hearted cut file from The Cut Shoppe. 


For my layout, I used the Crate Paper Heritage collection by Maggie Holmes- such a lovely collection and perfect for my family photo.

To begin the layout, I sized the cut file to fit in my traveler's notebook (approximately 4.25"x8.25").  I knew I wanted to bring the cut file over to the other page, so I added an additional column of the hearts.  I cut out the cut file using a woodgrain patterned paper from the collection- I always love a good woodgrain! 

Next, I adhered the cut file to a white cardstock base, sized to fit in my album.  I added my photo and embellished around it using clear stickers, puffy stickers, and ephemera.


For the other side of the spread, I added the cut file to the edge of the page, also adding two strips of patterned paper from the collection.  I added a tag and a white acrylic piece to serve as my title.  I did some simple embellishing using some ephemera pieces and stickers.

I love how this layout turned out using this fun cut file!


Thanks for stopping by today!  Make sure you check out this cut file in The Cut Shoppe Store!


Sunday, January 21, 2018

"I Woke Up Like This" with Kira

Hello friends!  It's Kira and I am back with another 12x12 layout.  I decided to use one of the cut files a little differently this time around.  So instead of cutting around it, I used it as a template for some hand stitching.  And I think you'll agree that it turned out pretty awesome!


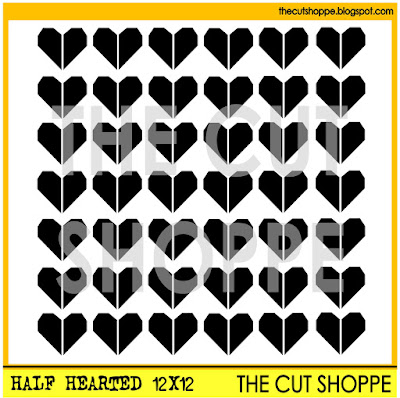
I used the Half Hearted cut file from The Cut Shoppe.  I loved the simple heart shapes (easy to stitch) and the fact that it was a background (which made it a great statement piece for this layout).  I am sure there is an easier way to accomplish this, but the way I completed this layout was but using the draw feature in Cricut design space to draw the background.  I had originally thought I would just pierce my holes and then erase the lines, but that seemed time consuming.  So instead, I placed my drawn cut file over a blank piece of white cardstock and pierced my holes through both pieces of paper. 


After piercing all of my holes, I decided on my thread.  I was planning to make this more of a Valentines Day layout, with pinks and reds as my thread, but thought I might run out of those colors if I went that route.  Instead, I chose a variety of colors that I felt would work well with the AC Paige Evans sticker book. 


I picked out seven colors because I thought there were seven hearts in each row.  There were not seven hearts in each row.  I can't count.  I didn't realize this until I had used five colors.  Oh well, the last colors I used got split between the final hearts.  It worked out in the end. 

The final result was almost to pretty to create a layout on.  Almost.  I printed out this photo of my youngest son in his pajamas that I took the other day.  We always get a little bit of alone time in the morning before my oldest son wakes up and I love that half hour or so we get to spend together.  I mean, look at that face!  Who wouldn't love snuggles on the couch with him?!


I printed the photo in black and white so his colorful jammies wouldn't clash with all of the colors on this layout.  I grabbed a chipboard pom pom frame from the Good Vibes collection, and framed his photo with that.  I wanted to make sure the photo really stood out from that busy background.  But I also didn't want to take away from the background with my embellishing.  I thought the best way to do that was to color block my embellishments.  I added a few clusters around my page, adding foam in places to create a little dimension.


I considered a title, but didn't want to add anything too large to the layout.  I found a sticker in the sticker book that said "I woke up like this" and thought it worked perfectly for this layout.  I finished everything off with a little bit of gold Heidi Swapp color shine and called it done!


Thank you so much for stopping by!

Until next time,


Monday, September 26, 2016

Hey Love

Hello friends! Today I have a new layout to share with you using the Heart to Heart cut file. It was just perfect to do some hand stitching!


To create this layout, I used the sketch pen option in my Silhouette Cameo. Once I had the design drawn out, I added stitching holes. I tried to estimate about where my photos would be so I wouldn't have to stitch underneath them. Stitching takes long enough without having to do an area that will be covered up! I was inspired by the Pink Paislee Take Me Away collection, and used threads that coordinated with the colors in the patterned papers. I alternated the colors, making sure to space them out when possible. 


Once I had it stitched, I added watercolor. I found that the stitching helped me stay in the lines. With the lighter colors (yellow specifically), I found it better to paint first, and then stitch. The paint was darker than the thread and showed when I tried to do thread first.


After I had my flowers finished, I added my frames and photo. I kept the embellishing minimal to focus on the beautiful flowers. I forgot how much I love to sew cut files! Thank you for joining me today, I hope you feel inspired to do some stitching!


Wednesday, June 22, 2016

Totally Lovely!

Hi! Irit here with a new layout I made using some awesome cut files from The Cut Shoppe. Here's my finished layout-


I used the Half Hearted file for my background. I only traced a part of it in the Silhouette software to create the perfect fit for my design.


For my title I welded two words from the Say The Word file to create custom title.


I backed the hearts with lots of pretty patterns from the Pink Paislee Fancy Free collection.


Added some final touches with little embellishments like puffy stickers and buttons.


Check out the process video-


Thanks for visiting, check out The Cut Shoppe for these and more great cut files and have a lovely day!


Friday, February 5, 2016

T-Town

The cut file I used for the page below seems to be a design team favorite, as it's been featured several times in the last month. What's really cool is the uniqueness of each layout. The hearts have been used with sketch pens, stitching, watercolor and more. Today's hearts are rainbow-hued! Here it is, the Half Hearted 12X12 cut file from The Cut Shoppe Etsy store:


For the past four years we've made numerous trips to Tuscaloosa while my middle son was enrolled at the University of Alabama. One of our favorite eateries had a wall full of painted guitars, including a striking one emblazoned with the words "Sweet Home Alabama". It inspired the colorful layout below: 


Several colorful embellishments were added to the hearts in two separate clusters, one at the upper right:


 And one at the bottom left:


I loved leafing through my patterned paper stash for colorful scraps with which to back the heart halves. Equally fun was sifting through my embellishments for coordinating bits and pieces. It was a bit of work to gather and put this page together, but totally worth the time and effort!

Thanks for visiting The Cut Shoppe blog today. Until next time,

To

Friday, January 22, 2016

Best Ever

Hello there! Today I have a fun layout to share with you using the Half Hearted cut file. This cut file is definitely a new favorite of mine, and I've loved seeing the other design team members use it! 


While it's perfect for Valentine's Day, the way I used it in this layout was more for everyday.


This layout looks more complicated than it is. I cut the cut file out on a patterned paper, and backed the negative with a bunch of different patterns from a 6x6 pad. I made sure to try and distance similar patterns and colors. After that, I added my layering and embellishing. The layout was looking really busy, so I toned it down by adding definition to the hearts with a black pen. Easy peasy!


I definitely want to use this cut file again for a Valentine themed layout! Thanks for joining me today!


Tuesday, January 19, 2016

Half Hearted with Sketch Pens


Hey there, Aimee here sharing how I created my background 
using the Half Hearted cut file and Sketch Pens!


This layout was super fun and easy to create, just a bit time consuming, but I love that I created “my own paper” using a digital cut file from The Cut Shoppe!


First I opened my Silhouette program and imported my cut file, traced and sized it to fit my paper.


I knew I wanted to “draw” the hearts; I just needed to come up with a pattern. To help me with this pattern I decided to change each heart to the color I intended it to be {using the rainbow line icom}.


Once I changed the color of the hearts, I filled them with color {using the bucket of paint icon} so I knew which hearts had been drawn, and in what color.


You can see the red “trace” line on the hearts that are to be drawn or “cut” {using the pen/rachet blade icon} this particular photo the silhouette was working on the blue hearts.


Here the final hearts are being drawn


Here is a photo of the hearts all drawn. You can see that they didn’t all get drawn perfectly, easy fix I just took the pens and completed the lines


I then stitched down the middle of each heart


And here is the final product:


{Embellishments from: Pinkfresh Studio, Color Cast Designs, Amy Tan, American Crafts, Heidi Swapp, 7paper,  & Me and My Big Ideas}


I then focused on using product that complemented the hearts. This is also a really great way to use up your stash!


Thanks for stopping by today; have you used the silhouette sketch pens yet?

Thursday, January 7, 2016

Hello Life

We're well into the New Year, but I'm here today to share my first post of 2016!  There are four new Cut File sets that are available in The Cut Shoppe, after our short holiday break.  I always love the background cut files, so I decided to go with the Half Hearted 12x12 cut file for my layout.


https://www.etsy.com/listing/262957806/the-half-hearted-cut-file-is-a?ref=shop_home_active_2

I used the 6x6 Paper Pad from the Fancy Pants Happy Place collection to back each of the hearts.  I chose several different patterns, to create a varied look on the layout.  After I backed each of the hearts, I machine stitched down the center line of each row.  Then I placed my photos, title and embellishments in a diagonal design on the layout.  

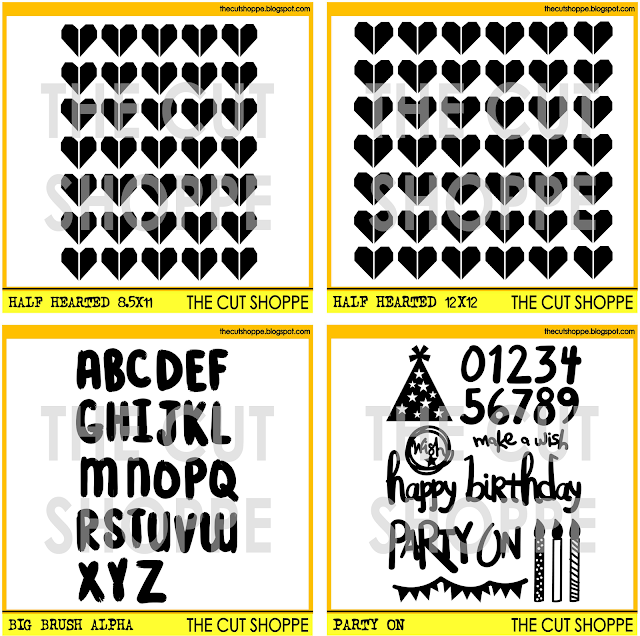
There are lots of fun ways to use the Half Hearted cut file, and it's available in 8.5x11 too!  You can pick it up in The Cut Shoppe, and you'll also find these other new designs, while you're shopping!

https://www.etsy.com/shop/TheCutShoppe

http://www.ashleyhortondesigns.com/