Showing posts with label Spread Your Wings. Show all posts

Tuesday, March 14, 2017

Spread Your Wings cut file

Hi Girls! It's Flóra sharing a spring themed layout on The Cut Shoppe blog. For this project I used the gorgeous Spread Your Wings cut file. I love it so much that I cut it out three times to create 3D effect. I chose the Pink Paislee - Paige Evans Oh My Heart collection, because I thought it would fit to my fun scrapbook page idea.


In this photo you can see all the three layers. I placed them on above each other and fix them with machine stitching. In some places I cut the upper two layers so the wings can "fly" and create the 3D effect.


As I was working with a white cardstock I had a feeling my layout is too empty. First, I added colorful enamel dots and later I enhanced the fun look with tiny paint splatters.


Instead of alpha or word stickers I used a card as a title. I adhered two 2"x2" photo and few chiboard stickers for embellishing. I didn't want to over decorate my layout, as I think the Spread Your Wings butterflies needed to be in the focus.


Thanks for stopping by today! I hope find some new ideas here. Find the Spread Your Wings cut file in The Cut Shoppe. Flóra


Monday, July 18, 2016

Guest Designer | Rachel Lowe

Happy Monday!  It's time to introduce our second Guest Designer for July!  Please help me welcome Rachel Lowe!  Rachel's layouts caught our eye on social media, and we love the way she incorporates cut files into her beautiful layouts.  Before we see what Rachel created for us today, let's get to know a bit more about her.

http://www.inmyworld-scrapbookingourjourney.com/
 
Hello my name is Rachel Lowe and I am from beautiful Perth, Western Australia. I am married with four great kids.  My crafting background is painting and quilting. However once I discovered scrapbooking I was hooked. I would describe my style as classic/contemporary. I am a lover of clean lines, negative space, embellishment clustering and sewing. I also love using my Silhouette Cameo. I am a keen photographer and believe the ‘photo' is everything on a layout.
 
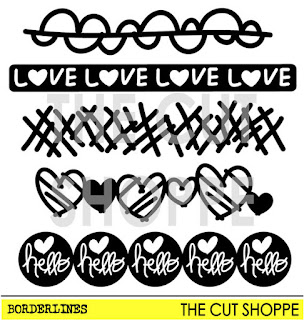
I am thrilled to be the guest designer for the Cut Shoppe as most of my layouts have a cut file or two from the store! The layout I have created today I have used two cut files, Spread Your Wings and the Borderlines cut file (choosing the heart border to place behind my photo). 
 
https://www.etsy.com/listing/224956433/the-spread-your-wings-cut-file-can-be?ref=shop_home_active_44
 
https://www.etsy.com/listing/196672172/the-borderlines-cut-file-consists-of-5?ref=shop_home_active_51
 
Thanks so much for joining us Rachel!  Now, let's take a look at what Rachel created!


What a beautiful layout!  The soft colors look so pretty, and the White on White tone adds a gorgeous look to the layout!  Thanks for sharing your work with us Rachel!
 
You can find more of Rachel's amazing work by visiting her Blog, In My World, and follow her on Instagram at @rachellowe___.
 
http://www.ashleyhortondesigns.com/
 

Thursday, September 3, 2015

Throwback Thursday | Find Your Wings & Fly

It's #Throwback Thursday at The Cut Shoppe, and I'm here today to share a new layout using the Spread Your Wings cut file and the A to the Z Alpha cut file!  I did a bit of altering to both of these cut files, to create the look I wanted on my layout.


https://www.etsy.com/listing/224956433/the-spread-your-wings-cut-file-can-be?ref=shop_home_active_12

https://www.etsy.com/listing/207294713/the-a-to-the-z-alpha-is-a-handwritten?ref=shop_home_active_13

I just wanted one of the butterfly shapes from the Spread Your Wings cut file, so I only traced the butterfly on the top outside edge.


Next, I used the Erase tool on the left hand side of the tool bar, and erased the traced portion of the butterfly, to the center of the body on top and bottom.


Once I erased the lines, I copied and pasted the right hand side of the butterfly.


Next I needed to flip the second butterfly half, so I went to Object > Mirror > Flip Horizontally.


Then I just moved the two pieces together, making sure the lines of the body lined up and touched.  Now I had the individual butterfly shape, taken from the full cut file and ready to use!


I also altered the letters from the A to the Z cut file, by tracing them and moving each of the letters for my title to overlap.  Once I had them in place, I went to the Modify window and clicked Weld, to make my title into one large piece.


I hope you learned some new tricks for altering your cut files from The Cut Shoppe!  They are great to use as is, or you can add your own spin to them, using different functions in Silhouette Studio!

Supplies:  Spread Your Wings cut file & A to the Z Alpha cut file:  The Cut Shoppe; Patterned Paper, Chipboard, Bits & Flair Button:  Fancy Paints; Color Shine:  Heidi Swapp; Enamel Dots:  Freckled Fawn, Phrase & Date Stamp:  American Crafts; Phrase Stickers:  Tim Holtz; Die Cut Machine:  Silhouette Cameo

http://www.ashleyhortondesigns.com/

Sunday, March 15, 2015

This is 40


Hello there, it's Cara and since I recently had a big birthday I decided I needed to document it with one of my favourite things: butterflies :D    ...that and R2D2 ;)


I used the 'Spread your Wings' cutfile, which just might be one of my favourite cutfiles in the whole shoppe :D

The Spread Your Wings cut file, can be used as a background design for your scrapbooking and papercrafting projects.


I also used the 'today' from the free cutfile set that was included in the last Cut Shoppe newsletter.  You can sign up for the newsletter here.

Of course I can't forget the little 'awesome nerd' I just felt like it was perfect for this photo since I'd rather wear an R2D2 T-shirt than a blouse anyday!


The Awesome Nerd cut file is a title phrase, that can be used on your scrapbooking and papercrafting projects.


Have a fantastic day!


Tuesday, March 10, 2015

Find the Good in Everything...

Hi everyone!

It's Tarrah back here with you and today I have a new layout to share using one of the recently released Cut Shoppe Files! The Spread your Wings cut file is one of my recent new favourites!

I used the gorgeous American Crafts Serendipity collection to create my layout, I loved the ombre pink paper from this collection...I knew I wanted to use the Spread Your Wings cut file with this paper to give a descending effect....  
The featured cut file on my layout....'Spread Your Wings'...


I also used 2 of the free cut files found in the latest Cut Shoppe newsletter on my layout, I used the middle heart and the 'Today' word on white cardstock....  sign up for the newsletter here to receive free cut files!


 I used a couple of cute resin embellishments too, the bow and the diamond...
Thank you for joining me on The Cut Shoppe blog today...I hope I have inspired you to buy some cut files to add to your next project!

Saturday, March 7, 2015

You & Me

Hello everyone, and happy weekend! I have a layout to share with you using the gorgeous Spread Your Wings cut file.


 I love how elegant the butterflies are!


To create this layout, I cut the butterflies out from a multi-colored patterned paper. I made it smaller, then cut it again from a printed vellum. I layered them on top of each other in order to make it look more 3D and fluttery!


I added splatters of black mist, and then a few pieces of patterned paper. I wanted the butterflies to be the focal point of the page. I can't wait to use this cut file again! Thanks for stopping by, and have a wonderful day!


Friday, March 6, 2015

Remember That Song?

Happy Friday!
Remember that song "Fooled Around And Fell In Love" by Elvin Bishop? I think it was from 1975 and I am pretty sure it was in the movie Boogie Nights. Great! Now that you are singing that and will be for the rest of the day (you are welcome!) I will fill you in on what it has to do with today's layout and cut file!

When I saw Ashley's "Spread Your Wings" cut file I just knew I already had the absolute perfect photograph for it! I really wanted to use watercolors on these butterflies to mimic the colors of the lovely Monarch. First, I started cutting the butterflies and then I stopped my machine. Why hassle with painting them AFTER they were cut out? Sometimes you just have to fool around!!


I fooled around with my watercolors on a fresh sheet of white cardstock, textured is my preference. Once it was dry, I spattered it with black watercolor paint, smudged it a little here and there and put it in my Cameo as I would a regular sheet of cardstock. I cut out my butterflies, trimmed a few off to get the look I was working towards and glued it to another sheet of white cardstock.


I added the bits and pieces to bring it all together and finished it with a little shimmer spatter and a few cork hearts. This really is a beautiful cut file however you plan to use it.

My boys are pretty much the coolest kids I know and living in the woods they are pretty comfortable with nature. This past summer we were just standing outside chatting with the neighbors and this Monarch just flew up, landed in his hands, and stayed there for quite some time. Thank goodness for iPhones and their "pretty darn great" cameras!

I literally FOOLED AROUND with this technique and cut file AND FELL IN LOVE with how this turned out. I can see myself using this technique many times in the future.

**Quick Tip** Once your watercolors are dry, spin your page a few times before deciding which direction to put it in the machine. Mine is not the original orientation I painted it in.


Be sure to check out all the new files at The Cut Shoppe!


Thursday, March 5, 2015

What a Wonderful World

Hi guys!  It's Ashley, and I have a new layout to share with you today, using the new Spread Your Wings cut file, as well as a Process Video for the layout!  Spring is right around the corner, and this cut file will definitely make you think of warmer days and Green things blooming!!  :)  I took a little bit of a different approach, and instead of going with all pastels or bright colors, I decided to mix in a lot of Black.  I have a thing for Black on my layouts!!


https://www.etsy.com/listing/224956433/the-spread-your-wings-cut-file-can-be?ref=shop_home_active_1

I cut the Spread Your Wings cut file two times, using White cardstock.  I used one of them as a mask to add Black Color Shine to the left hand side of the layout, and the second I added to the right hand side of the layout.  I really liked the contrast it added to my page, using the bold Black with the Pink and White.

I have a Process Video for today's layout, if you would like to take a look at the process for creating the page!


There are also two other new sets in The Cut Shoppe today, so make sure you stop by to check them out!

https://www.etsy.com/shop/TheCutShoppe?show_panel=true

Supplies:  Spread Your Wings cut file:  The Cut Shoppe; Patterned Paper, Wood Tags, Wood Beads, Rub-Ons & Puffy Stickers:  Pinkfresh Studio; Flair Button:  A Flair for Buttons; Color Shine:  Heidi Swapp; Enamel Dots:  Freckled Fawn, Wood Veneers:  Elle's Studio; Thickers:  American Crafts; Die Cut Machine:  Silhouette Cameo

http://www.ashleyhortondesigns.com/