Showing posts with label machine stitching. Show all posts

Monday, February 3, 2020

Christmas Traditions- Audrey Yeager

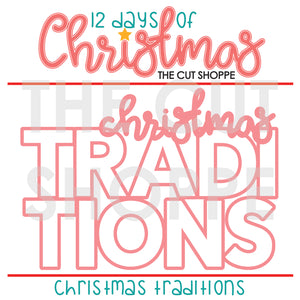
I'm almost caught up with my winter holiday scrapping, but have a few more pages I want to get done!  I wanted to document a new tradition that I started with my kids of making pierogi for Christmas Eve dinner, so the Christmas Traditions cut file was perfect for this page.   Better yet, this was a FREEBIE cut file that Ashely gave away during the 12 Days of Christmas!


Christmas Traditions

A goal of my holiday scrapping is to try and use my stash.  I broke out some OLD Basic Grey papers (from 2006!) and was determined to use them on my page.

I first cut the cut file from white cardstock. In Silhouette Studio, I worked with the file to cut out the backing for the letters with patterned paper (instead of tracing and backing each letter by hand). I also recut the word "Christmas" from a different colored paper to make it stand out a bit more.


On the page itself, I cut a large circle for the background, distressed and machine stitched around the edges.  I layered my photos with a mat and some patterned paper, and fussy cut flowers that I cut from patterned paper.


I also cut some small circles from patterned paper as well, and embellished with enamel dots, puffy stickers, brads, and a few more punched flowers.


Thank you for joining me today!

You can watch the entire process here:


Wednesday, January 15, 2020

Best Pals- Thin Line Alpha Cut File- Audrey Yeager

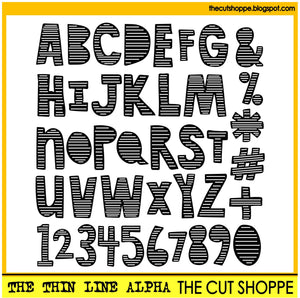
Hi everyone!  I went through the store to find a fun alpha to use on my boy page (and there are LOTS to choose from!  I went with The Thin Line Alpha and cut the word "Pals" on my page below:


The Thin Line Alpha

This page was also a stash buster!  I first went through my stash to find some colors that I wanted to use.  I was struggling at first with a page design, but one of my goals was to use more patterned paper.  So I just layered some big rectangles of the patterns I liked with the photo on top in a frame.


Then I fussy cut out some stars and others from my stash.


Circle embellishments on the edges help soften the flow of the design.


Some details with border stamps and machine stitching.


Finally, the cut file I used to cut the word "Pals".  I was worried that cutting the letters this size with all the detail they have would be tricky, but they cut so beautifully from patterned paper!


Thanks so much for looking and go check out all the Alpha Cut Files in the store!


Wednesday, June 19, 2019

Life Skill | Kelly Janes

Hey friends! Kelly here today to share a new layout using the Shining Star Cut File from The Cut Shoppe Store!


I started by sizing the cut file to 11.5" in Cricut Design Space and cut the cut file on a piece of white cardstock. I pulled the positive piece of the cut file (the image you see above) and just used the negative pieces (the pieces you would normally throw away) for my layout. I also used the star from the cut file as a template to trim my 3.5" photo into a star shape.


I went through my ribbon stash and grabbed a rainbow of colors. I then lightly attached the ribbon the the negative pieces of the cardstock using tape runner, and then stitched along the edge of each piece of paper. I also added hand stitching between each of the negative pieces of the cut file.


I decided to leave one of the spaces empty for my title and journaling. I taped that piece of the cut file to a scrap piece of paper and ran it threw my WRMK Typecast Typewriter to ensure that I would have perfect placement of the journaling. I added my title using Thickers from my stash.


I really debated on whether or not to embellish the layout any further. I felt like there was already so much going on with the different color ribbons, but decided to add a small clustering of embellishments in a few areas on the layout...staying with the tone on tone technique.

This layout was so fun to put together and I love thinking outside the box when it comes to using cut files! Have you ever tried to use just the negative pieces of a cut file?!


Thursday, March 14, 2019

I Am | Tarrah McLean

Hi Cut Shoppe fans,

It's Tarrah McLean back with you and today I am sharing a fun layout with you that uses the brand new 'All The Angles' cut file. 

I love creating layouts like this where it gives you the opportunity to use up some leftover papers and embellishments you may have had sitting around for a while! I loved that I had enough papers to be able to back each of the triangles in this design.
All the Angles

I cut out the cut file from white cardstock, once the triangles were all backed behind, I used washi tape to secure them as I knew I was going to add machine stitching. I absolutely LOVE machine stitching and the effect it brings to a page.

 I kept the title and embellishing fairly simple, I used some stickers, wood veneer, die-cuts and some metal brad stickers to embellish. Some things I did use foam tape with for added dimension however not all needed the dimension. 

I added a little bit of tone on tone embellishing as you will see in the next 2 photos, where there was a teal paper, I added the same colour embellishment to that spot and so on. My photo was adhered with foam tape and some layers added enough for dimension. I placed the photo slightly to the right of the centre to allow for embellishing.

Thank you for stopping by today! Make sure to check out the awesome Cut Shoppe store! There are new designs being added all the time plus you will find your favourites in there too!

Happy creating!

Wednesday, February 27, 2019

beautiful you | orange gearle

Hello!  Orange Gearle here with a layout using the Beautiful You cut file. I cut the file using white card stock. I intended to use white letters, on my blue background, but then an accident happened, and I really liked the accident!  When I set the negative down on my paper, I had to go with it! Here is my layout :


Here's another look at the file in use:


Since my daughter's name is Bea, I thought it was the perfect file to use with a pic of her looking her BEAutiful self. I also liked the idea of backing the BEA with a different color. :-) I used a punch to punch out different sizes of butterflies to add as embellishment. I also added some awesome flair!


Bea had been in the sun the whole weekend, and looked so brown! So that is what I journaled about!


I made a video of my process if that's something that suits your fancy!


Thank you so much for stopping by! See you again soon! XO o.g.


Monday, February 25, 2019

Beautiful | Marsha Farris

Hey friends!  Marsha here, and today I'm sharing a layout in my traveler's notebook album.  For my spread, I used the new Beautiful You cut file available at The Cut Shoppe.


I used mainly the beautiful Cocoa Vanilla Studio Midnight collection to complete this layout.  To begin, I cut out the cut file using a wood grain paper from this collection.  I chose to back it with an ombre patterned paper.  I just love the way it looks layered behind the wood grain!  Next, I chose a few die cuts and stickers from this collection to create a small embellishment cluster at the bottom of the page.


For the other page, I layered my photo behind a photo frame die cut and placed a few other ephemera pieces at the bottom and top of the photo.  This helps to lead the eye around the page and draws attention to the photo of me with my precious niece.


I hand wrote my journaling on a tag and tucked it behind the photo.  For the final finishing touches, I did some machine stitching on the edges of both pages and sprinkled some wood veneer dot and heart pieces around the page.


Thanks for joining me today.  I hope I have given you some ideas for using cut files on your traveler's notebook layouts or other projects!


Tuesday, November 27, 2018

One Cut File - Three Ways | Kelly Janes

Hey there friends! Kelly here today to share THREE layouts using the Great Pumpkin Cut File!


I started with an idea to use the Great Pumpkin Cut File as a template for hand stitching, so I placed the cut file on a piece of woodgrain patterned paper and used my paper piercer to punch holes in the background. I started with a standard backstitch, but it wasn't giving me as much dimension as I was hoping. I went over the stitching a second time using a chain link stitch. I then quilled multiple pieces of orange and yellow papers for even more dimension. I added my photo and a few embellishments to finish the layout!


I then thought it would be fun to use the negative pieces from the Great Pumpkin Cut File for another layout! I used orange watercolors and Halloween stamps to create a pattern on the cut file. I also added orange machine stitching to all of the pumpkin pieces. I added foam squares and fun foam behind the pumpkin to add dimension. To finish the layout, I added a photo  and Halloween themed embellishments.


For my final layout, I decided to use the outer rim of the cut file. I added watercolor splatters and purple hand stitching around the pumpkin. I then grabbed multiple scraps of Halloween themed patterned papers and I was recently inspired by Paige Evans to pull out my border punches! I created a fun, colorful pattern within the pumpkin image. I added a couple photos, a few embellishments and a couple lines of journaling to finish this layout!


I love that I not only used the same cut file, but I used the same cut from the same cut file for all 3 of these layouts! Remember to visit The Cut Shoppe Etsy Store to check out all of the cut files!