Showing posts with label thecutshoppe. Show all posts

Tuesday, March 24, 2020

Happy spring layout - Lisa Fonseca

Hey friends, 

it's Lisa on the blog and today I'm sharing my last layout for TheCutShoppe.


The cutfile I'm using is called Happy spring, you can find it by clicking on this link. :)

For this layout, I wanted to use very bright spring colors, so I chose pink, yellow and mint. I went through my paper scrap stash and chose all the ones that I thought would look good together, then I traced all the letters on the mint and pink papers and cut them out. 


For my background, I created three stripes of color, using acylics, on a white cardstock sheet. Then I adhered my letters to the mint and pink sections. I wasn't careful with the placement of the letters, I wanted them to be a bit crooked, so that when I placed the cutfile on top, they would't match perfectly. If you have been following me for a while, I'm sure you know that I like doing this. I like when the letters peek out from the sides.


The yellow section was still empty at this point. I wanted to place my photo there but I also needed something else to fill up more space. So I went back to my cutfiles and used one of the flowers from the Spring Flowers cutfile. I backed it, as well as my photo, with a yellow patterned paper. I thought it would be cool if the flower had a stem going down to the green section. So I cretated a stem with leaves and a cute little knot. 


I went through my stash and chose a lot of cute little details to add. Stickers, ephemera pieces... I added them all to the corresponding section. To finish I splattered some paint. 
I hope you like how it turned out. 


I want to thank Ashley Horton again for giving me the chance to work with her great cutfiles. Audrey, I wish you all the best for your future projects. :) 

Don't forget that you can still purchase cutfiles on the CutShoppe website!!! :) 

Thank you for the support and nice comments on Instagram.

See you,

Lisa


Tuesday, February 25, 2020

Lovely Day layout - Lisa Fonseca

Hey scrappy people,

it's Lisa and today I'm sharing a new layout, using the SQUARE OFF cutfile.


You can find the cutfile on the CUTSHOPPE website. 

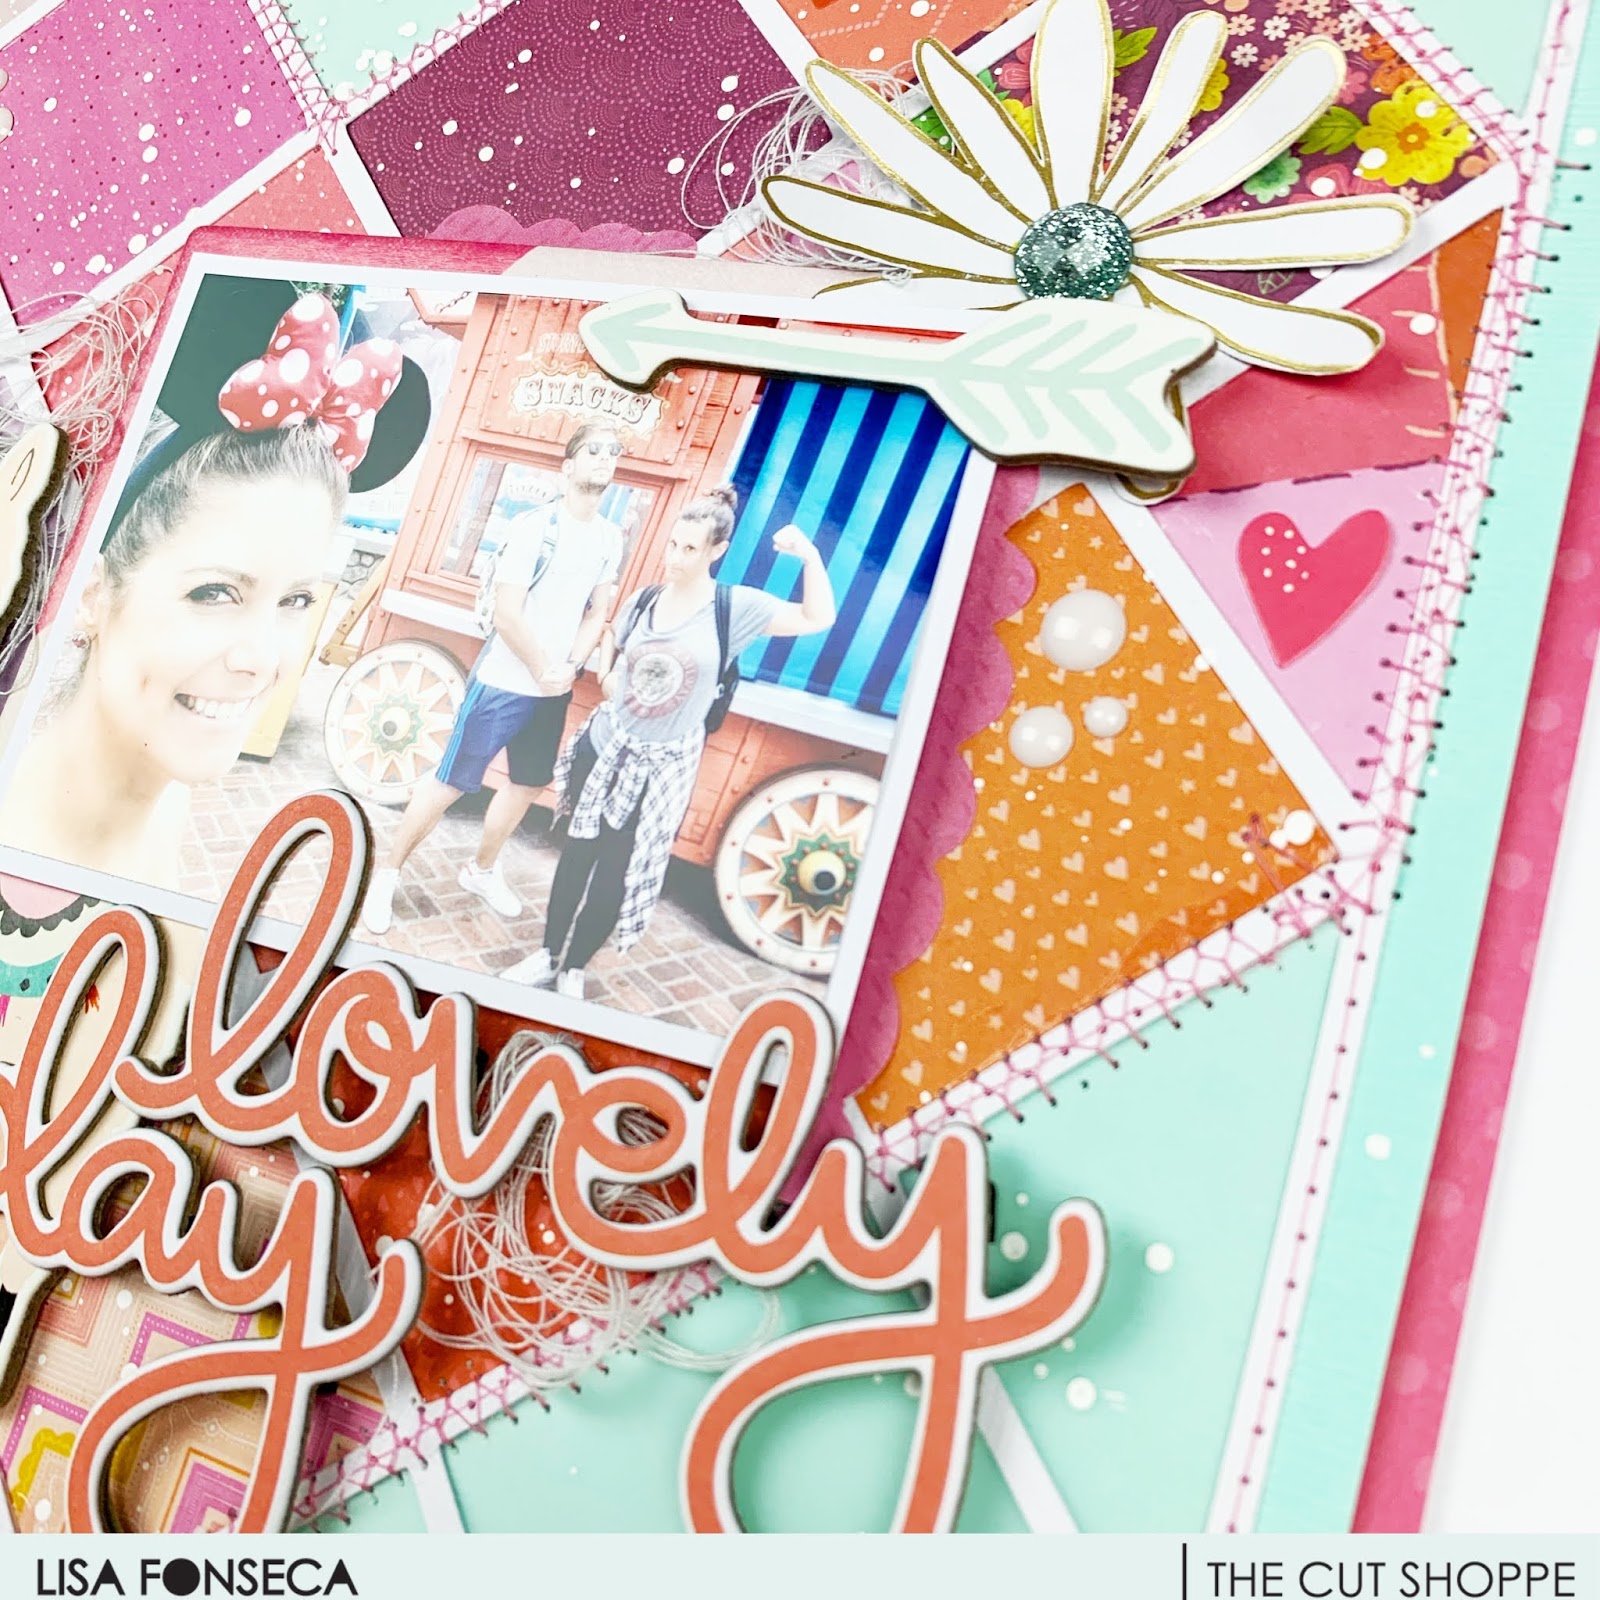
When you look at the cutfile as is, you see this regular square pattern. When I looked at it a bit longer though, I could make out a heart in the middle, by filling only some of the squares. In fact, the very cool thing about this cutfile, is that you can fill any squares and make it look different every time. So there are many possibilities with this cutfile. 


To fill the squares, I wanted to use only reds, pinks, oranges and purples. The little 2x2 paper pads from Pink Paislee, are exactly the same size as were the squares of my cutfile. That was awesome. :) So I went through all of the Paige Evans collections and got out all of my swatch books. I chose all the ones that were in the colors that I needed. 


I backed all of the squares to create the heart shape and backed the rest of the squares with vellum (which you can't really see on the pictures...). Then I adhered the whole thing to a mint sheet of cardstock and started machine-stitching. I used a regular stitch on the borders and a zig-zag stitched all around the heart.

Then I created a frame for my layout, using a pink patterned paper from my stash.


To embellish, I didn't really had somethi ng specific in mind. So I went through a of things from my stash and chose a cardboard llama from Crate Paper, some fussy-cut flowers from Dear Lizzy, some cardboard words and arrows from My Mind's Eye (I think...;) and some other little bits. I matted my photo on some patterned paper and adhered it to the layout, using foam.


Then I added my chosen embellishments in a way that I liked and looked balanced to me. I also added some tangled thread to give the whole thing more detail and interest. 

To finish, I added some white splatters of paint.

I really hope you like it and are inspired to use that cutfile too. 

See you soon, 

Lisa

Friday, January 24, 2020

Baby it's cold outside layout - Lisa Fonseca

Hey friends, 
it's Lisa back on the blog today and I'm sharing a super cute layout with a brand new cutfile.
The cutfile I'm using is called FRESH CUT TREES and is available on the THE CUT SHOPPE website. 

In fact the cutfile is made of four rows of trees, all on top of each other. What I did was cut it out two times. One time filling the 12x12 sheet, one time a bit smaller. So I had big and smaller trees. I cut the cutfile apart and used two rows of each. 
First I backed them with pretty patterned papers from the Crate Paper Snowflake collection. Then I positioned them on the paper, always using two rows, that I superposed in a way that the bigger trees would overlap the smaller trees a bit. I also used foam dots to adhere the bigger trees, to create dimension.


Then I used another cutfile for my title, which is called WINTER IS COMING. I cut out the letters from white cardstock and placed them on patterned paper before cutting them out, leaving a colored border. The word 'cold' I backed in the traditional way.


I really love the effect it gives with the different fonts and different colors. 
I matted my photo with five or six scraps of paper and adhered it to the layout, in between the rows of trees. I also created a frame for the layout, using a pretty patterned paper. Then I went through my embellishments and used stars and some animals to pimp my pretty layout.


To finish the layout, I splattered some gold ink in some places.

I really love this tree cutfile because, as I did, you can use it in so many different ways. You can use it as is, or cut the trees as you like and need them on your layout. The phrase cutfile is also very fun. It's meant to be used in a traveler's notebook, but I switched it up and used it on my layout. So, as you can see, you only need a bit of imagination and your options are endless :)

See you soon!

Lisa


Friday, January 10, 2020

Mele Kalikimaka layout - Lisa Fonseca

Hey scrappy people,

it's Lisa back on the blog to share this layout with you.


For this layout, I used a new cutfile called LET IT SNOW from the CutShoppe. It's a snowflake wreath and it's so cute. 
I had the idea to cut it out of two different colored cardstock sheets and adhered it to a pretty, matching background. In my stash, I found this cool green paper from Pinkfresh Studio and thought that those two pink shades would match perfectly. I used them to cut out my cutfile but also to create a frame for my layout. I stitched around the frame in a zigzag, using pink thread.


So when I had my two wreaths cut out, I adhered them to the background, paying attention to only put glue in the middle of each snowflake, so that later, I could create texture by pulling up the little branches. I love the effect it gives with the darker color peaking out from behind the lighter one. 


I used the same two colors to matte my photo and adhered the picture to the background using adhesive foam. I also used two older gold glitter frames behind the photo. Then I went through the rest of my Snow and Cocoa collection and used all the things that I thought would be cute. 


For my title, I used three different kinds of Thickers. I wrote "Mele Kalikimaka", which means "Merry Christmas" in Hawaiian. In the picture I'm in Oahu and even if it doesn't look like it, it was the 23th of December :)


I wanted to add more sparkle, so I used four different colors of sequins and adhered them to the little holes in the snowflakes. I also used white puffy hearts in each of the snowflakes' centers. I finished by using some white snowflakes to lighten up the wreath and also some black splatters to balance the darkness of the photo.

I hope you like it and are inspired to use this new cutfile.

Thank you so much for stopping by, see you soon!

Lisa

Sunday, November 24, 2019

Cozy Times - THE CUT SHOPPE

Hey scrappy people,

it's Lisa back on the blog to share my new layout I made using the Lovely Labyrinth cutfile available on The Cut Shoppe website.


When I saw this cutfile, I immediately had the idea to use it as the little shell of a snail. I cut it out of light pink paper and backed it with yellow, blue and pink hearts that I had cut slightly bigger. When I was done backing the cutfile, I adhered it to a bright pink cardstock and cut the circle out. 


As I like to do, I created the rest of the snail by paper-piecing all the parts and sticking them together. 
I adhered the snail to my background and used a ton of big flowers I cut out of an old Amy Tangerine patterned paper. The colors and style were perfect, it looks so cute. 


For my picture, I used one we took almost a year ago, when me and my girls were having fun taking pictures in cozy clothes... :) I matted it with some scraps of patterned paper and added it to the layout. Then I added my title using Thickers. To add some more cute details, I used some blue puffy stars all over and also added some blue splatters.


I hope you like how it turned out...
See you soon!

Lisa :)