Sadly, this is my last post as a design team member of The Cut Shoppe. I have LOVED every second I've spent on this team with such a great leader and talented designers, and I look forward to seeing where The Cut Shoppe goes. Thanks to Ashley, for allowing me to overstay my welcome on this wonderful team.
For my last DT layout, I used a few of my favorite cut files. I adore the Any Which Way background cut file, and turned it on it's side for my project. I got my title from the Let's Do Summer cut file.
Here's my layout.
Here's a closeup of the arrows, I added some patterned paper behind some of them.
Hey, everyone!! Kat here today! For my last layout for The Cut Shoppe I decided to combine an old favorite with a newer file. I ADORE the Plus Infinity background cut file and I've wanted to use it for awhile, but didn't have any good ideas. And then we moved recently and I was forced to go through all my scrapbook stash and found some pretty glitter paper buried at the bottom of a paper pile. I was inspired to create this bling-ed out layout about my niece:
For my title I used the This & That cut file - I think it pairs perfectly with the bling-ed out background!
And here's a close up with the light reflecting off the page so you can see just how glittery it is. I LOVE it because it highlights my niece's personality so well - she sparkles and shines so brightly!
I also just want to take this time to quickly thank Ashley for having me on the team for the last few months. I had such a great time and it was such a fun opportunity! I can't wait to see what new files she creates in the coming months!!
Happy Monday, friends! Missy back with you today. The layout I'm sharing here features two awesome cut files: Get to the Point and A Banner Day. Those arrows are very popular these days! I've seen lots of you awesome scrappers using this file already, and the projects inspired me to use it as well.
I shrunk the arrows down to a smaller scale and used a small circle photo in the center of them. I actually began this layout without a photo. I used that Basic Grey paper as my background first thing and didn't know what kind of layout it would turn into. Surprise...it's a Summer page!
It took many turns and had many ups and downs along the way. I did back every arrow with patterned papers from American Crafts Rise & Shine and Echo Park's I Love Sunshine. Once I had a rainbow theme going on, I knew I had to make a bright and summery layout. I ran into a bit of frustration with adding my inks and sprays behind the photo, but I kept working at until I was satisfied.
I knew I had to use this "Love" banner as part of my title, so I cut it big enough to stretch from the photo to the edge of the page. I traced the edges with black pen and then stitched through it. I also traced several of the arrows and added black lines on some of them just to add more pops of black. My three flair buttons are from A Flair For Buttons.
I used stickers and chipboard pieces from both AC and EP collections. I do like how the rainbow colors look against the black and white background. It's definitely different than my usual pool layouts :)
I added in a few stamps around the page as well. The papers behind my photo are from the AC Sketchbook collection as well as Echo Park.
Here's one last look at those awesome arrows...this cut file is definitely one of my favorites!
Here's my process video of how this layout came together...I hope you enjoy!
To create my layout, I cut the background out of white cardstock paper. I then placed the yellow patterned paper behind it. I printed a small instagram photo and layered it on top of tabs and tags. I splattered black ink across the page and then embellished with lots of bits and pieces.
Supplies: Elle's Studio: Let's Eat Collection: Patterned paper, bits and pieces, cutouts, tags, wood veneers; American Crafts: White cardstock; Studio Calico: Mister Huey's Inky Black; The Cut Shoppe: Get To The Point 12x12 cut file
Hello, it's Cara here with my last post as a Design Team member. It's a fantastic team, thank you so much Ashley for having me.
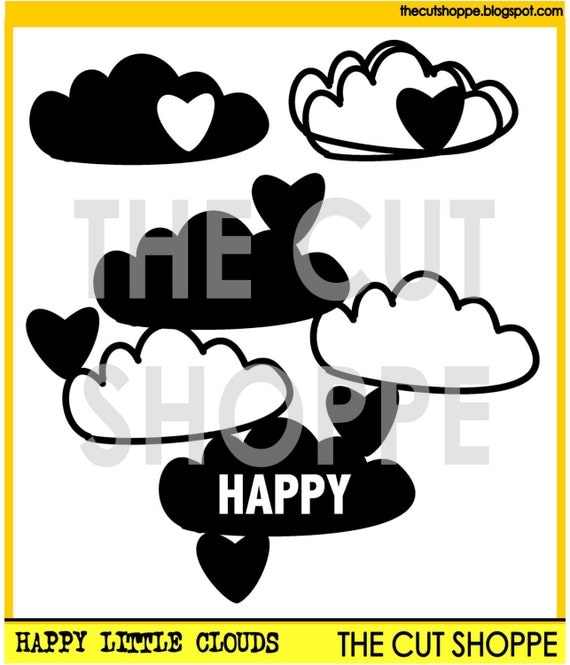
For my last page I decided to use the Happy Little Clouds cutfile. I fell in love with those sweet little clouds and it is still one of my favourites :D
Before I added the mint coloured clouds, I used the top left cloud of the cutfile to make stitching holes in my background paper to make the string art cloud with floss.
Thanks so much for the great run Ashley! It's been a pleasure. If you'd like to keep up with me, my website is thehootingpirate.com and I'm @caravincens on instagram and periscope! Or you can come catch me teaching at True Scrap Planner LOVE September 19. I'd love to see you there! :D
Welcome to Throwback Thursday, today on The Cut ShoppeBlog! This week I decided to use the Picture Perfect cut file set on my layout. My design was inspired by the fun frame wall that Paige Evans has in her daughter's room! I cut all of the frames from different patterned papers included in the Crate Paper Wonder collection and used the frame wall as a jumping off point for my design.
There are four frames in the set, and I wanted five on my layout, so I cut the one on the bottom right hand corner twice. I loved how the frames worked for my title, photo and embellishments.
I kept this layout clean & simple as far as Mixed Media goes...I didn't even add any Color Shine, if you can believe that! So I decided to add a lot of interest and texture inside and layered over the frames, with chipboard, wood veneers, enamel dots, Flair Buttons and Bits.
And just a side note behind the photo - This was taken on our recent trip to Texas, and he was not having a good day. The restaurant we tried, was a three hour affair, due to the fact they only took cash (which meant we had to leave and go to the ATM and then come back), the wait in line for a table, and the almost hour wait to get our food! Needless to say, he was done by the time I took this photo!!
If you haven't had a chance to visit The Cut Shoppe lately, make sure you stop in to take a look at all of the available cut files! And I'll be back next week with four new sets, that will be added to the Shop!
Supplies: Picture Perfect cut file: The Cut Shoppe; Patterned Paper, Bits & Pieces, Chipboard, Stickers, Enamel Dots, Cork Number & Thickers: Crate Paper; Patterned Paper: October Afternoon; Flair Buttons: A Flair for Buttons; Wood Veneers: Studio Calico; Letter Stickers: Elle's Studio; Thickers & Date Stamp: American Crafts; Tiny Attacher: Tim Holtz; Die Cut Machine: Silhouette Cameo
I cut my 12x12 Sideways Chevron Background out of white cardstock paper. Not all of the cuts, cut all the way through. This is because I need a new blade, but I loved the look. I decided to leave a lot of the pieces that did not cut all the way through on this page, to give it a sense of white balance. I popped out a few pieces and then layered a piece of Finder's Keepers Patterned Paper behind it. I then printed my small photo and added embellishments, stitching, stamping and the title.
This layout came together quickly, and I love the look. Here is the background cut file that I used:
Thanks for stopping by today, I hope you enjoyed my layout. If you make a layout using cut files from the shop, we would love for you to share it with us on our Facebook Page!