Showing posts with label Shimelle. Show all posts

Saturday, September 28, 2019

zoo day shenanigans | orange gearle

Hi! Orange Gearle here with my last post as a Design Team member! Here is my layout:


I used the Hul-la-ba-zoo cut file set for the title as well as the flag at the top that says “It’s a jungle out there”. Here is a look at the complete cut file:


I added a border to the original file to create a black outline for my title as well as the flag.


 Here are a couple more close ups. 


I used mostly the Field Day collection from Shimelle for this layout. I fussy cut some flowers to add as embellishments and I also used a punch for my butterflies.


Thanks so much for stopping by! XO o.g.


Sunday, August 18, 2019

too cool for school | iris fox


Hello fellow cut file fans!  Iris here with a back-to-school layout using not one, but two recent cut files: School Days and Too Cool for School.


It's not easy to find school products that compliment the purple both my daughter and her boyfriend are wearing in the photos, but I happened to have this multi-colored lined paper from Shimelle's Sparkle City.  It was kismet.  I left the branding strip to ground the page and cut off from the top to make it 12x12.

My idea was to create a doodley background, having the two cut files cut in black to be part of the doodles, so I cut both from black cardstock. Too Cool for School is cut 6 inches high and the backpack is 3 inches high.


I strategically placed the backpack diagonally from the title, and a speech bubble-shaped clip at the top, giving me a visual triangle of deep black outlined elements. Then I gathered lots of fun embellishments that would go with teens at school and complemented the colors, from a variety of manufacturers. I scattered them them along the diagonal starting from the bottom left going up to the top right.  

I nestled my journaling under the photos between a cluster of embellishments and the title.  I then stamped some doodles and phrases from Crafty Jen Schow's Here for It stamp to fill in spaces between embellishments and to add a little bit of layering.  The date fit snuggly within the speech bubble.  The final touch was to sprinkle purple acrylic paint.


With back-to-school season in full swing, you'll want to stop by The Cut Shoppe to grab some fabulous back-to-school cut files!


Friday, July 19, 2019

cheers of joy | orange gearle

Hi! Orange Gearle here with a layout in my traveler's notebook using the Snack Attack TN cut file.


Here is a look at the complete cut file:


I wanted the ice cream cone part of this cut file -- but I didn't want the words on there because they didn't fit my story, so I deleted them in the software before I hit cut! 


I backed the cut file with paper from Shimelle's 6x6 paper pad in her Glitter Girl Collection. I originally chose this collection because it has ice cream cones in it -- and then I didn't use any of them! 😆


I fussy cut a bunch of flowers from the same collection and made clusters across the two page spread. 


My title is a loose take on "tears of joy" but also, in this photo my daughter and I were doing "cheers" with our cones -- AND the paper on the cones say, "Joy". #seewhatididthere


I added some layers behind my photo and some journaling on both pages. This came together quickly and I really love using The Cut Shoppe TN cut files -- they make it so easy to put it all together!  I made a video of my process if that's something that suits your fancy.


Thanks for stopping by and see you again soon! XO o.g.


Sunday, July 8, 2018

"Bebe Galan" by Caroli Schulz

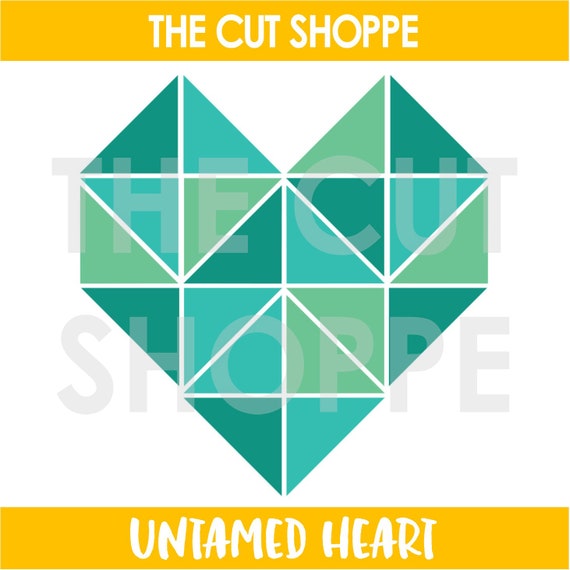
Hello peeps! How are you? Today I want to share here this layout I made using The Untamed Heart cut file


This is such a simple cut file, but it offers a lot of possibilities! This is the layout I made:


As you can see, the cut file takes almost all the page, but at the same time you have plenty of space for photos and embellishments. I used Little by Little collection by Shimelle, it's so sweet and perfect for this pics of my little boy.


I backed some of the spaces using photos, patterned paper, and also used some of the spaces for writing my journaling. I put my title combining Thickers and a word I cut using free font Better Together. 


I hope you liked this idea and got inspired to use this file on your scrapbooks, hopefully you are heading to your scrap room now :) 

Thank you for stopping by today, have a great day!

Friday, March 9, 2018

"Rainbow Of Possibilities" Layout with Enza

Hello everyone! Enza here to share a new, colorful layout with the Bermuda Triangle cut file.


If you have seen my work, you might have noticed how much I love background cut files. They are the perfect starting point for a layout and a nice “tool” if you want to incorporate multiple patterns and colors. The collection I have used for this page is the happy Box of crayons by Shimelle. I don't have any of the embellishments yet, so I had to make do with patterned paper, but I really couldn't wait ;)

I started by backing the cut file. The easiest way to do this if you are using just one patterned paper is to cut the outline only. The Release Compound Path function in the Silhouette software is your friend in this case, as it allows you to get rid of elements you don't want to send to cut. Here I deleted all the triangles and kept the main outline and all the areas in between. I then adhered the two pieces together with liquid adhesive.


Next, I fussy-cut a bunch of frames from one of the patterned papers and arranged them in a wonky way around the photo. I used foam adhesive for dimension.


To give it a feminine touch, I also added fussy-cut flowers and leaves.


Cut files are truly an amazing tool - they save the day most of the time, especially when you don't have enough elements from a collection or want to make patterned paper the star of your page.

Thank you for stopping by. Don't forget to check out The Cut Shoppe Etsy store for more inspiring designs.


Friday, January 5, 2018

Spring Blooms Layout | Elsie Robinson

Hey friends, it's Elsie here and I think I've officially ditched the Winter/Christmas layouts now it's a new year!

Whilst I've loved making Christmas projects, I'm definitely ready to start creating something different. So for this layout I was inspired by some of the beautiful floral cut files that are on offer in the Cut Shoppe store.


I started by super-sizing the rose cut files from the Blooming Bouquets and Spring Fling sets and I cut them from white cardstock. However, I wanted the stems to be green, so instead of manipulating the cut file and cutting the flowers and stems from different papers, I painted the stems green with some watercolours.

I didn't saturate the paper with a lot of water so they didn't warp at all and I love how much quicker this was so do than having to edit and run different papers through my cameo!


For my title, I again super-sized the 'Bloom' from the Spring Fling set and cut it from white cardstock. I stitched around the title with some white thread, to add a bit more definition.


I backed the large roses with pink and purple papers, the title with a yellow pattern and then I cut some more flowers from the Funky Florals and Flower Delivery sets and backed them with blue patterns.

With this being quite a busy page, having each of these elements have their own base colour meant they all didn't blend together and it really made these gorgeous files the stars of the page!


By raising the 'bloom' title on some small foam squares from the patterned paper, I was able to tuck the rose stems and some ephemera pieces into the letters, which helped integrate such a large title into my scene!

I love how this turned out and I think that incorporating a large title in this way, is something I'll definitely be doing again in the future!


Make sure you click on the images below to grab these cut files for yourself!

Thanks for stopping by!


Tuesday, May 30, 2017

Oh Ava

Hello its Melissa here and I can't believe May is nearly over!  Its almost Winter her in the Southern Hemisphere, and my youngest is 6 months already!!

For this post I decided to focus on a layout with a big title and small photos.  I used my March Hip Kit, and in order to make this layout come together quickly I used the Paige Evans Oh My Heart paper with all the squares of patterns on it.  I cut the title with the All Caps Alpha.  When I first made it the letters were getting a little lost, so I outlined them with watercolours in corresponding colours. This layout is all about our baby girl and her love for her blanket.


I love the little bear sticker from Shimelle's Little by Little collection standing on the "A"!


I had fun layering the Oh My Heart floral die cuts.


 Here is the All Caps Alpha.


Thanks so much for looking! I'll see you soon in June.