Hello,
this is Jennifer with a new layout for The Cut Shoppe!
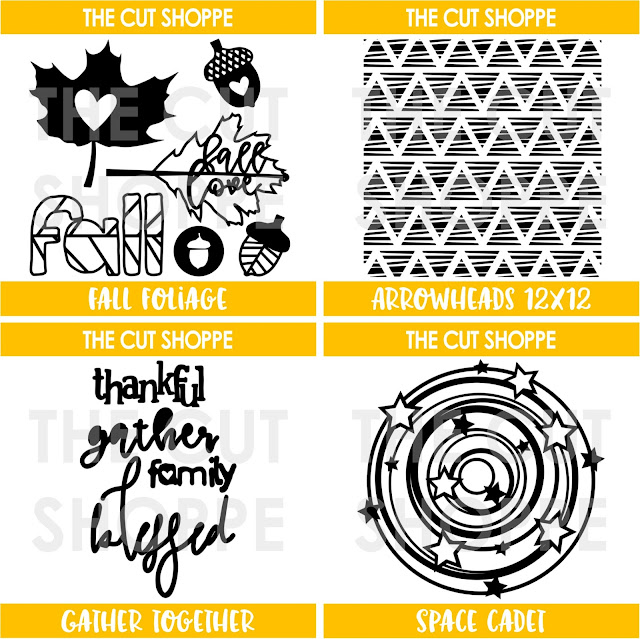
For this layout I used one of the new cutfiles for November: Space Cadet. I just live the galaxy feel it gives and I just had to cut it from a night sky paper from my stash.
For my title I used one of the sentiments from the Give Thanks cutfile set. I cute it from white cardstock and later on backed it with a light blue paper which I cut a bit bigger to give it a bit of a background. I find that it makes the title stand out more from the background.
For my background I used white cardstock and added a bit of mixed media. I used pearlescent watercolors from Finetex to add a shiny circle in rose gold behind the cutfile and later added a few splatters of gold and dark blue watercolors. It made my paper warp a bit because I didn't use gesso but I can live with that.
I backed the open stars from the Space Cadet cutfile with golden glitter paper and later used one of the negatives as an embellishment.
I tried capturing the shiny background with my camera to give you a bit of an impression on how it looks in the right light. It's a very subtle color.
Thanks for stopping by on The Cut Shoppe blog today. I hope you have a great day and I'll see you soon.
xoxo,
Sunday, November 12, 2017
Friday, November 10, 2017
Traveler's Notebook Cuppa Joe | Kelly Janes
Hey friends! Kelly back with you again today to share a new project using the Cuppa Joe Cut File in my Traveler's Notebook.
This is a first for me as I've never worked with a Traveler's Notebook. I'm participating in the My Thankful 30 project this year and thought a TN would be a great size to use for this project. I started my project in Cricut Design Space by slicing out a coffee cup image from the Cuppa Joe Cut File. I then used the Contour feature to hide all of the words within the coffee cup and mirrored the image so the handle would be on the opposite side.
I cut the coffee mug image on watercolor paper and used multiple products from Shimmerz Paints to paint the mug. I then used multiple Maggie Holmes products along with a few embellishments from my stash to complete this project.
I love that cut files can serve so many different purposes. They can be a focal image on your project, used as a die cut or as a layer like I've done here!
Now you can take a look at my process video that includes a Cricut Design Space tutorial.
Thanks so much for spending part of your day with me and remember to head to The Cut Shoppe Etsy Store to check out all of the cut files and digital collections!
Thursday, November 9, 2017
Tone-On-Tone Technique | Elsie Robinson
Hey friends, it's Elsie here! One of the things I was most excited about creating when I got my cameo was backing cut files... I know that really doesn't sound all that exciting, but I love to take my time and do some mindless and repetitive tasks when I'm crafting! I find that so relaxing.
And so that's what I focused on for today's project! Here's my layout:
I created this cluster of hearts using the gorgeous Pie Hearts cut file set. In my Silhouette software I arranged the hearts into a design that I liked, welded them all together and cut the design from white cardstock.
Then I put a movie on and had a really great evening backing all of the sections of the hearts!
I love this technique because it means I can use lots of patterns and colours in a controlled and neat way. But to really simplify the whole process I separated the hearts into three clusters and assigned them a colour and only used papers of that colour in each heart.
This worked out perfectly because I had ten hearts in my design, so there were three hearts for each of the three colours and one for my photo.
I primarily used the Maggie Holmes 'Carousel' collection on this page and to embellish I only used the pink, yellow and blue embellishments. I clustered all of the embellishments around and on top of their matching coloured hearts.
This tone-on-tone technique keeps the embellishing process super simple, as well as adding loads of detail and dimension to a page with very little effort. It also makes the cut file stand out and be the "star" of the page and is also a really great way to stash-bust!
I also used the outline of one of the clouds from the April Showers set and cut that several times in different sizes from white cardstock. Although the cut file and embellishments made this page plenty busy, I couldn't resist adding a few clouds to make this page even more whimsical... what can I say?!
Thanks for stopping by today everyone!
SaveSave
And so that's what I focused on for today's project! Here's my layout:
I needed some downtime the other evening, and was in the mood to be creative without having to think too much about what I was doing. And so backing a cut file was the perfect creative task for me to do!
I created this cluster of hearts using the gorgeous Pie Hearts cut file set. In my Silhouette software I arranged the hearts into a design that I liked, welded them all together and cut the design from white cardstock.
Then I put a movie on and had a really great evening backing all of the sections of the hearts!
I love this technique because it means I can use lots of patterns and colours in a controlled and neat way. But to really simplify the whole process I separated the hearts into three clusters and assigned them a colour and only used papers of that colour in each heart.
This worked out perfectly because I had ten hearts in my design, so there were three hearts for each of the three colours and one for my photo.
I primarily used the Maggie Holmes 'Carousel' collection on this page and to embellish I only used the pink, yellow and blue embellishments. I clustered all of the embellishments around and on top of their matching coloured hearts.
This tone-on-tone technique keeps the embellishing process super simple, as well as adding loads of detail and dimension to a page with very little effort. It also makes the cut file stand out and be the "star" of the page and is also a really great way to stash-bust!
I also used the outline of one of the clouds from the April Showers set and cut that several times in different sizes from white cardstock. Although the cut file and embellishments made this page plenty busy, I couldn't resist adding a few clouds to make this page even more whimsical... what can I say?!
Thanks for stopping by today everyone!
SaveSave
Tuesday, November 7, 2017
Fall Love with Enza
Hello
everyone! Enza here to share a new layout with some awesome cut files.
The Fall theme is still going strong for me. I love this time of the
year so much, I just want it to last forever. I combined two cut files
on my page: Wreathed in Love and Fall Foliage.
I
often try to combine cut files to give them a new look. Nothing wrong
with just using them as they are, but I find it's fun to figure out how
you can modify them a little to get something unique. Here I just welded
two of the images together to make the leaf look as if it was part of
the wreath. I then backed the same leaf with two different patterned
papers from the Pebbles Heart Of Home collection, which is one of my
favorites at the moment.
I fussy cut lots of flowers as well as some leaves, and arranged them in clusters around the cut file.
On
the top right corner of the page I added a few sequins for color and
interest. I also repeated the sequins around the leaf to bring the
design together.
I hope you have found some inspiration today. Visit The Cut Shoppe Etsy shop for these and more amazing cut files.
Thank you for stopping by!
Monday, November 6, 2017
New Cut Files | It's Fall Y'all
What's a better way to kick off the week, than with new Cut File designs??!! Thursday's are usually our new cut file reveal day, but our family was in Disney last week, so I decided to do the new reveal today! :) This week we've got a mix of fall and everyday cut file designs. I had to go with one of the fall designs, and I'm sure there's no surprise there!! The Fall Foliage cut file set has one of my new favorite designs, and I've been waiting to use it for today's layout!
I created the word fall in this set to mimic the veining in a leaf. I love the variation it gives you for adding patterned paper behind the design. You can back each individual section, each letter or the top and bottom half of each letter like I did on my layout!
I wanted to add more of an eye-catching look to the title, so I hand-stitched around each of the letters with a different colored embroidery floss. I coordinated the thread colors to match the papers and embellishments from the Crate Paper Gather collection.
I layered my photo and some of the embellishments over the large letters, and kept everything else a bit more on the simple side. I really wanted the title to be the focal point of the layout.
There are plenty of fall designs included in the Fall Foliage cut file set. You can pick it up in The Cut Shoppe Etsy store, along with our other new designs!
Thanks for stopping by today! We'll have our next new cut files in the Shop on Thursday, November 16th, so make sure to mark your calendar!
Sunday, November 5, 2017
Hello baby with Anna Komenda
Hello crafty people. It's Anna here with my brand new project created with The Cut Shoppe cut files. It's a fall / Halloween and almost Christmas season on the scrappy blogs but I will break the cycle with a layout filled with colorful flowers and baby pictures :)
I used "Hello, let's chat" cut file to build a base of my page. I cut it using light pink cardstock and filled the gaps with small pictures and paper scraps
I also cut a lof of tiny flowers using "The flower delivery" set along with "The funky florals". I used a watercolor paper and painted them using watercolors.
Flowers help me to get this whimsical mood highlighted by funny characters like bee or owl.
I hope you like this simple yet cheerful page with my cheeky and lovely daughter. It feels like an ancient history for me because she is already 4,5 years old and is no longer bald :D
Those are the cut files I used to create this page.
Thank you for stopping by and see you in about two weeks.
XO Anna
Friday, November 3, 2017
"Game Day" with Kira
Hey everyone! Kira here with another 12x12 scrapbook layout. I have been doing a lot of fall themed layouts recently but realized I hadn't documented one of my favorite fall traditions, FOOTBALL!
The Game Day cut file was perfect for documenting these photos of my husband and our oldest son watching a Seahawks game together.
I started this layout by pulling out papers that would work for a Seahawks theme color scheme. I went with blues and greens and greys. I cut out "Game Day" in white cardstock to serve as my title for this page. And then I backed each letter with a different patterned paper.
I used this grey, diamond print paper as my background. Then used another grey, brushstroke patterned paper as a base for my photos. I layered up some project life cards, along with some cards I had stamped to ground my photos on each side.
I created a DIY banner with some green cardstock and some white foam thickers. I got the idea from a felt banner shop I follow on Instagram and thought the idea would translate great onto a layout!
I wound some string around the top of my layout and attached the banner pieces with mini white clothespins. I finished off the page by adding some white and blue acrylic stars and a few silver star sequins.
You can watch my entire process here.
Thanks for stopping by!
Subscribe to:
Posts (Atom)


