Tuesday, December 31, 2019

Planner Love | Kelly Janes

Hey all! Kelly here again to share another Happy Planner spread with you using the Fall Favorites and Eat Beat Digital Stamps.


I am  LOVING using my Classic Happy Planner as a way to document my everyday life. It's such an easy way to get a lot of photos and stories documented in a small album. It's really simplifying my approach to scrapbooking.


I used Photoshop to size and change the color of the digital stamps. (Ashley has a great tutorial on YouTube showing how you can easily do this.) I then printed the stamps on clear sticker paper and added the customized stickers to my planner with other stickers from Me and My Big Ideas.


I absolutely love how these stamps look as clear stickers. I also love that there are so many possibilities with the digital stamps (change the size, change the color, print on sticker paper, cardstock or directly on your photos). So much fun!!!


Monday, December 30, 2019

Warm & Cozy by Joanna Bandelin

Hi friends Joanna here, I'm sharing a very merry Christmas themed page. I used the Fresh Cut Trees cut file from The Cut Shoppe.


I cut out the trees to fill up my background and backed it using the Crate Paper Snowflake collection. 


I made a mat for the photos of my daughter being silly in her Christmas pjs, layering a few pattern papers to create borders. I made a cluster to the left of the photos using different elements and embellishments.

I added a few gold stars on some of the trees for a little sparkle and finished off my page with a date stamp on the bottom. 
I love this cut file, it's just perfect to document those holiday photos.
Thanks for stopping by!


Sunday, December 29, 2019

Merry & Bright | Marsha Farris

Hey friends!  Marsha here with you today sharing a layout in my December Daily.  I am slowly but surely filling my album with lots of memories from the month.  My layout is featuring one of the FREE 12 Days of Christmas cut files- Christmas Ornaments.


For my layout today, I used mainly the Crate Paper Snowflake collection.  I chose to only cut out a portion of the cut file so that it would fit onto one side of my album.  I cut out the cut file using white cardstock and backed each ornament with different patterned papers.

 
I added some stamping to a couple of the ornaments, along with some gold chipboard stars and puffy number stickers.


For the other side of the layout, I added my photo and used ephemera, and stickers to embellish the page.  I used some puffy gold phrase stickers for the title.


The spread came together so quickly using this fun and FREE cut file!  Be sure to stop by The Cut Shoppe store and check out all of the new designs.  

Thank you for stopping by today!  


Saturday, December 28, 2019

Happy Day | Kylie Kingham.

Hello friends its Kylie back with you today to share a brand new layout. I've been working on some of my sons album pages and found the Haphazard Hexagons cut file was perfect for todays design. Once completed it added so much colour to my page!


Each Hexagon was backed with the same co-ordinating papers before I adhered the cut file to my background paper with some foam tape. By using the foam helps it to sit up a little from the background, adding a nice dimension and texture to your completed work.


Once my cut file was in place I was able to add my photo as well as various embellishments. I wanted the Hexagon background to be a feature so my photo was added to the lower left hand side corner.


To create different layers some die cuts were tucked in under my cut file and others added above with even more foam tape.


To complete my layout and to add balance to my finished page, a title was also added.


I hope you have enjoyed seeing my layout today and it gives you some inspiration for your own creating.Don't forget to check out all the fabulous cut files on offer on the website HERE.

Happy scrapping!


Thursday, December 26, 2019

NEW CUT FILES!

We are looking forward to a New Year, but before 2020 begins, we have one last set of NEW Cut Files for 2019!  You can find our designs that released today in The Cut Shoppe store, under the New Designs section.

https://thecutshoppe.com.co/collections/new-designs

We hope you and your family are having a great holiday season, and we wish you a HAPPY NEW YEAR!  Don't forget, that we love to see what you're doing with the Cut Files, so make sure you tag us @thecutshoppe on Social Media or use the hashtag #thecutshoppe, when you post. 

https://www.instagram.com/ashleyhorton75/

Wednesday, December 25, 2019

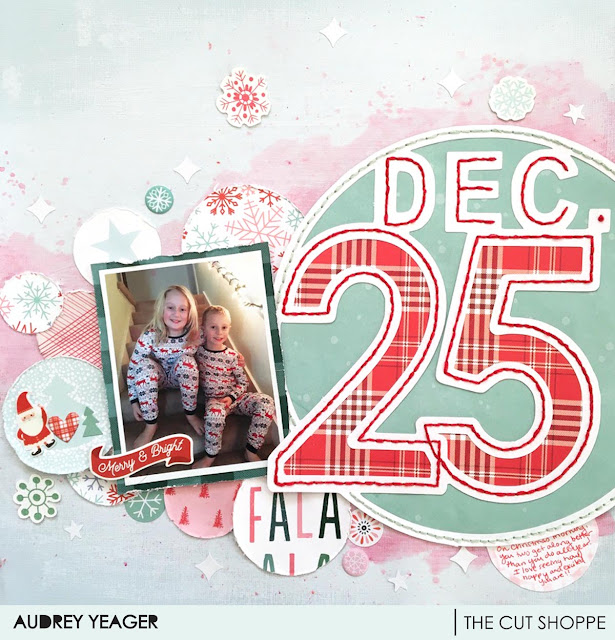
Dec 25 | Tarrah McLean

Merry Christmas creative friends!

It's Tarrah back with you and today I am sharing a new Christmas layout using the 12 Days of Christmas 'Dec 25' freebie!

The Dec 25 freebie...find all the 12 Days of Christmas cut files in the store here

I decided on a red, black and white colour palette for this layout, I am not normally a plaid person but I love how the red and black plaid looked backed in the '25'. I decided on the pretty black floral for the 'Dec'.

Once I had backed the entire cut file, I added craft foam underneath and popped it up on to the small back spot paper. I often pop up cut files from the background paper to allow for tucking in embellishments as well as layering them on top of the cut file.

I added my photo on top of the '5' and layered a black doily and one of the frames from the collection. I added some wood veneer embellishments as well as die-cuts and stickers to finish off my page. Overall this layout came together pretty quickly once I had my cut file backed and ready to go.

Thank you so much for stopping by today! I do hope you have a wonderful day celebrating Christmas with your loved ones!

Happy creating!

Tuesday, December 24, 2019

Make It Merry!

Merry Christmas friends!!  Tomorrow is the BIG day, but we wanted to share some Christmas inspiration with you today.  Our designers are sharing some amazing layouts, to help you get inspired for all of those upcoming Christmas projects you'll be working on.

We have plenty of holiday cut files for you in The Cut Shoppe store!  You can check out our Holidays Section and don't forget about our FREE 12 Days of Christmas Cut Files.  You can find them all, HERE.  

AUDREY YEAGER - SEASONS GREETINGS

https://www.instagram.com/audreykit1/

JOANNA BANDELIN - SLEIGH RIDE

https://www.instagram.com/joeygirlcreates/

KYLIE KINGHAM - ELF MAGIC

https://www.instagram.com/paper_sweetpea/

TARRAH MCLEAN - ELF MAGIC

https://www.instagram.com/tarrahm/

We wish you and your family a VERY MERRY CHRISTMAS from The Cut Shoppe and we look forward to bring you new Cut Files in 2020!

https://www.instagram.com/ashleyhorton75/

Monday, December 23, 2019

Using Digital Stamps as Clear Stickers | Kelly Janes

Hey friends! Kelly here to share a new way to use the Digital Stamps that are available in the Shop.


I've really been enjoying using a Happy Planner as a way to document our everyday moments. These photos usually get trapped on my phone because I don't know how I would document them on a 12x12 page. I thought it would be fun to use a few of the digital stamps as stickers on my spread!


I used the Day to Day Digital Stamp and the Fall Favorite Digital Stamps in Photoshop to change the colors to match the other stickers I would be using on the spread. Ashley has a great YouTube tutorial showing how this can easily be done!


I printed the stickers on clear sticker paper and fussy cut the images and added them to the spread. I absolutely LOVE how this turned out and will be doing this again VERY soon!


Holiday Decor with Kira

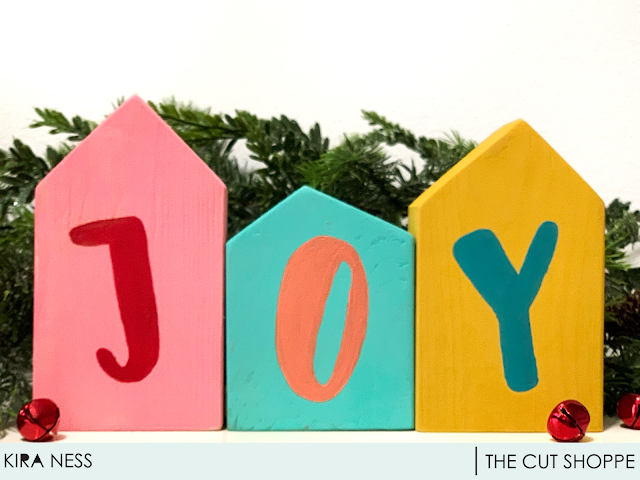
Hey there!  It's Kira and I am back with a simple off the page project, using a cut file from The Cut Shoppe, to pretty up your mantle, or to give as a gift!


I started with some scrap pieces of wood.  I cut these into the basic "house" shape and sanded down the edges.


Then I used the All Caps Alpha to cut the word "joy" on my Cricut.  You can choose any word, but I went with "joy" purely based on it's length.  Instead of using the cut out letters, I used the cut file as a stencil to paint on my blocks.


I first painted the blocks a base color (opting for some non-traditional colors and not being the least bit disappointed!).  Then I used my "stencil" to paint on the letter in a different color.


Since I didn't use a stencil or stencil brush, these required a bit of post painting touch up.  I used a tiny brush to touch up the edges.


Ideally, you'd finish off these blocks with a clear spray paint so your paint won't chip in the long term, but for the sake of time, these were photographed prior to spray painting.


Thanks for stopping by!

xo, Kira