I've really been enjoying using a Happy Planner as a way to document our everyday moments. These photos usually get trapped on my phone because I don't know how I would document them on a 12x12 page. I thought it would be fun to use a few of the digital stamps as stickers on my spread!
Showing posts with label stickers. Show all posts
Monday, December 23, 2019
Using Digital Stamps as Clear Stickers | Kelly Janes
Hey friends! Kelly here to share a new way to use the Digital Stamps that are available in the Shop.
I've really been enjoying using a Happy Planner as a way to document our everyday moments. These photos usually get trapped on my phone because I don't know how I would document them on a 12x12 page. I thought it would be fun to use a few of the digital stamps as stickers on my spread!
I used the Day to Day Digital Stamp and the Fall Favorite Digital Stamps in Photoshop to change the colors to match the other stickers I would be using on the spread. Ashley has a great YouTube tutorial showing how this can easily be done!
I printed the stickers on clear sticker paper and fussy cut the images and added them to the spread. I absolutely LOVE how this turned out and will be doing this again VERY soon!
I've really been enjoying using a Happy Planner as a way to document our everyday moments. These photos usually get trapped on my phone because I don't know how I would document them on a 12x12 page. I thought it would be fun to use a few of the digital stamps as stickers on my spread!
Monday, June 12, 2017
Fun Trip
Hey there scrappy friends,
Zsoka here with you today with my last before one layout for The Cut Shoppe! However, this is my last blog post here, my last layout will only be posted on my own blog in two weeks. I hope you'll check it out, it will be a special one ;P.
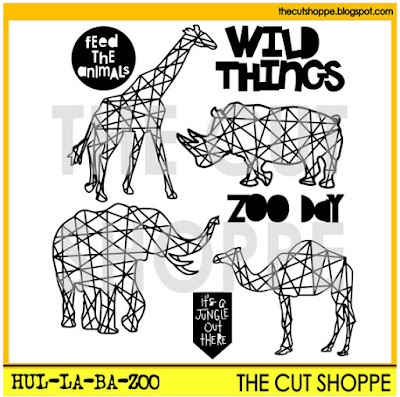
As I was browsing through my cut files, I realized I still haven't used the Hul-La-Ba-Zoo cut file even though I've been wanting to for ages.
While on Spring Break in April, we went on a Safari in Italy and we took many photos of all the different animals. For whatever reason I didn't take more than 2 photos of my favourite giraffes! Either way, I decided to use the giraffe cut file to go with my giraffe pictures and document this memory.
I chose the wonderful Crate Paper Oasis collection which reminded me of Safaris, trips and getaways. Then I cut two giraffes in two different sizes (one image I mirrored so they are facing each other) then backed them with two patterned papers from the collection.
For my background I picked a wood grain paper and I used a very limited color palette, which I find matches the Safari theme. I used embellishments from the Oasis collection: die cuts, chipboard stickers, a chipboard frame and stickers as well as some wood veneers and plain chipboards from other manufacturers.
I created two clusters with tropical leaves, most of these came from the ephemera pack, some I fussy cut from a patterned paper. I also added some chipboard leaves for additional dimension.
For my title I used the gold phrase stickers from the Oasis collection. I just love the font!
I hope you like how this layout turned out! I will be honest, I promised myself earlier to never use another animal cut file on a layout (long story!) but with these pictures this file was kind of the obvious choice right?! :)
Thank you for stopping by today and also for all the support in the past! I'm also thanking Ashley from the bottom of my heart for this wonderful year that went by way too quickly! I am grateful for having been a part of the last TCS DT. I sure will miss it!
Have a great day and see you around X
Monday, May 8, 2017
This sweet face
Hi there scrappy peeps,
Zsoka back with you today with a new layout.
For today's layout I picked one of the more recent cut files, the Spiral Scallop. I love circles and I love scallops so this was a no brainer!
I decided to use the cut file in two ways: as a stitching template and as a normal cut file.
I used my sketch pen on my Cameo to draw the lines of 4 circles that I arranged the way I wanted them in my Studio program. I then pierced holes along the lines. You can use the perforate option in the Studio program to do this for you, but I prefer to do it by hand.
I used different color embroidery floss for each circle, all matching the collection I chose to work with: Oh my heart from Paige Evans / Pink Paislee. The smaller circles were a nightmare to stitch to be honest! The lines were so close and I broke my smallest needle a while back so I had to use a bigger one which didn't make my life easier. Or the paper prettier!
I added patterned papers and a photo in the middle of the circles, then embellished them with stickers, ephemera pieces, chipboard stickers, charms, puffy stickers...Then I moved onto the next section of my layout, the die cut scallops.
I printed 4 different sized scallops and apart from the biggest one, I backed them all with patterned papers. Then I just layered them on top of each other, using foam tape between each layer. There's no reason for my doing this, other than I really love layers!
I mixed and matched some thickers and alpha stickers for my title and wrote my journaling along the biggest circle.
I splattered some bronze ink around my page then I was done!
Hope you like my project and I could inspire you in some small way! See you soon!
X
Friday, January 13, 2017
Colors
Hello there scrappy friends,
Zsoka back with you today with a new layout. I started out by selecting a collection I wanted to work with. This is one of the last Basic Grey collections that came out earlier this year. I'm yet to use the last BG collections, I haven't had a chance yet.
Then I looked at the cut files and for some reason this one jumped out at me. I haven't used it yet!
I multiplied the heart cut file and arranged them in a curved way, then welded them. I backed the hearts with differemt patterned papers. I wanted to only have patterned paper on the left side of my layout, so I adhered my cut file to it and cut off the right side. Then I adhered this piece to a white card stock.
I wanted to bring in more yellow, so I painted around my cut file. I also added a lot of tiny yellow splatters to create a sort of bridge between yellow and white if that makes sense.
I added a few enamel dots from the collection and I selected some wood veneers too from my stash because I barely have any embellies from this collection.
To finish off my layout I added a couple of stickers, labels and my title, wrote my journaling and stamped my date.
Thanks so much for stopping by today. Have an awesome day! X
Subscribe to:
Posts (Atom)