Showing posts with label Zsoka Marko. Show all posts

Monday, June 12, 2017

Fun Trip

Hey there scrappy friends,

Zsoka here with you today with my last before one layout for The Cut Shoppe! However, this is my last blog post here, my last layout will only be posted on my own blog in two weeks. I hope you'll check it out, it will be a special one ;P.

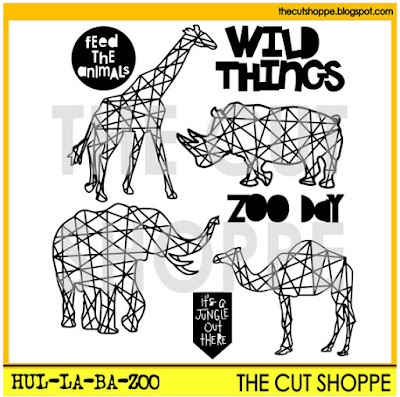
As I was browsing through my cut files, I realized I still haven't used the Hul-La-Ba-Zoo cut file even though I've been wanting to for ages.

While on Spring Break in April, we went on a Safari in Italy and we took many photos of all the different animals. For whatever reason I didn't take more than 2 photos of my favourite giraffes! Either way, I decided to use the giraffe cut file to go with my giraffe pictures and document this memory.
https://www.etsy.com/listing/468665995/the-hul-la-ba-zoo-cut-file-set-includes?ref=shop_home_active_41

I chose the wonderful Crate Paper Oasis collection which reminded me of Safaris, trips and getaways. Then I cut two giraffes in two different sizes (one image I mirrored so they are facing each other) then backed them with two patterned papers from the collection.


For my background I picked a wood grain paper and I used a very limited color palette, which I find matches the Safari theme. I used embellishments from the Oasis collection: die cuts, chipboard stickers, a chipboard frame and stickers as well as some wood veneers and plain chipboards from other manufacturers. 


I created two clusters with tropical leaves, most of these came from the ephemera pack, some I fussy cut from a patterned paper. I also added some chipboard leaves for additional dimension. 


For my title I used the gold phrase stickers from the Oasis collection. I just love the font!


I hope you like how this layout turned out! I will be honest, I promised myself earlier to never use another animal cut file on a layout (long story!) but with these pictures this file was kind of the obvious choice right?! :)

Thank you for stopping by today and also for all the support in the past! I'm also thanking Ashley from the bottom of my heart for this wonderful year that went by way too quickly! I am grateful for having been a part of the last TCS DT. I sure will miss it!

Have a great day and see you around X

Monday, May 22, 2017

Hey hey my my

Hi guys,

Zsoka back today with a new layout!

I've picked the All Heart Remix cut file which is one of my favourites ever from The Cut Shoppe and I've used it many times too. In fact I've used it in this form as well, cropped into two semi-circles, but I do like this design so I don't mind doing it more than once. The end result is always different since I use different collections, decorate differently and so on.

https://www.etsy.com/listing/234503384/the-all-heart-remix-cut-file-is-a


I've chosen the stunning Wild at Heart collection from Cocoa Vanilla Studio - now that CVS is finally available in Germany (at Scrapbook Werkstatt) I can't stay away :).

I very often go with white card stock for my cut file because I generally don't have a plan in my head when I start a layout. And with a white cut file one can go in many directions!


I backed the bigger semi-circle with different patterned papers from the collection and glued it down on the right top side of my page. I didn't glue down the biggest hearts so they add a bit of dimension.


I layered some tissue paper and a couple of the frame ephemera pieces behind my photo and placed these on the big semi-circle. I added some phrase stickers, chipboards, ephemera, fussy cut butterfly and a flair button to embellish this side. I wrote my journaling here too.

Don't ask about the title...I just had this song on my mind when I was working on the layout :).


As for the smaller semi-circle. I cut this from the same white card stock and glued it down completely so it is flush against the background. I hand stitched a few of the hearts and did some string art.


I filled some hearts with those fabulous glitter enamel dots, some wood veneer hearts and I added a couple more fussy cut butterflies.

I splattered some blue paint across my page to finish it off. I hope I could inspire today in some small way!

Thank you for stopping by X


Monday, May 8, 2017

This sweet face

Hi there scrappy peeps,

Zsoka back with you today with a new layout. 

For today's layout I picked one of the more recent cut files, the Spiral Scallop. I love circles and I love scallops so this was a no brainer!


I decided to use the cut file in two ways: as a stitching template and as a normal cut file.


I used my sketch pen on my Cameo to draw the lines of 4 circles that I arranged the way I wanted them in my Studio program. I then pierced  holes along the lines. You can use the perforate option in the Studio program to do this for you, but I prefer to do it by hand.


I used different color embroidery floss for each circle, all matching the collection I chose to work with: Oh my heart from Paige Evans / Pink Paislee. The smaller circles were a nightmare to stitch to be honest! The lines were so close and I broke my smallest needle a while back so I had to use a bigger one which didn't make my life easier. Or the paper prettier!


I added patterned papers and a photo in the middle of the circles, then embellished them with stickers, ephemera pieces, chipboard stickers, charms, puffy stickers...Then I moved onto the next section of my layout, the die cut scallops.


I printed 4 different sized scallops and apart from the biggest one, I backed them all with patterned papers. Then I just layered them on top of each other, using foam tape between each layer. There's no reason for my doing this, other than I really love layers!


I mixed and matched some thickers and alpha stickers for my title and wrote my journaling along the biggest circle. 


I splattered some bronze ink around my page then I was done!

Hope you like my project and I could inspire you in some small way! See you soon!

X


Saturday, April 22, 2017

Summer Fun

Hi All,

Zsoka here with you today to show you my latest layout I've created for The Cut Shoppe.

I chose the Geo to Go cut file this time. I love this cut file, it's not the first time I used it!

https://www.etsy.com/listing/201043453/the-geo-to-go-cut-file-is-a-12x12?ref=hp_rv
  
I decided to go with the wonderful summer collection, Endless Summer from Cocoa Vanilla Studio. I am not so into pastels but this collection is a dream to work with, I am glad I bought it! It simply makes me happy. Every single piece! What I love about CVS the most is the big variety of embellies with each collection. My favourites are the woodies, I may or may not have bought 3 packs of them :D.


I started out by backing my cut file with different patterned papers as usual. This took me a while, so I was watching Jane the Virgin in the meantime. Have you guys seen it? Hilarious. I used to watch telenovelas as a kid, because that was pretty much all we had on TV back then, ha! Anyhow, back to topic.

I printed a big size photo for a layout and I only have 12x18" photo paper, which I normally waste...But this time I actually took the time and figured out how to fill it up and print more photos on it in all sorts of sizes. Well this one is a bit of an odd size, I just enlarged it to fit in the last bit of white space I had left.


I put some tissue paper behind my photo and adhered it to my background. I then cut a frame from the ephemera pack in half and glued these in two corners of the photo, just to add a little something. My title is also from the ephemera pack, I glued SUMMER directly onto my photo and added some pop dots to the FUN die cut to raise it up a bit. I attached a small die cut with a clip - this is the only thing on the layout that is not from Endless Summer. I believe this is from Freckled Fawn. Also a woodie found its new home in this corner!


There are a few hibiscus die cuts in the ephemera pack and they are so gorgeous! I tucked them under my photo on the top and on the left. Some of them I popped up to give them a bit of dimension.
I then added some more ephemera pieces to the left side of my photo, plus a puffy camera and a woodie. Of course!


One of the Geo tags I filled with enamel shapes and yet another woodie. :)


To finish it off, I stamped my date and added some black ink splatters. No journaling on this one since I scrapped several photos from the same day!


Thanks for stopping by today, I hope I could inspire you X


Monday, April 10, 2017

Thumbs Up

Hi guys,

Zsoka back with you today with a new layout.
I used a cut file that I've been meaning to use for ages, though not the way I ended up using it :).


I wanted to go with a geometric type background cut file and then just use the outer parts of it. The Quirky Quilt cut file was perfect for this!

I traced the whole cut file and then I just kept deleting the shapes until I had the design left that I had on mind.


I used the wonderful Oh My Heart collection from Paige Evans for Pink Paislee. I chose two patterned papers: the little heart design for my cut file and the ombre paper for backing this. Since this was not a terribly time consuming activity, I thought I'd add a little something to it. I busted out my embroidery floss stash and looked for colors that matched the background paper. Then I spent some time on hand stitching around each shape. This adds some texture and interest to the layout.


I was actually going to go with Pancakes for title (or something along those lines) using the adorable, colourful alpha thickers from this collection. And they fit really well too! But then I saw the Thumbs Up phrase thickers, and I knew I had to go with those. Not that I wouldn't find another photo of my kid where he gives me thumbs up... In almost every picture he does that :D.


Photographing metallics is my pet peeve really...But these rose gold chipboards are so pretty, I had to use them! Besides, I was so happy I found the one that says Eat dessert first! I don't mind using random things on my layouts, but 'm totally excited when I find something that matches my theme! This was meant to be!  


I had a part of another cut file left (Spin Circle) that I used the same day and I added it here as a layer behind my photo. I don't like to throw things away! I also used some tissue paper and an ephemera piece for layers. I didn't go crazy on embellishing around my photo because my background was so busy. Instead I added a lot of enamel dots to my cut file in coordinating colors.


I typed up my journaling on white cardstock and cut it into several pieces which I glued down below my photo. I can't for the life of me find the date on this layout, it looks like I forgot to add it?! This doesn't happen often! So I'd better go now and find this page before I forget about it, again!

I hope I could inspire you today in one way or the other! Thanks for stopping by! X

Friday, March 17, 2017

First Ride

Hi there scrappy friends,
Zsoka here with you today with a new layout.
When I saw the new bike cut file, I knew I wanted to use it right away. I already did a bike layout last year, using my favourite Fancy Pants Good Fellows collection, but for this one I wanted to use a feminine line full of flowers, because of the basket filled with flowers in the new Full Bloom cut file! I also used some other cut files:
https://www.etsy.com/listing/240626846/the-make-a-splash-cut-file-includes-5?ref=shop_home_active_59


I blew up the cut file and cropped the front of it.
Since I already had Paige Evans' Oh My Heart collection on my table when I started working on this, I just went with that collection again. I went through the papers and found the perfect one for my wheels! Or at least I think I did! :) It's a shame I had to cut up two 12x12" papers just to get the right pattern but I still have one left, so it's OK, it was all worth it.
 
I adhered my bike to the background and hand stitched around the wheels to give them extra definition. I also glued enamel dots in the middle of my wheels, mostly for fun :).
 
I then fussy cut loads of different size flowers from one of the patterned papers and added these to my basket and also to the front of the bike. Some I popped up using some foam adhesive so they have a bit of dimension.
 
 
Looking at the layout at this point, I felt like the top was too empty and I wasn't planning to put my title there. After brainstorming with a friend I decided to add a sun and some clouds. Cheesy, yes?! I hand stitched around the sun and adhered it to my page with foam adhesive. The clouds I left as they were, didn't back them, just to have a bit of airy feel to them.
 
For my title I used the alpha thickers from the same collection. I was a bit hesitant to add my journaling where it is now, because the whole layout was kind of straight and this spot was tilted. But I took a deep breath and started writing...I actually like how it turned out.
 
I don't do such themed layouts often anymore, but I thought it fits my photo, since my son was just a baby back then.
I hope you found some inspiration here today! Thank you for stopping by! X