Showing posts with label Jillibean Soup. Show all posts

Sunday, September 8, 2019

sweater weather wall hanging | iris fox


Hello friends, Iris here back with more fall love using my new favorite supply, the Fall Favorites Digital Stamp set! And this time I was inspired by the "sweater weather" sentiment to make this cute, little wall hanging for the upcoming season.


I gathered my supplies: a Jillibean Soup Mix the Media 6"x6" wood and canvas panel, Simple Stories Say Cheese 4 stamp set (because it has a sweater), Sulky Water Soluble Stabilizer, Hero Arts Shadow Ink in Soft Brown, Post-it brand removable tape, an embroidery needle, and a selection of threads.


The Sulky Water Soluble Stabilizer comes in printable sheets that are sticky.  I resized the word to 1.25"x 2.5", printed it on the stabilizer sheet, cut it out in a small rectangle, peeled away the backing sheet, and stuck it to the canvas. After the stitching is done, the stabilizer is washed away!


For the sweaters, I used the sweater stamp 3 times, but after I stamped the hoodie in the middle, I stamped the image on the Post-it tape and fussy cut the center so that I could use it as a mask.  I also cut a piece to mask off the hood.  With the masking pieces on the stamp, I inked it, removed the mask pieces, and then stamped onto the canvas.


After all that prep, it just took some time to stitch it all out.  This proved a timely project for me because I was sick, so I just sat and stitched for two days.


Look at how awesome the word art looks.  I love adapting scrapbooking products onto fabric to create unique pieces!


I hope sharing this project inspires you to use scrapbooking products off the page!  Thanks for stopping by to check out my wall hanging.  Don't forget to check out the latest releases at The Cut Shoppe, including the Fall Favorites Digital Stamp set, and all the fabulous new stamp sets.  I want to use them on all the things, and I'm pretty sure you will too!! :D


Saturday, June 29, 2019

Birthday Burger | Iris Fox

Hello friends.  Iris here ready to say Supersize me!  That's exactly what I did with one of the latest cut files from The Cut Shoppe. Meet Fast Food:


And this is the layout I created with this fun cut file:


I documented my daughter's 8th birthday when she actually didn't want a cake, but asked for Five Guys burger (a double of course) and fries.  This cut file was so perfect for this story! I used the Jillibean Soup Let's Celebrate collection which is chock full of fun colors.  


I started right off backing the cut file, which I cut at 6.5" tall by 8.87" wide.  I did pull a darker green polkadot from my stash for the lettuce and a woodgrain for the patty.  I didn't add back the extra sesame seeds because she usually picks some off the bun.  Wanted to keep it authentic! Lol Backing this cut file was super fun to see it come together. I added a candle from the collection right in the middle of the bun, and voila, birthday burger.


I wanted everything to pop from the background, but I didn't want it to be too dark, so I cut a 9" circle from the light green paper from the collection, backed it with a dark blue, and built the cut file and photos within the circle. I overlapped the cut file at the bottom corner to make it more fun and interesting.


I printed my journaling on vellum to add to the fry holder.  To get a rough idea of the size I needed, within the Silhouette software I copied my typed journaling and sized it on the cut file on my screen.  Then in Pages (the word processing software on my Mac) I adjusted the size and spacing to match.  Once printed, I cut them into strips and did any final adjustments as I placed it on the page.


Then I added some embellishments in the areas where the cut file meets edges, spelled out my title all along the curve with the awesome rainbow alphas that are also Jillibean Soup, and as the final touch I stitched through the middle of them to be certain they will stay down and more importantly to add interest and whimsy.


I felt like a kid with a crayon box making this layout.  Normally I'm a very literal scrapbooker, and wouldn't have though to have a huge burger and fries taking up a significant portion of my page, but I'm so glad I supersized.  It's super fun and I can't wait to do it again with fun cut files from The Cut Shoppe.  Stop by the shop to grab yourself some fun files!


Sunday, March 10, 2019

Spring | Erica Thompson

 Hello! Erica here with you today to share a spring layout using the new Floral Wreath cut file!
I started with some American Crafts smooth white cardstock to cut my file. I pulled out the Photoplay Paper Bloom collection and started to back the Floral Wreath. I love the pretty colors in this collection. 

 I tried to use a pattern paper for my background but in the end I used a white piece of cardstock...shocking I know! I added foam behind the cut file to pop it up and give it a little dimension. I added some embellishments to the center of all the flowers. I used enamel dots and stickers from the collection and some die cuts from my stash. 
I also used a couple new epoxy flair from Scrappin Happy Studio that went well with the Bloom collection. Here is a look at my final layout! You can check out my YouTube channel for the process video HERE!

Make sure to stop by The Cut Shoppe and check out the new cut files released March 7th!


Thursday, February 28, 2019

You And Me | Erica Thompson

Hello everyone! Can you all believe today is the last day of February! This month has gone by so fast and so much inspiration has been shared! Today I want to share a layout using the You and Me cut file that was just released on February 21st!
https://thecutshoppe.com.co/collections/new-designs/products/you-and-me

If you have been following me for awhile then you know I love to use cut files with big words! I cut this out in some American Crafts smooth white cardstock and backed it with papers from the Jillibean Soup Garden Harvest collection. I just love the rich colors in this collection!
I added some fun splashes of color to my background using inks and mists from my stash.
This fun heart epoxy from Scrappin Happy Studio was the perfect embellishment to add to this layout of my husband and our one and only little girl!
I love that Ashely's files are so easy to use and you can resize them to fit your projects! Here is a look at my full layout!
 You can check out my process video HERE on my YouTube channel! Make sure to check out all the newly released cutfiles in The Cut Shop!

Monday, June 12, 2017

Fun Trip

Hey there scrappy friends,

Zsoka here with you today with my last before one layout for The Cut Shoppe! However, this is my last blog post here, my last layout will only be posted on my own blog in two weeks. I hope you'll check it out, it will be a special one ;P.

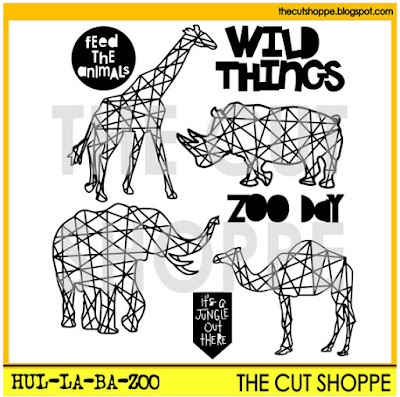
As I was browsing through my cut files, I realized I still haven't used the Hul-La-Ba-Zoo cut file even though I've been wanting to for ages.

While on Spring Break in April, we went on a Safari in Italy and we took many photos of all the different animals. For whatever reason I didn't take more than 2 photos of my favourite giraffes! Either way, I decided to use the giraffe cut file to go with my giraffe pictures and document this memory.

https://www.etsy.com/listing/468665995/the-hul-la-ba-zoo-cut-file-set-includes?ref=shop_home_active_41

I chose the wonderful Crate Paper Oasis collection which reminded me of Safaris, trips and getaways. Then I cut two giraffes in two different sizes (one image I mirrored so they are facing each other) then backed them with two patterned papers from the collection.


For my background I picked a wood grain paper and I used a very limited color palette, which I find matches the Safari theme. I used embellishments from the Oasis collection: die cuts, chipboard stickers, a chipboard frame and stickers as well as some wood veneers and plain chipboards from other manufacturers. 


I created two clusters with tropical leaves, most of these came from the ephemera pack, some I fussy cut from a patterned paper. I also added some chipboard leaves for additional dimension. 


For my title I used the gold phrase stickers from the Oasis collection. I just love the font!


I hope you like how this layout turned out! I will be honest, I promised myself earlier to never use another animal cut file on a layout (long story!) but with these pictures this file was kind of the obvious choice right?! :)

Thank you for stopping by today and also for all the support in the past! I'm also thanking Ashley from the bottom of my heart for this wonderful year that went by way too quickly! I am grateful for having been a part of the last TCS DT. I sure will miss it!

Have a great day and see you around X

Wednesday, March 22, 2017

LOVE YOU & LOVE COFFEE!

Hi friends! It's Monique here again today sharing a layout created the fabulous "Heart Felt" cut file from The Cut Shoppe's Etsy Store. I really adore this cut file and could use it over and over again. Today I chose a photo of my youngest making me coffee ... this is one of the first times he's doing that so that had to be documented. Normally I'm the one making him a hot chocolate, but today he wanted to do something in return. He's such a sweet kid!! The Healthy Hello Soup collection from Jillibean Soup was perfect, with it's coffee cups papers and die-cuts.


The Heart Felt cut file is really a background cut file but cut in a smaller size it's just as awesome! 


A few close-ups:


I created my layout on a sheet of white AC cardstock, but when I was finished with my page I found the result a bit too white and decided to use my SC water color paint to color the inside of the hearts in a light yellow. Love the result! 

And don't you just love these cup die-cuts from Jillibean Soup?! 


I added some random machine stitching and my page was done! Hope you like it! 

Thank you so much for stopping by our blog today! Don't forget to have a look in The Cut Shoppe's Etsy Store for many more beautiful cut files! 


Wednesday, September 28, 2016

Life Together

Hello friends!! Kelly here and I'm back with a layout using the Spinwheels Cut File. Background cut files are some of my favorites because they are so versatile!


I started by slicing out an individual "spinwheel" image in Cricut Design Space. I then welded multiple sizes of the "spinwheels" together to create this diagonal design. I backed the cut file with a pattern paper from the Amy Tangerine Better Together Collection. I also added hand stitching using white embroidery floss to help highlight the cut file.


I placed my photos in the upper left and lower right hand corners framing the cut file. I placed multiple cluster arrangements around the photos including products from Shimelle, Maggie Holmes, Amy Tangerine rub-ons, and Jillibean Soup sequins.


I've also put together a video showing the process of how this layout came together! I also have included a quick Design Space Tutorial.


Thanks so much for stopping by today and remember to head over to The Cut Shoppe Etsy Store to check out all of the amazing designs that are available!!

Tuesday, September 13, 2016

My Crew

Hello friends!! Kelly here today with a layout featuring the Hul-La-Ba-Zoo Cut File from The Cut Shoppe!


We came across a photo booth at the zoo and I loved how the photos turned out! It was such a fun way to document the day! The fun geometric shape of all of the animals in the Hul-La-Ba-Zoo Cut File are perfect for zoo photos! I paired the cut file along with products from Amy Tangerine, Dear Lizzy, JilliBean Soup, the Hip Kit Club and more!


One of my favorite techniques is to back cut files with busy pattern paper. You can see how the JilliBean Soup pattern paper just helps the giraffe jump off the page. 


I've also put together a video showing the process of how this layout came together! There's a bonus Cricut Design Space Tutorial!! 


Thanks for stopping by today and don't forget to head over to The Cut Shoppe Etsy Store to check out all of the cut files!!