Showing posts with label Brush Up Alpha. Show all posts

Friday, August 30, 2019

July Calendar

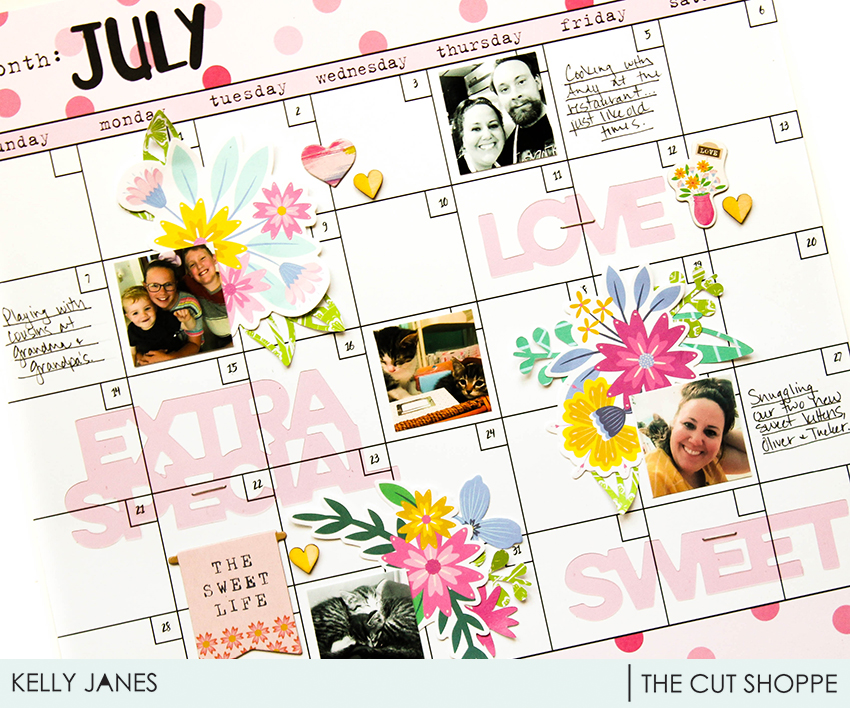
Hey friends! Kelly back today with a new layout using two cut files, Flower Delivery & Brush Up Alpha.


I love cut files because they can be used as large focal points on a layout or they can be used as subtle embellishments; which is what I've done today. I recently discovered the Happy Planner and will be using one as a type of Project Life documenting. I was messing with my printer settings so I had a couple sheets of July photos. I stumbled on a calendar patterned paper from Bella Blvd and thought it would be perfect to use; especially since I'm currently loving planner style documenting!


I positioned my photos on the layout and then grabbed a few floral die cuts. I cut leaves and a pink flower from the Flower Delivery Cut File on patterned paper and tucked them in with the die cuts to add extra pops of color.


There was also an area for the month at the top of the 12x12 patterned paper, so I cut "July" from the Brush Up Alpha Cut File on black cardstock. I added my journaling and a few more embellishments to finish the layout.


I absolutely love the versatility of cut files! A large focal point or using them as die cut type embellishment can make such an impact on a layout or project! Don't forget to visit The Cut Shoppe Store to check out all of the cut files, classes, and digital stamps!


Sunday, September 2, 2018

"Farmhouse Goals" with Kira

Have you had a chance to plan out what you're going to make for this month's challenge?  If you haven't seen what the challenge is, you can read about it here.  I made a super cute piece of decor with a vintage milk can...and I was so obsessed with how it turned out, that I HAD to document it!

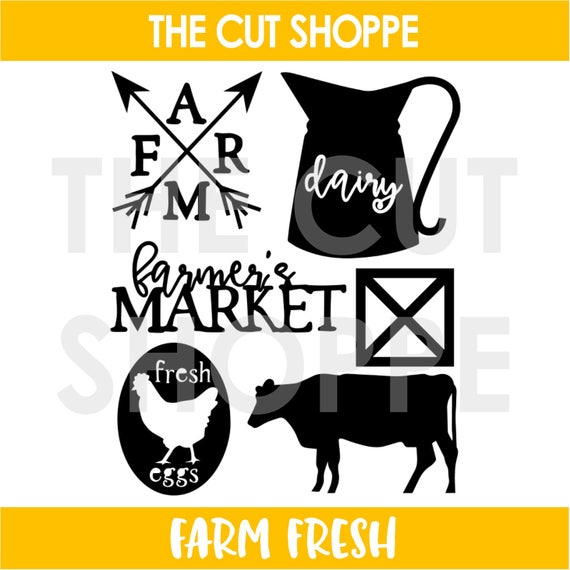
I started my layout using the same Farm Fresh cut file from The Cut Shoppe that I used for my milk can.   I had almost decided to use this cow on the can, but decided on the "farm" cut file instead.  So now was my chance to use that cow! 


I cut it out on some black and white paper, to mimic the look of a cows spots, without being so literal.  Then I used a piece of wood grain paper as my background.  I added some handstitching around the cow in some white DMC embroidery floss. 


I had a million pictures of my milk can since I was so obsessed with it, so finding one that would work wasn't a problem!  I fussy cut around the can and decided to use it as a sort of embellishment. 


I used the Brush Up Alpha cut file for my title, cutting it out on some blue floral paper.  I am really digging a vertical title on my 8.5x11 layouts lately, so I attached it going up the side of my page. 


I used some black alphas to complete my title. 


The Make a Pretty Life June kit was perfect to embellish this page.  I added different die cuts and textural elements to complete the page.


Thank you so much for stopping by!  Make sure to join us on Facebook to play along with this challenge!

xo, Kira

Monday, August 6, 2018

"Home Brew" by Kira

Hello friends!  It's Kira and I am back with a layout for our very first Facebook challenge!  If you haven't heard, The Cut Shoppe Scrap Spot is now hosting monthly challenges, which gives you the opportunity to win some cut files!  Kelly is hosting this month's challenge and you can read all about it here.


I decided to go big with my title.  I love big titles on a page, so this challenge was perfect for me to make another HUGE title.  I started with this photo of my husband's very first home brewed beer.  I recently purchased him some home brew supplies so he could have his very own hobby (which we all know is so important, right?!).  Since there's no beer themed cut files in the shop (hint, hint Ashley), I used the Brush Up font to create my title, "Home Brew".


I cut the title out vertically on my page, using a patterned paper background.  Then I added some foam behind my background paper, around my title before adding some white cardstock behind my title.


I used the newest Amy Tangerine collection, Shine On, sticker book to fill up my letters.  I love all the little flowers and leaves peeking out from my title.  I also added other tiny elements like sequins, puffy hearts and flower ephemera.


I added my photo next to the word "brew" and added some more embellishments to the page.  And I just love how this turned out!


Make sure you join the Facebook group so you can join in on this challenge as well!  Thanks for stopping by!

xo, Kira


Monday, July 23, 2018

Christmas in July with Kira

Hey everyone!  I can't help myself when I see a fun trend going on in the crafty world...I just HAVE to join in.  So when everyone started posting about their fun Christmas in July projects, I was feeling a bit left out.  Since I usually complete my entire holiday album in December, I don't have a lot of Christmas photos to scrap in July, but I thought I could make some cute Christmas decor instead!


Have you used The Cut Shoppe cut files for home decor yet?!  If not, I am going to show you step by step how easy it can be!

First, gather your supplies:
 - project surface (I used this 18" x 5" wood plaque)
 - paint and paint brushes (I stuck with white and black but clearly you could make this project as colorful as you'd like!)
 - vinyl (I am no vinyl expert and know there are tons of choices out there, I used American Crafts black mat vinyl which I purchased at my local Tuesday Morning)
 - a cut file or two!
 - a die cut machine (I own/use a Cricut, but I know Silhouette has all the same capabilities in this department)
 - contact paper or blue painters tape


I started by painting my wood plaque.  I used regular acrylic paint and painted the background white and the "frame" black.  It's best to do this first so you can let it dry while you cut your vinyl.

Next, choose your design.  I used the Wintry Mix cut file as my main focus on this piece.  I had a hard time deciding between a few of the designs on this cut file because they're all so cute!  I eventually went with the mountains.  I sized them to 4" tall so they would fit on my plaque.  This only made them about 8" wide though, and needed to fill in some space.  So I used the Brush Up Alpha to spell out the phrase "Let it Snow". 


Once I had the sizing how I wanted it, I cut everything out on the vinyl.  You'll place your vinyl color side up on your mat to cut, and choose the appropriate setting on your machine. 


 Once the images are cut out, you'll need to "weed" the image, leaving it looking like this:

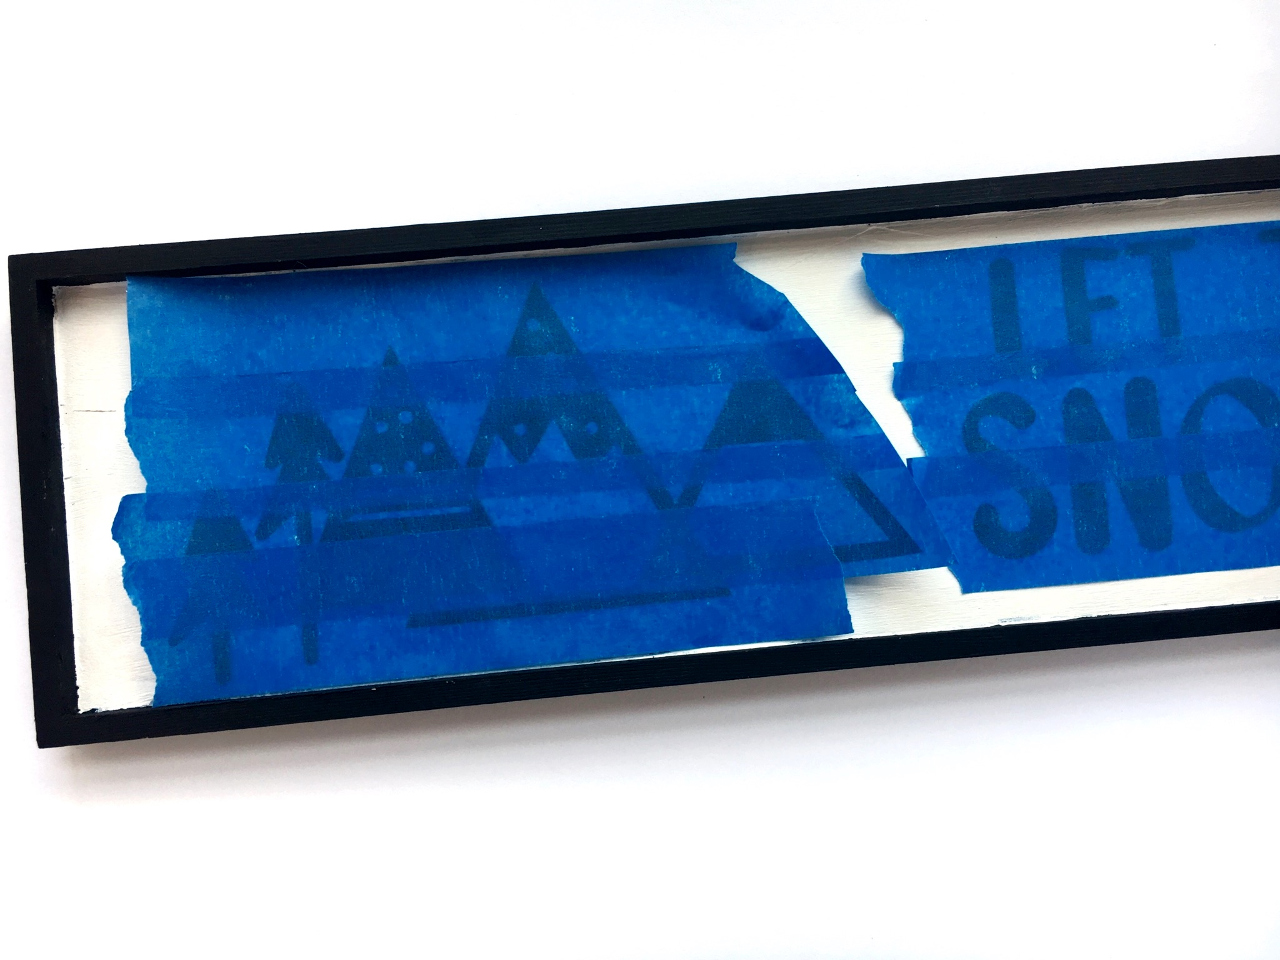
Then you'll use contact paper, or blue painters tape (whichever you have on hand, they both work great!) to transfer the images to your project base. 


If you use painters tape, layer each strip over the other so it forms a single sheet of tape.  Rub over the top of the tape so that the vinyl adheres to the tape and lift it from the vinyl backing. Then place the image on your project base. 

Once all the images are where you like them, rub down so that everything sticks in place.  When removing the tape, go slowly so you don't accidentally ruin placement or tear the vinyl.

 And there you go!  A custom piece of Christmas decor!


I had made a mistake on my first cut so I had an extra little tree from the Wintry Mix cut file.  I decided to place it to the right of "Let it Snow". 


I am super happy with how this came out and can't wait to display this with the rest of my holiday decor this winter!  Thanks for stopping by!

xo, Kira


Wednesday, July 11, 2018

DIY Personalized T-Shirt and Coffee Mug | Helen Gullett

Hello The Cut Shoppe friends... Helen is back here today with another fun DIY projects using The Cut Shoppe Cutting Files.


Personalizing items are fun, special, and perfect for gifts and even for yourself to use. And... thankful for digital cutting files, you can create any thing and any style with them.

My projects today are a Personalized T-Shirt and Personalized Coffee Mug using the Brush Up Alpha, the Bountiful Blessings, and the Java Scripts.


On the t-shirt, I created the words, Grateful and Caffeinated, using the Brush Up Alpha set. First, I opened the files in PNG using my Silhouette Studio Designer Software. Then I traced them to make the cutting lines. I released the compound path for all of them, and then picked the letters I wanted to use for the words, then create compound path again.

Next step is I arranged them slightly overlapping each other, and then weld.

For the Blessed arrow word, I simply opened the PNG file, then traced the image, then released compound path of all, and then created the compound path just for the Blessed arrow word.

I measured the width and length the space I wanted to put the cut out vinyl on the t-shirt. I arranged all the all the words, resized, grouped, and then resized again to fit the size on the shirt.

Alway to remember that when you work with Heat Transfer Vinyl (HTV), ALWAYS REVERSE your image before cutting it. I cut it out using the black glitter heat transfer vinyl, I added a pillow case on top of the shirt, and then using my iron (hottest setting, no steam) to transfer the image on my shirt. I pressed the top and I pressed again from the back. It is about 20-30 seconds each press.


And for the mug... to create the cutting files, I followed the same step I did for the Blessed arrow word. I resized the image to fit on my coffee mug.

I cut the image out using the purple glitter HTV. Before adding the cut out HTV on the mug, make sure you clean the mug with alcohol wipe to remove all the residue and dirt.

I added the cut out HTV on the mug, and I used my iron to transfer the image. I did it directly on top of the plastic carrier, no pillow case layer. I pressed longer that I did on the shirt. And also I only used the tip of the iron. I lifted up the plastic carried often to make sure the HTV was glued on the mug.

After all image transferred well on the mug, I secured it with Mod Podge Dishwasher Safe. Using this Mod Podge, to make sure it can be washed at Top Rack Dishwasher. But it takes about 30 days to cure before you can put it in the dishwasher. So if you plan to make this mug for presents, plan ahead... especially for Christmas, it is great time to start planning and making :D :D :D

Here are all the cutting files I used on my projects today:


I hope these projects give you some inspirations to keep creating with The Cut Shoppe cutting files. THANK YOU so much for stopping by today. Have wonderful day!


Saturday, March 25, 2017

Elevator Usie

Hey friends! Kelly here with a new layout using the Selfies and Usies Cut File and the Brush Up Alpha Cut File!


I started in Cricut Design Space by slicing out the individual letters I needed from the Brush Up Alpha Cut File. I cut each letter for the word 'Elevator' 4 times and then stacked them together to create dimension. I repeated the same steps for the word 'Usie' included in the Selfies and Usies Cut File.


I cut a large circle on a sheet of purple cardstock and then layered a patterned paper from the Paige Evans Oh My Heart Collection behind the circle. I positioned my title from the cut file sets on the patterned paper and added multiple embellishments from the Oh My Heart Collection. To give the layout a finished look I added hand stitching using white embroidery floss around the circumference of the circle.


Now take a look at how this layout came together!


I absolutely love the combination of the fonts from the Brush Up Alpha Cut File and the Selfies and Usie Cut File! Remember to head to The Cut Shoppe Etsy Store to check out all of the cut files! Thanks for joining me today!


Tuesday, January 10, 2017

Restore

Hi its Melissa here, Happy New Year!!  I always love to start my year off with a word that will set the scene for the year.  I write my goals around that word, and I choose a bible scripture that supports my word.  This year my word is "Restore", and its appropriate for me after 9 months of being sick with Hyperemesis Gravidarum (extreme morning sickness) throughout my entire pregnancy.  Now that baby Ava is 7 weeks old I'm looking forward to getting my health and life back on track, and being fit and healthy.

I used two cut files for this layout, the new Flower Delivery cut file and the Brush Up Alpha, which is an older release.   My background paper is by Cocoa Vanilla Studio and all other products are from Take Me Away by Paige Evans for Pink Paislee.


I cut my title twice from white cardstock and layered it up for extra dimension.


I had so much fun cutting the flowers and leaves from different patterned papers and layering them with dimensional foam so they popped off the page.


Here are the two cut files, so many creative possibilities with both of them!


Thanks so much for looking!