Showing posts with label Cool Kid. Show all posts

Saturday, August 25, 2018

Best Kid | Tarrah McLean

Hi there Cut Shoppe friends!

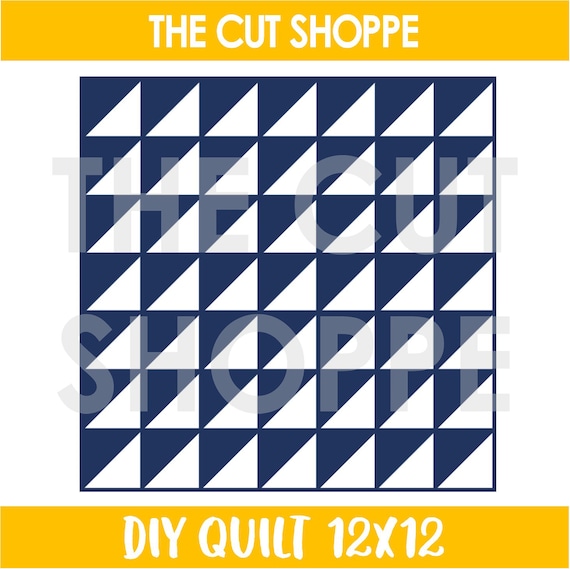
It's Tarrah McLean back with you and today I am sharing a new layout using the super cool DIY quilt cut file from the store!

I had lots of the embellishments left from the Crate Paper Cool Kid collection but only a few of the papers from the 6' x 6' paper pad so I decided that this was a perfect way to use up both even though I didn't have any of the 12' x 12' papers left. I cut the DIY Quilt cut file from plain white cardstock and once I had backed all the triangles with the papers, I simply backed the whole thing against some black cardstock.

The 12 x 12 DIY Quilt cut file
I also machine stitched on the diagonal along the top edge of the flat part of each triangle. I love the texture and added decoration it gives the page.

Because of the time and effort it took to back this cut file, I decided to not cover up too much of it and kept the embellishing to a minimum, mainly keeping the embellishments around the photo.

I love this DIY Quilt cut file as it has the potential to be suited to any theme layout whether that be a boy page like I have done, a travel page or even a pretty girls page. The opportunities with this one are endless! 

Thanks so much for stopping by today!

Happy creating!

Thursday, March 8, 2018

Don't Grow Up | Kelly Janes

Kelly here with you today to share a new 12x12 scrapbook layout using The Everyday Essentials Cut File & The You've Been Punc'd Cut File!


I cut a couple stars and an ampersand from The Everyday Essentials & a couple of the icons from The You've Been Punc'd Cut File using 6x6 patterned papers from the Crate Paper Cool Kid Collection. The photo I'm documenting is a self portrait my son drew of himself at school. I thought the CP Cool Kid Collection set the perfect tone for this layout! I tucked the cut files right alongside all of the other die cuts & embellishments to help enhance the layout.


I love using cut files as large focal points, but it's also so fun to size them down and use them as embellishments! There are just so many possibilities when it comes to cut files!!


Now you can take a look at my process video to see how this layout came together! 


Thank you so much for spending part of your day with me! Remember to head to The Cut Shoppe Etsy Store to check out all the cut files!! 


Saturday, February 25, 2017

Make a Wish!

Hi crafty friends! Kelly here to share a new layout using The Party On Cut File.


In Cricut Design Space I resized the "Make A Wish" sentiment from The Party On Cut File to approximately 13.5". Now if you are familiar with DS, then you know the largest image you can cut on a 12x12 cutting mat is 11.5". But I wanted my sentiment to fill the entire background and 11.5" just wasn't large enough. I continued to the cutting mat with my large 13.5" sentiment and repositioned the cut file by rotating it on the cut screen. I made sure that the cut file was placed within the 12" on the cutting mat and then sent the image to the machine. This worked perfectly! I was able to use my 12" cutting mat but cut the image at 13.5".


I cut the sentiment on both white and black cardstock. I then used the white cardstock to create a shadow effect behind the black cardstock. Next I backed the cut file with a pattern paper from the Bella Blvd-Alex Collection and added hand stitching around all of the letters. I then added 2 photos to my layout from my son's birthday along with embellishments & ephemera from Crate Paper-Cool Kid Collection and the Bella Blvd-Alex Collection.


I love enlarging cut files on my layouts. It always helps the design come together quickly because it helps fill the page.


I recorded a process video that shows how this layout came together. It also includes a Cricut Design Space tutorial showing you exactly how I cut this image in DS.


Thanks for joining me today and remember to head to The Cut Shoppe Etsy Store to check out all of the cut files!


Friday, February 24, 2017

My new favorite jammies

Hi there,

Zsoka here with you today, sharing my latest layout.

I've been doing a lot of girly pages lately and was kind of missing doing boy pages. So I grabbed my stash of Crate Paper Cool Kid and used that for today's layout. I love this collection so much!

I chose the Out of Line Alpha cut file to create a big title, which is also my main design element.


I cut the letters from yellow patterned paper so that they pop from the grey background. I backed these with different patterned papers from the collection. 


I used a photo of my son from when he was little.  I printed it twice, in different colors. Mainly because I couldn't decide which one I liked more. :) I layered some tissue paper and some patterned paper scraps behind my photos.


As an exception I didn't use a lot of embellishments. I tucked two tags from the ephemera pack under my photos and I wrote my journaling on these.


I added some strips of papers to the bottom and top and I also fussy cut some of the triangle paper and tucked it under my paper strips. I attached a chipboard piece at the top with my Tiny Attacher.


I love to use phrase stickers and there is a sheet with silver stickers in this collection. I chose a couple and placed them here and there on my page. And that was pretty much it!


I hope you enjoyed today's layout. 
Thank you for stopping by, see you soon!


Wednesday, September 7, 2016

My Boy Rules!


Today we are celebrating my sweet son's 17th birthday and what better way to do so than with the fantastic Boys Rule cut file from The Cut Shoppe!!


 For this project, my intention was to use the cut file as is; however, I really liked the variation of the letters when I used the negative cuts from "BOYS."


 The Cool Kid collection from Crate Paper is a perfect match with the Boys Rule cut file. 


 Once I had my base papers selected, I began arranging layers on the top left portion of the layout. Since my photo is small, I wanted the title and embellishments to really stand out. I chose the yellow paper with orange backing, which really pops, and followed that with layers of fun goodies.

To balance the movement of the layout across the page, I added stickers, embellishments, and a star-shaped clip to the bottom corner. I used the numbers one and six to show that Caleb was 16 when this photo was taken. The layout is fun and bright and really captures the "spirit" of boys in general.

Thanks for visiting today and I hope you are inspired to create!!


Friday, September 2, 2016

Explore

Hi there,

Zsoka back here with you today with a new layout!

By now you probably will not be surprised that I chose a circle cut file set, again :). I'm not sure why I am so drawn to circles but it's what it is! This new set, Strings Attached, is kind of awesome, don't you think?! Circles and string art in one, you know what I mean?


I decided to use one of the latest releases for this layout, Cool Kid from Crate Paper. Obviously I love this collection! It's the right amount of cool and adorable in one and I just love the bright colors. It seems that Crate Paper can do nothing wrong!


I picked a grey star print paper for the background, so that the bright color papers I chose for backing my cut files just pop. I created the design in my Silhouette Studio first, drew some circles in different sizes and scattered them around my page. I added my string circles just so I see the whole design together. I then I removed these and left only my simple circles and cut those from the grey paper. Then I backed them with some scraps. The string circles I cut from white card stock and I backed these too with several different color papers. The biggest one I first backed with my photo, then after trimming it, I also added patterned paper behind it. I machine stitched around all these with black thread. I popped some of my string circles on foam for some variation. I scattered some embellies around the page, some puffy stickers, stickers, chipboard stickers and phrase stickers. Oh and that cute silver star that I have no idea what it is made of ha!


As a final step I added my journaling, date and the obligatory ink splatters! I hope you like how this turned out! Thank you so much for stopping by! Have a great day X