Showing posts with label vellum. Show all posts

Saturday, August 31, 2019

fall favorites | iris fox

Hello friends! Iris here ready to shed summer and head into my most favorite time of the year, Fall. So when Ashley designed the new Fall Favorites Digital Stamp, I couldn't wait to play with them.  Nevermind that it's just the end of August. And since Fall is my love language, it was completely fitting that I document my love for fall with the new cut file called Love Language.


A heart with a bunch of speech bubbles, how fab is that?!  To begin, I cut the Love Language cut file out of white cardstock twice, because I had plans to tuck some elements under and knew it would look better if the whole cut file was raised.  In the Silhouette Studio, I decided where my pictures would go, which gave me the dimensions I'd need to print them at. I also opened individual PNG files that come in the Digital Stamps, copied my favorites to the same design space that my cut file was on, and resized them into the speech bubbles I wanted them on.  Then I moved them onto an 8.5x11 space and sent them to my printer directly from Silhouette Studio.  


To add a different element, I printed the Digital Stamps on vellum.  I absolutely love how crisp the black words look on the vellum, and how they still let the background show through.  


With the whole layout planned out in Silhouette Studio, it all came together easily.  It took some time to cut everything and back the file, but as usual it's totally worth it! 

I tucked some fabric leaves from my stash in 3 spots, and added embellishments from Ashley's Oakley Avenue Collection from Pretty Little Studio. Totally unplanned but totally perfect!  This includes the flair along with the title acrylic and little word strip.  In my clusters I added and a few misc brads and enamel dots.


I did add white splatters onto my background before settling the cut file on top, and to tie everything together I added more splatters in aqua and orange, concentrating on the areas around the embellishment clusters.


This layout, with the super fun Love Language cut file and Fall Favorites Digital Stamp set was such a treat to work on!  Stop by The Cut Shoppe to check these out and the other fabulous digital stamps that Ashley just added to the shop.  They add a whole new dimension of fun!


Sunday, July 28, 2019

december daily traveler's notebook inserts | iris fox

Hello cut file enthusiasts!  Iris here, and I'm getting some more #scrappychristmasinjuly scrapbooking done thanks to several fabulous holiday files in the shop: Tis the SeasonChristmas MagicTree Farm, and Tinsel Town.


I made myself four custom December Daily inserts for use in my Color Cast Designs wood veneer Traveler's Notebook covers with binder rings.


I finally brought my WRMK Foil Quill out to play!  In order to use it, I opened the ‘Tis the Season cut file and used the Internal Offset function to thicken the lines.  In order to do that, I selected the top four words, clicked Internal Offset, chose 0.010 inches, and hit Apply.  That added a line just inside the original outline.  I did that once again so most of my letters were 3 lines thick.


I selected "Sparkle" and did the same thing, but this time I continued to click on the Internal Offset until it was filled in completely. Then I chose the Sketch function before pressing the Send button.  The heated Foil Quill tip traces all the concentric lines.


I traced the ‘Tis the Season with gold foil onto vellum, and one of the trees from Tree Farm in green foil onto another piece of vellum.  I cut each to 4.25”x8.25”, the standard Travler’s Notebook size, and for the gold insert, I used a Fiskars border scallop punch on the right edge.


After that experimentation, I decided to mix it up and switch to traditional cutting, using Felicity Jane papers that I pre-cut to TN size.  I cut the "be merry be bright" out of the buffalo plaid so the sentiment is the negative on the page. For "Ho Ho Ho", I first welded the three together, then cut.  I used the positive piece, adding two tabs made from the same paper with my Tiny Attacher, then I handstitched all around the outline.


Now I have four cool TN dividers for my December Daily!  If you're finishing up holiday projects from last year, or you've started thinking about prepping for this year, stop by The Cut Shoppe to snag some fun Christmas cut files and get creative!


Thursday, May 30, 2019

Delightful | Iris Fox

Hello lovelies! Iris here with a sweet layout that I made about my mama.  One day we were looking through old photos and she told me she'd been a model for a photographer.  I hadn't known that and thought it was so cool!  So I'd scanned the photo and had been hanging onto it until I found the perfect products to scrap it with.  And then along came the DELIGHTFUL cut file from The Cut Shoppe.


I cut it about 8x9, to have a great big title to back with all the pretty papers (which are from the Felicity Jane "Megan" kit). My mom's photo is 4x6, so everything together fills the canvas nicely.

I backed the cut file first with vellum to soften the prints, then distributed the patterned papers so that lighter and darker ones alternated.  Before I adhered it to the background I did a little mixed media - gesso, watercolor in a light pink, and some warm grey splatters.
I clustered embellies in a few key areas to move the eye diagonally - at the top where the D is, since it's a solid letter with lots of white space; where the cut file overlaps the photo in the middle; and at the bottom right corner of the photo.  The way the L ends under the photo and the embellishments are across from it gave me a natural place to put my journaling, which I did also in a warm grey.  I wanted to keep everything on this layout soft.

The pastels, butterflies, and all the vellum touches were just so delightful, I knew I wanted to use them with the DELIGHTFUL cut file!! ;)

Go visit The Cut Shoppe to snag this file.  I can see it being versatile with lots of different color ways and patterns.

And if you'd like to see how I put this together, visit my Youtube channel.

Lots of love,


Sunday, April 7, 2019

Shine Like the Stars | Iris Fox

Hello! Iris Fox here with my very first layout as a design team member and I couldn't be more excited!!  I used the Lucky Stars cut file that came out last month.  Stars are one of my favorite icons and so it was great timing.


I started out by cutting the cut file with my Silhouette Cameo at just under 11 inches from white cardstock.  Initially I had it in mind to use as a stencil and I pulled out a grey textured cardstock for my background.  As I lay the cut file on, I decided to combine stenciling and the actual cut file.  So I tore it in half, and on the top half I spritzed white mist through the stencil to get the stars on the background.


I backed some of the stars with a buttery yellow cardstock.  I matted my photo with a couple pieces of vellum so you can still see some of the stars behind them, and also I placed my photo slightly off center so that not all the center stars would be blocked. I built a couple of clusters on either side of the photo with die-cut, chipboard, label, star-shaped paper clip, and I tucked thread under the title die-cut circle for extra texture and contrast. Almost everything is from Felicity Jane, except for the title die-cut which is Dear Lizzy. 


Along the top left and bottom right, I used torn strips of vellum and star washi to add some interest in blank spots.  They are topped with chipboard circles and star elements.  


To tie things together, I stuck a strip of the star washi under the date label, and then I sprinkled star sequins around all the embellishment clusters. 


I love the combination of textures and materials, and the softness of the misting above contrasting with the sharp lines of the cut file below.

Stop by The Cut Shoppe to check out this and all the other fabulous cut files. 
And stop by my channel to see the process video. www.youtube.com/c/whimsyfox/videos

Thanks for visiting today, and I'll see you here again soon! xxx


Friday, April 20, 2018

"Memories" with Kira

Hello again!  Kira here and I am back with a 12x12 layout today using the new Flutterby cut file.  Guys, how gorgeous is this cut file?!  I want to use it over and over again.  Butterflies on every layout, am I right?!


Anyway, I decided to use it on a layout about my youngest son's first time dying eggs.  In the photo, he's showing me the dye on his cute little fingers (but let's be honest here, the dye was EVERYWHERE).


I started out by cutting the cut file on textured white cardstock.  Then I uploaded the cut file into design space again, but this time deleted all but one butterfly and left it as a solid image.  I cut the solid butterfly out ten times at the same size of the other butterflies on plain vellum.


After I cut the vellum butterflies, I repeated the same step but with some pattern paper.  I used the exclusive paper in the April Citrus Twist PL kit, which is this gorgeous rainbow.  After all the butterflies were cut out, I layered them behind my cut file and adhered them together with just a tiny bit of glue right down the center of the butterflies.


I adhered the cut file (with vellum and pattern paper butterflies attached) to a piece of plain white textured cardstock using a small amount of glue.  Then I took my sewing machine and stitched along the center of the butterflies, all along the cut file, twice with white thread.  I folded up the wings and separated all the sections of the butterflies to give it some added dimension.


Then it was just a matter of embellishing.  And per the usual, I finished it off with a little bit of gold Heidi Swapp color shine.  And I am obsessed with how it came out!  I hope you try out this cut file too!  I can't wait to see what you come up with!


xo,

Kira 

Saturday, January 21, 2017

Sweet

Hello scrappy friends! It's Zinia here with a layout I create using some of the recently released cut files from the Cut Shoppe Etsy Store.

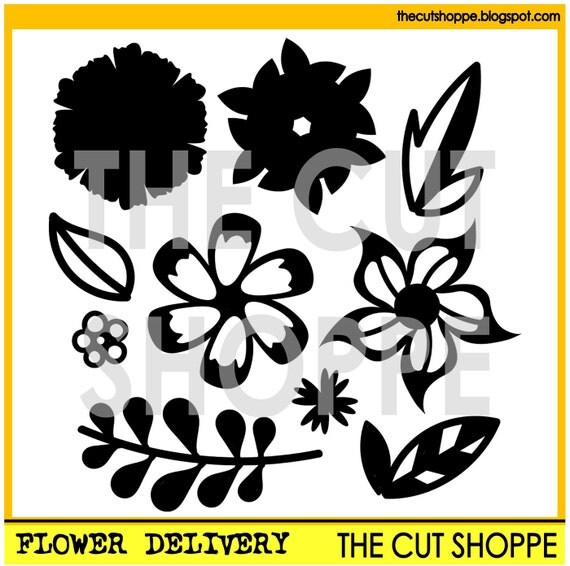
The cut file I'm talking about is called Flower Delivery. It's definitely my new most favorite design and I have a feeling I'll keep using it in a bunch of layouts.


I'm always obsessed with floral designs but this cut file has something special about it. I love how you can layer the different designs on top of each other to create unique effects.

For this layout, I decided to work with my December Hip Kits and use a colorful pattern paper from the Paige Evan's "Take me Away" collection. I cut out a bunch of flowers from that paper and then I cut some of the solid images out of vellum.


I used my watercolors to paint the vellum pieces and once they were dry, I stapled them with the designs I cut out of the pattern paper.


I covered the top of my page with another pattern paper and then using the same colors, I let some of my watercolors drip down on the white part of the page. Once it was dry, I scattered my layered flowers on the border between the two papers to create a dimensional bouquet. 


I stuck my photo on the upper part of the page and embellished it a little with a few gold accents and a couple of phrase die cuts.


So that was it! I really hope you enjoyed this and got inspired to create a beautiful paper bouquet on your layouts too. Until next time, happy scrapping.


Saturday, November 12, 2016

I Love Fall

Hello there! Today I have a fun, fall layout to share using the Fall Finds cut file and the Oakley Avenue collection.


To create this page, I used the "I Love Fall" phrase, and cut it out from white cardstock. Once I had the die cut, I seperated it into three phrases instead of one long one. I backed each one and stacked them in a row. Next, I cut out a larger "I Love Fall", and placed it underneath. 


I cut circles from the Oakley Avenue patterned paper, and scattered them under my photo. I mixed them with some of the flair from the collection, as well as some circles I punched from other Oakley Avenue papers with a circle punch. I can't even tell you how much I love the Oakley Avenue collection! The colors and patterns are so stunning, and I love the mix of clear, vellum, and regular patterned papers. The layer behind my photo is the most gorgeous multi-colored vellum! 

I finished the layout with die cuts throughout the page, and used gold thread to stitch some of them down. If you haven't picked up Oakley Avenue yet, you are definitely missing out! Thank you for joining me today!